Getting Started
Add Data to Your Bot
Enhance your bot's knowledge base by adding PDF documents as data sources. This feature allows your bot to pull answers directly from the content within the documents you upload. Follow these steps to integrate data into your bot efficiently.
Accessing the Knowledge Base
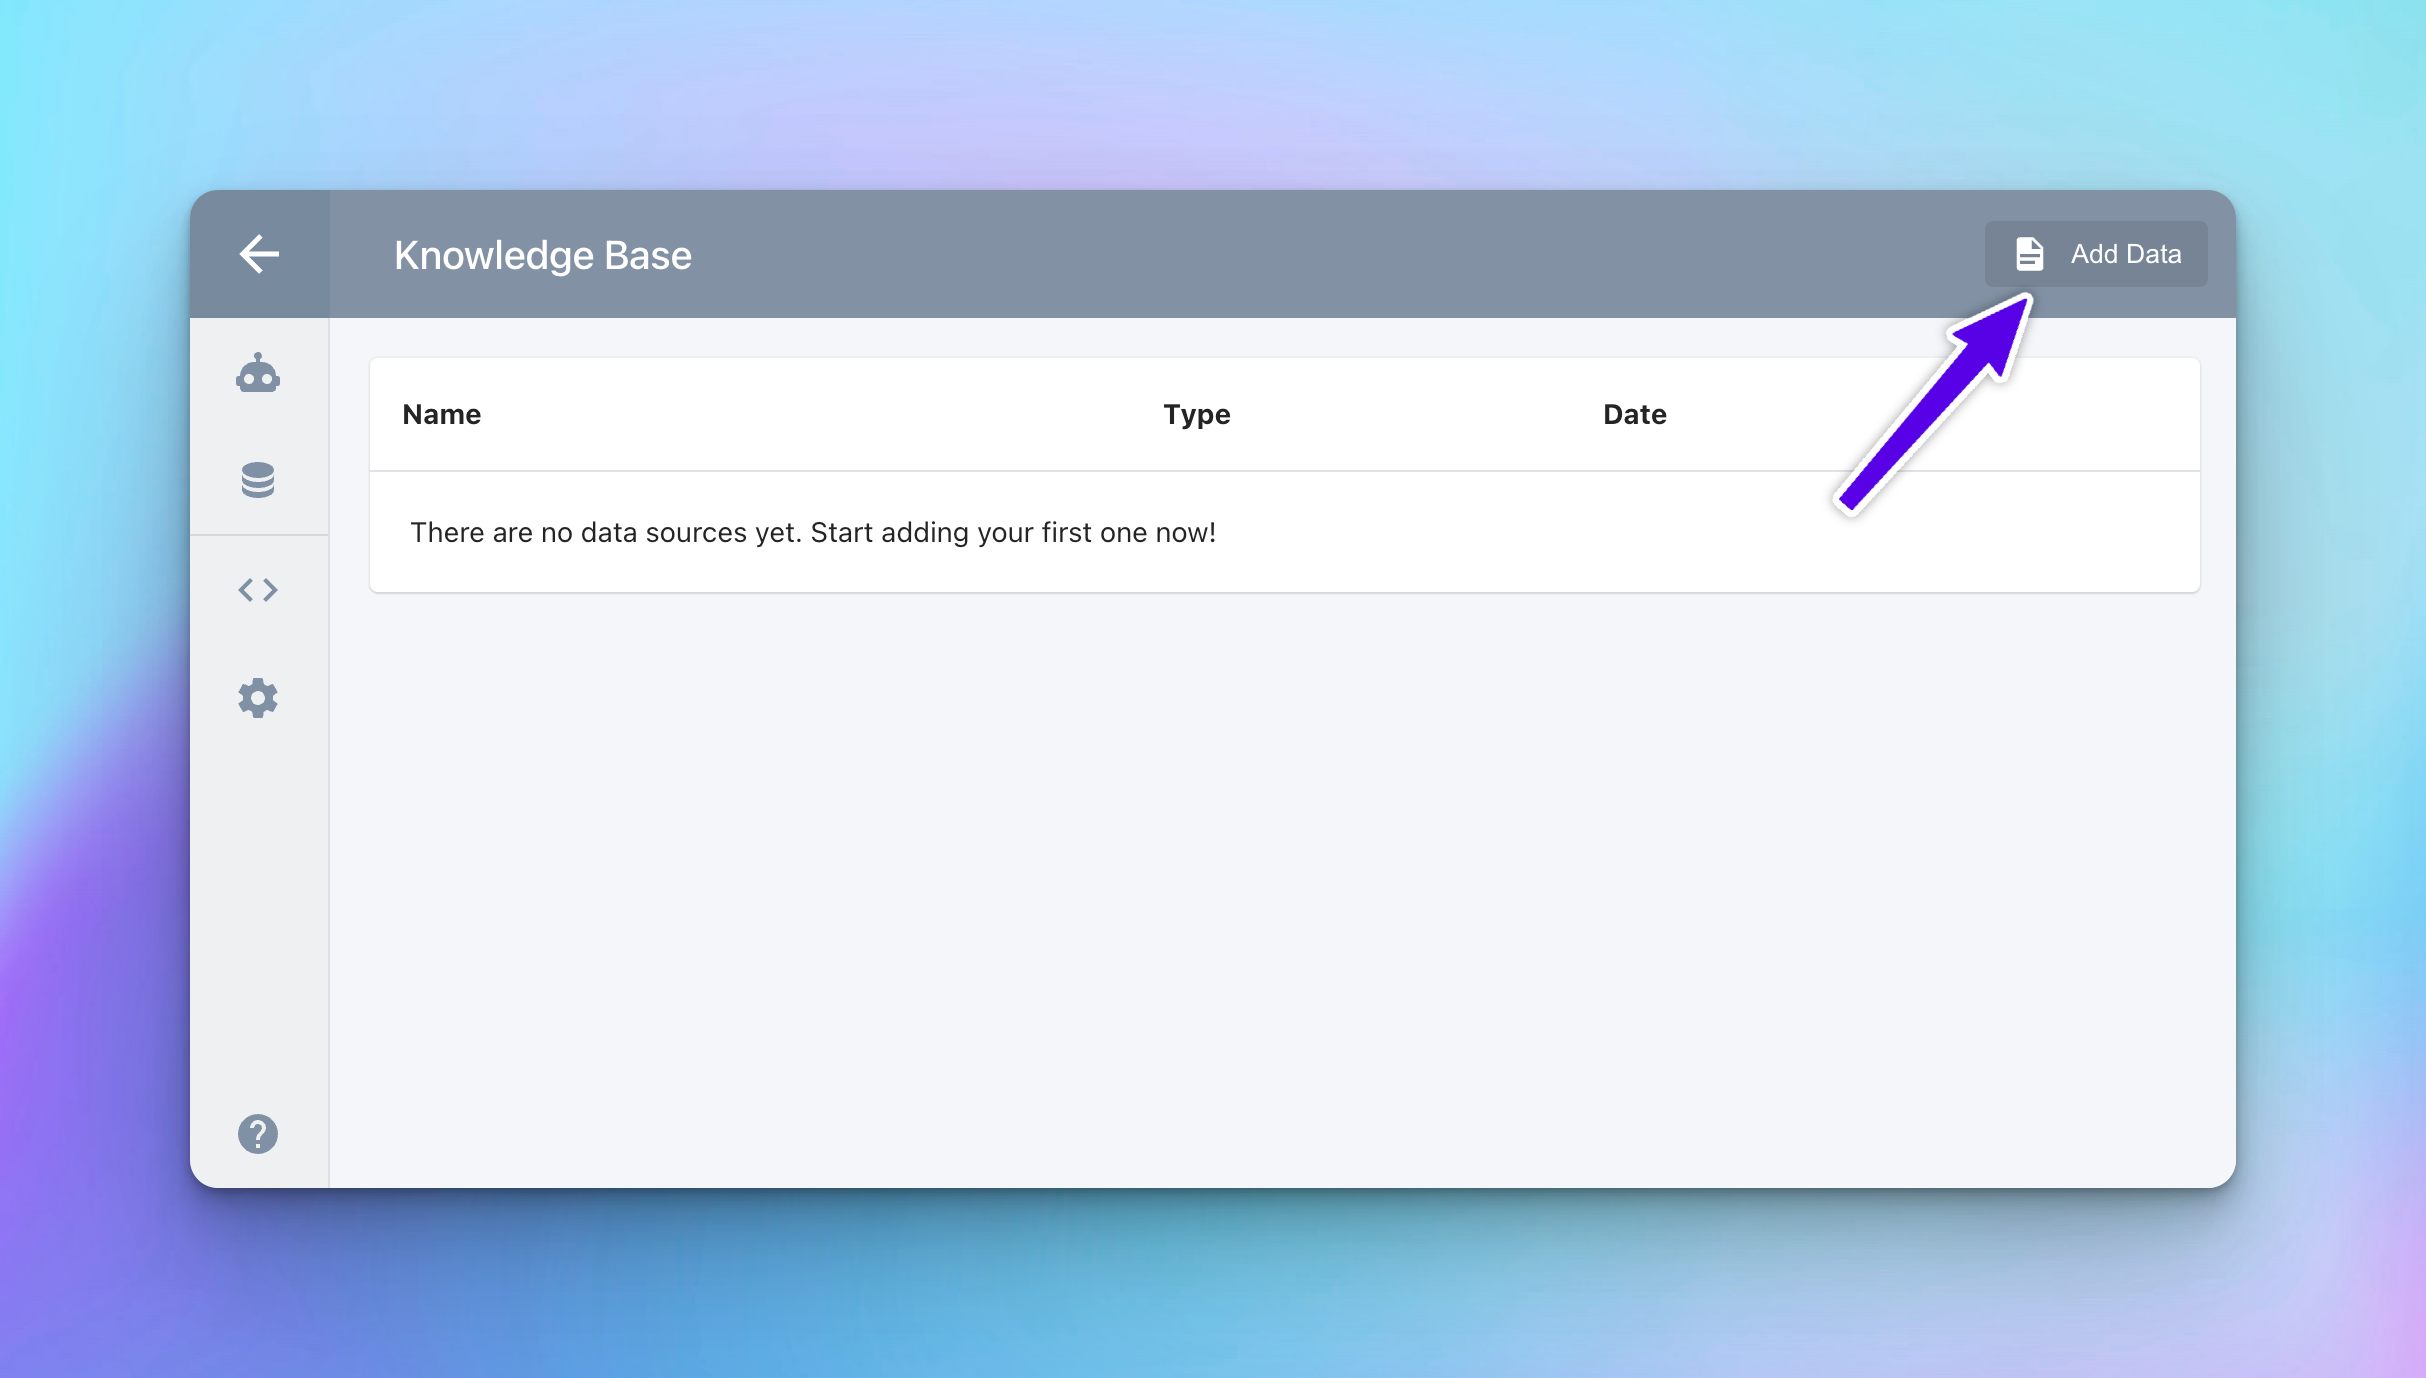
Navigate to the Knowledge Base: Begin by accessing your bot's detail page. On this page, you'll find a sidebar. Click on the item labeled "Knowledge Base" to proceed.
Add Data: On the top right of the Knowledge Base page, click the "Add data" button. This action opens a popup.
Uploading and Tagging Documents
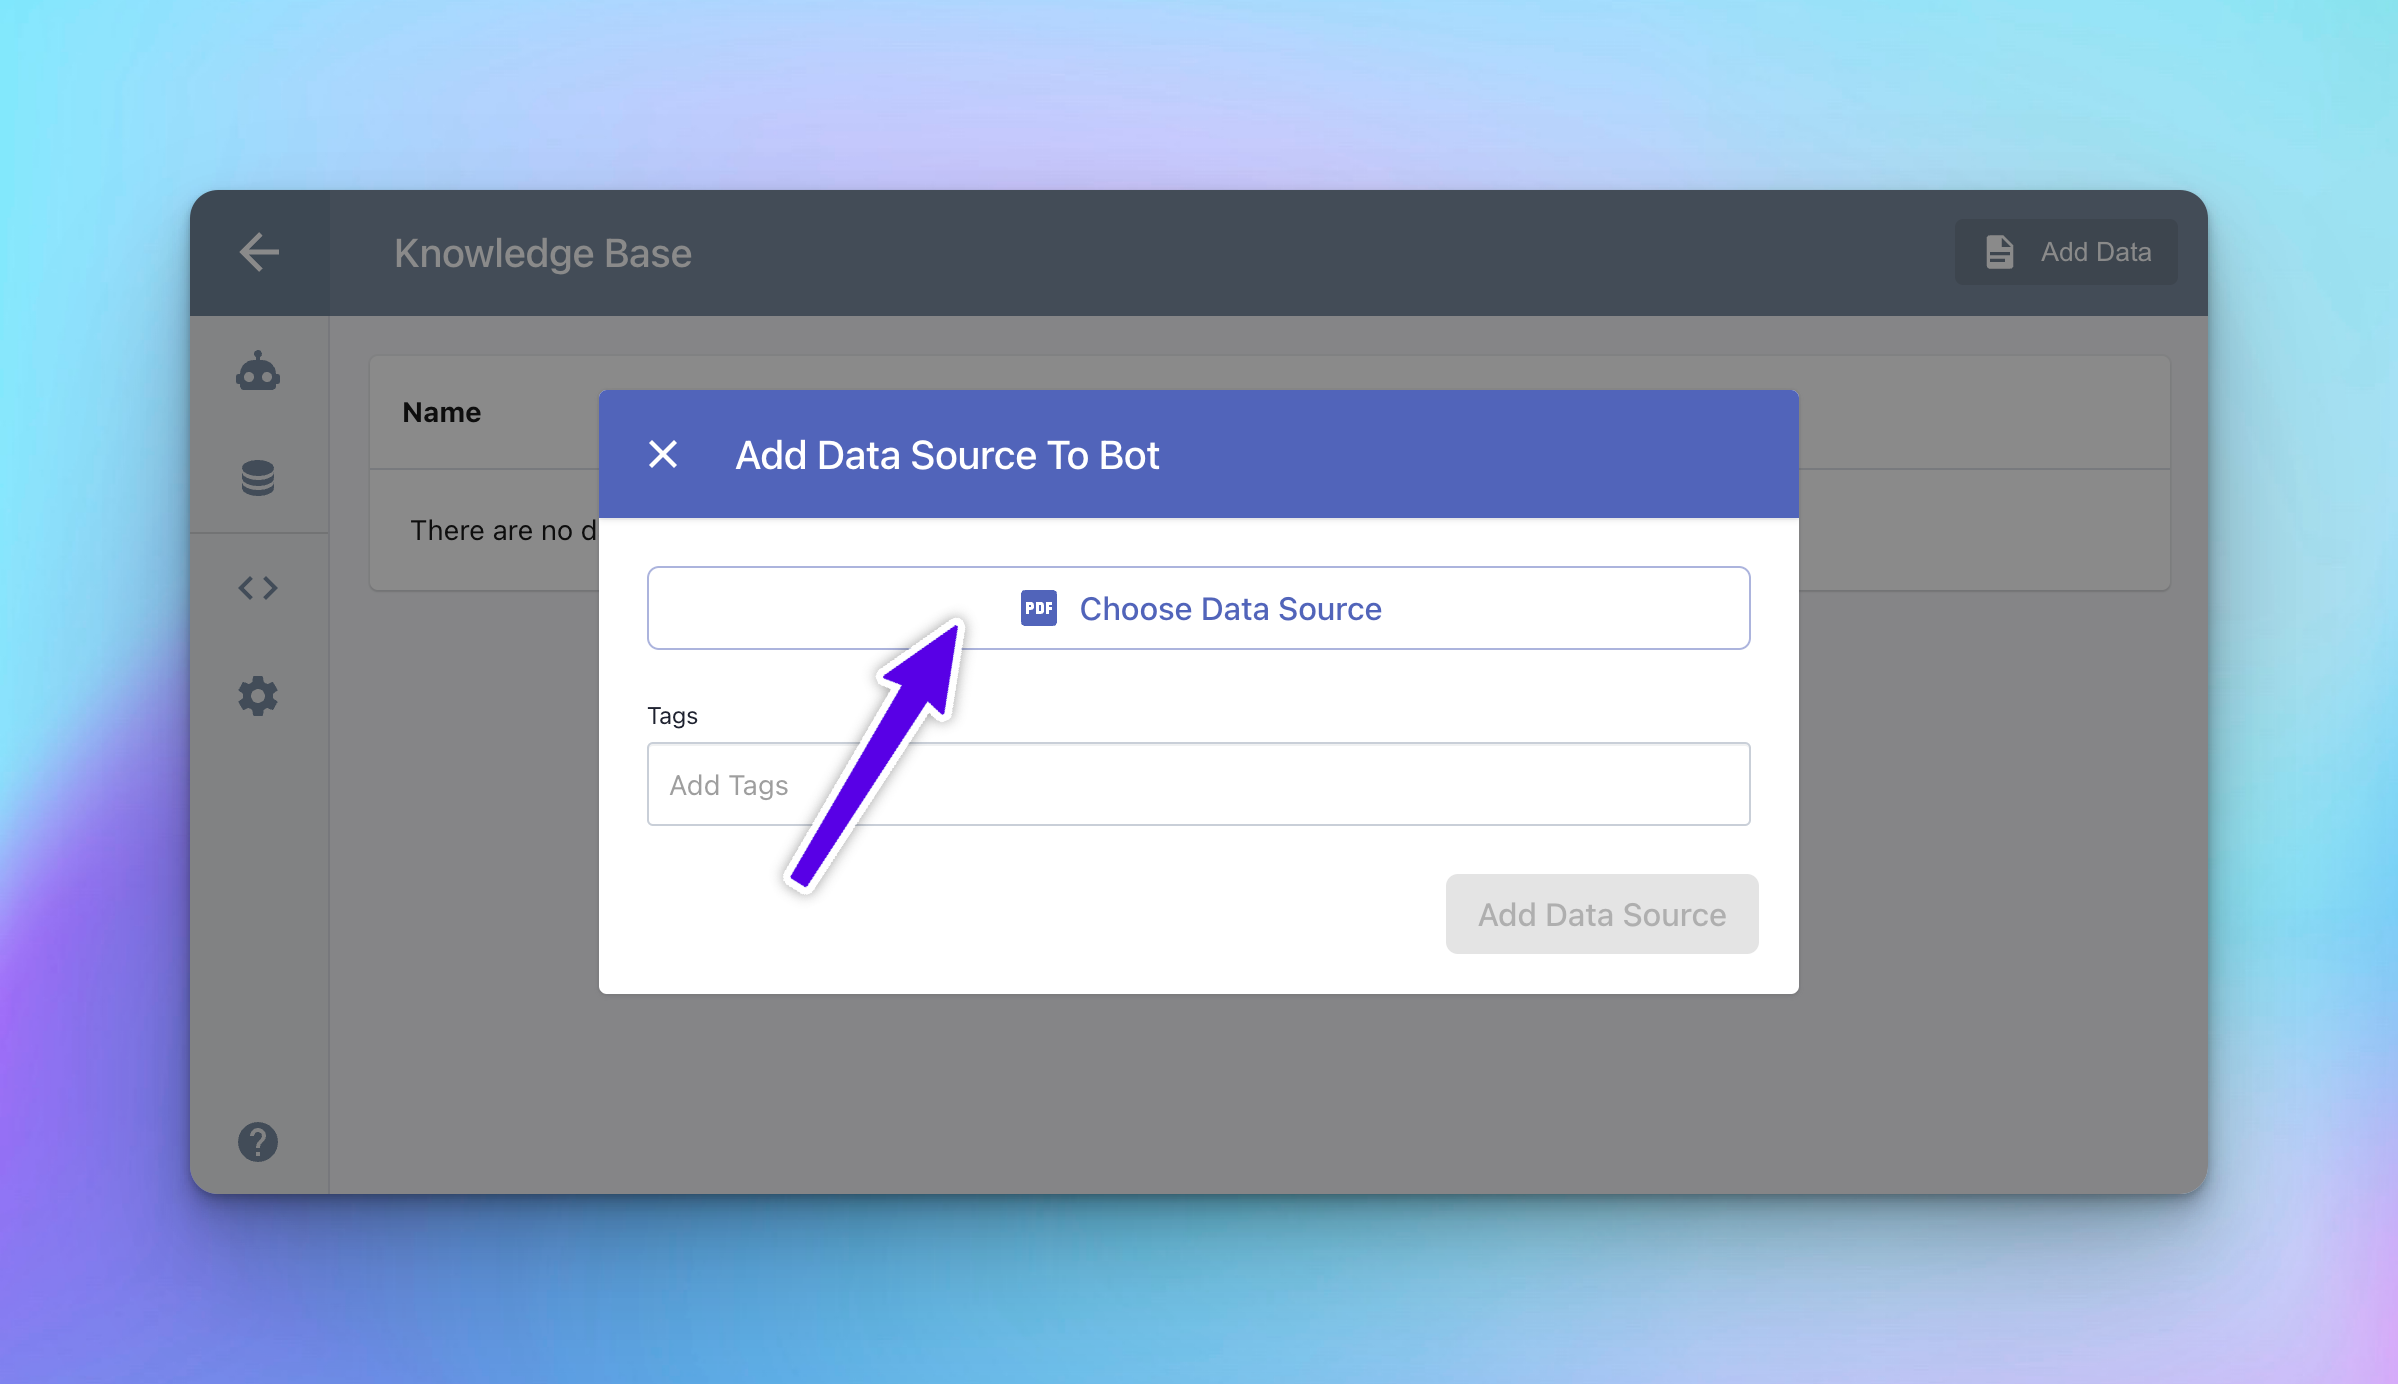
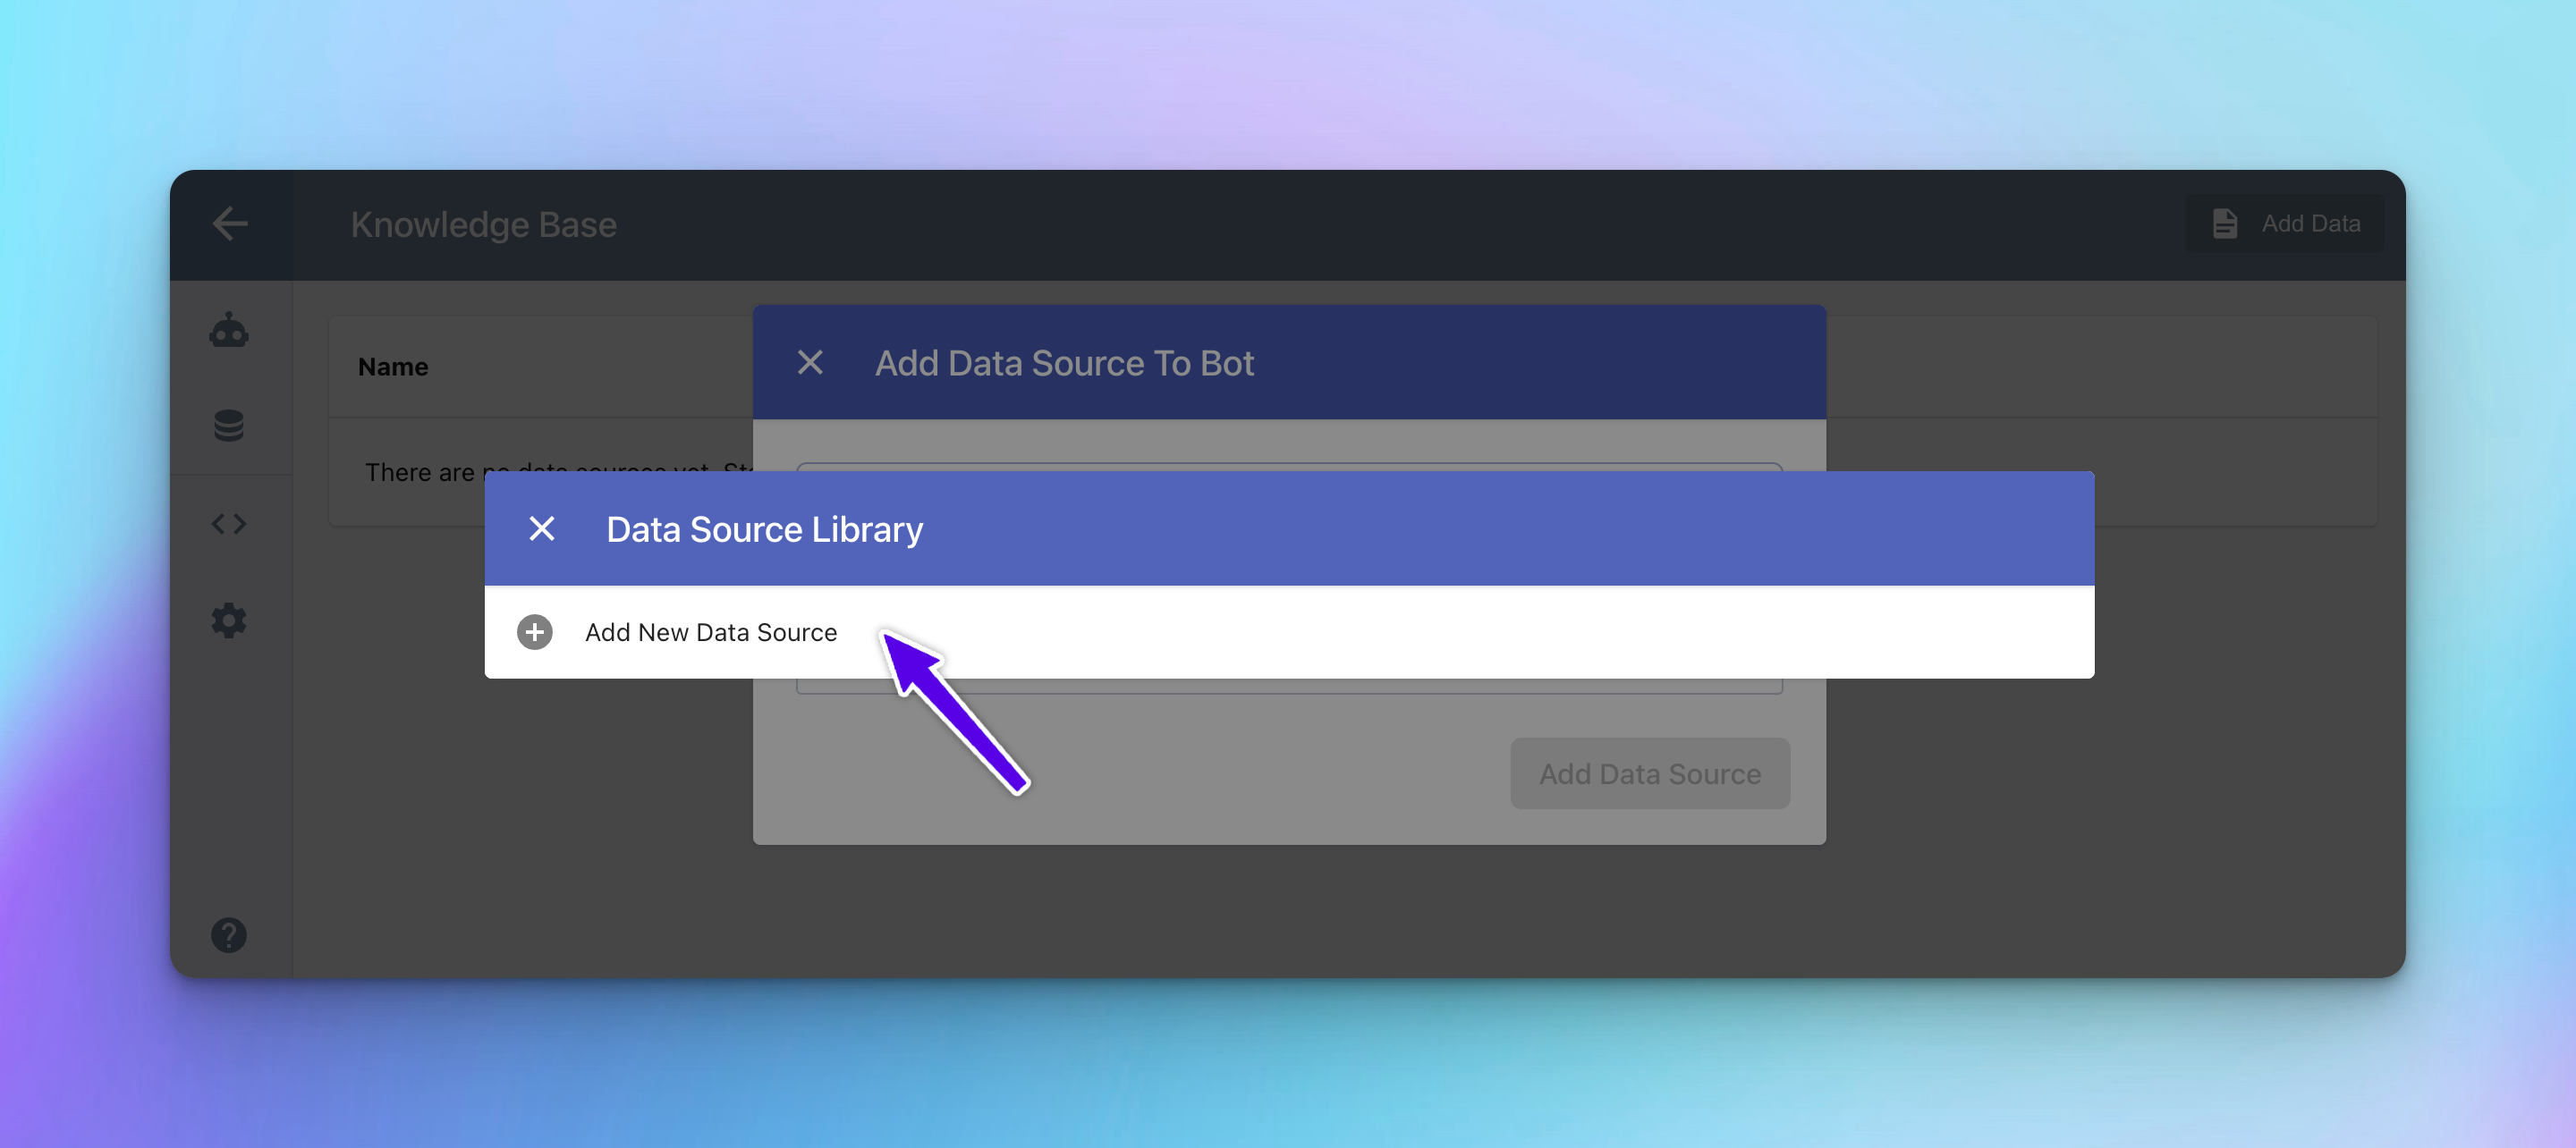
Initiate Data Source Addition: Within the popup, click on the "Add data source" button to open the data source library. Below this button, there's an input field for "Tags". Tags help categorize your documents, allowing the bot to answer queries based on documents associated with specific tags.
Upload New Document: If no documents are present or you need to add a new one, click "Add new data source". A popup will appear where you can upload your PDF document.
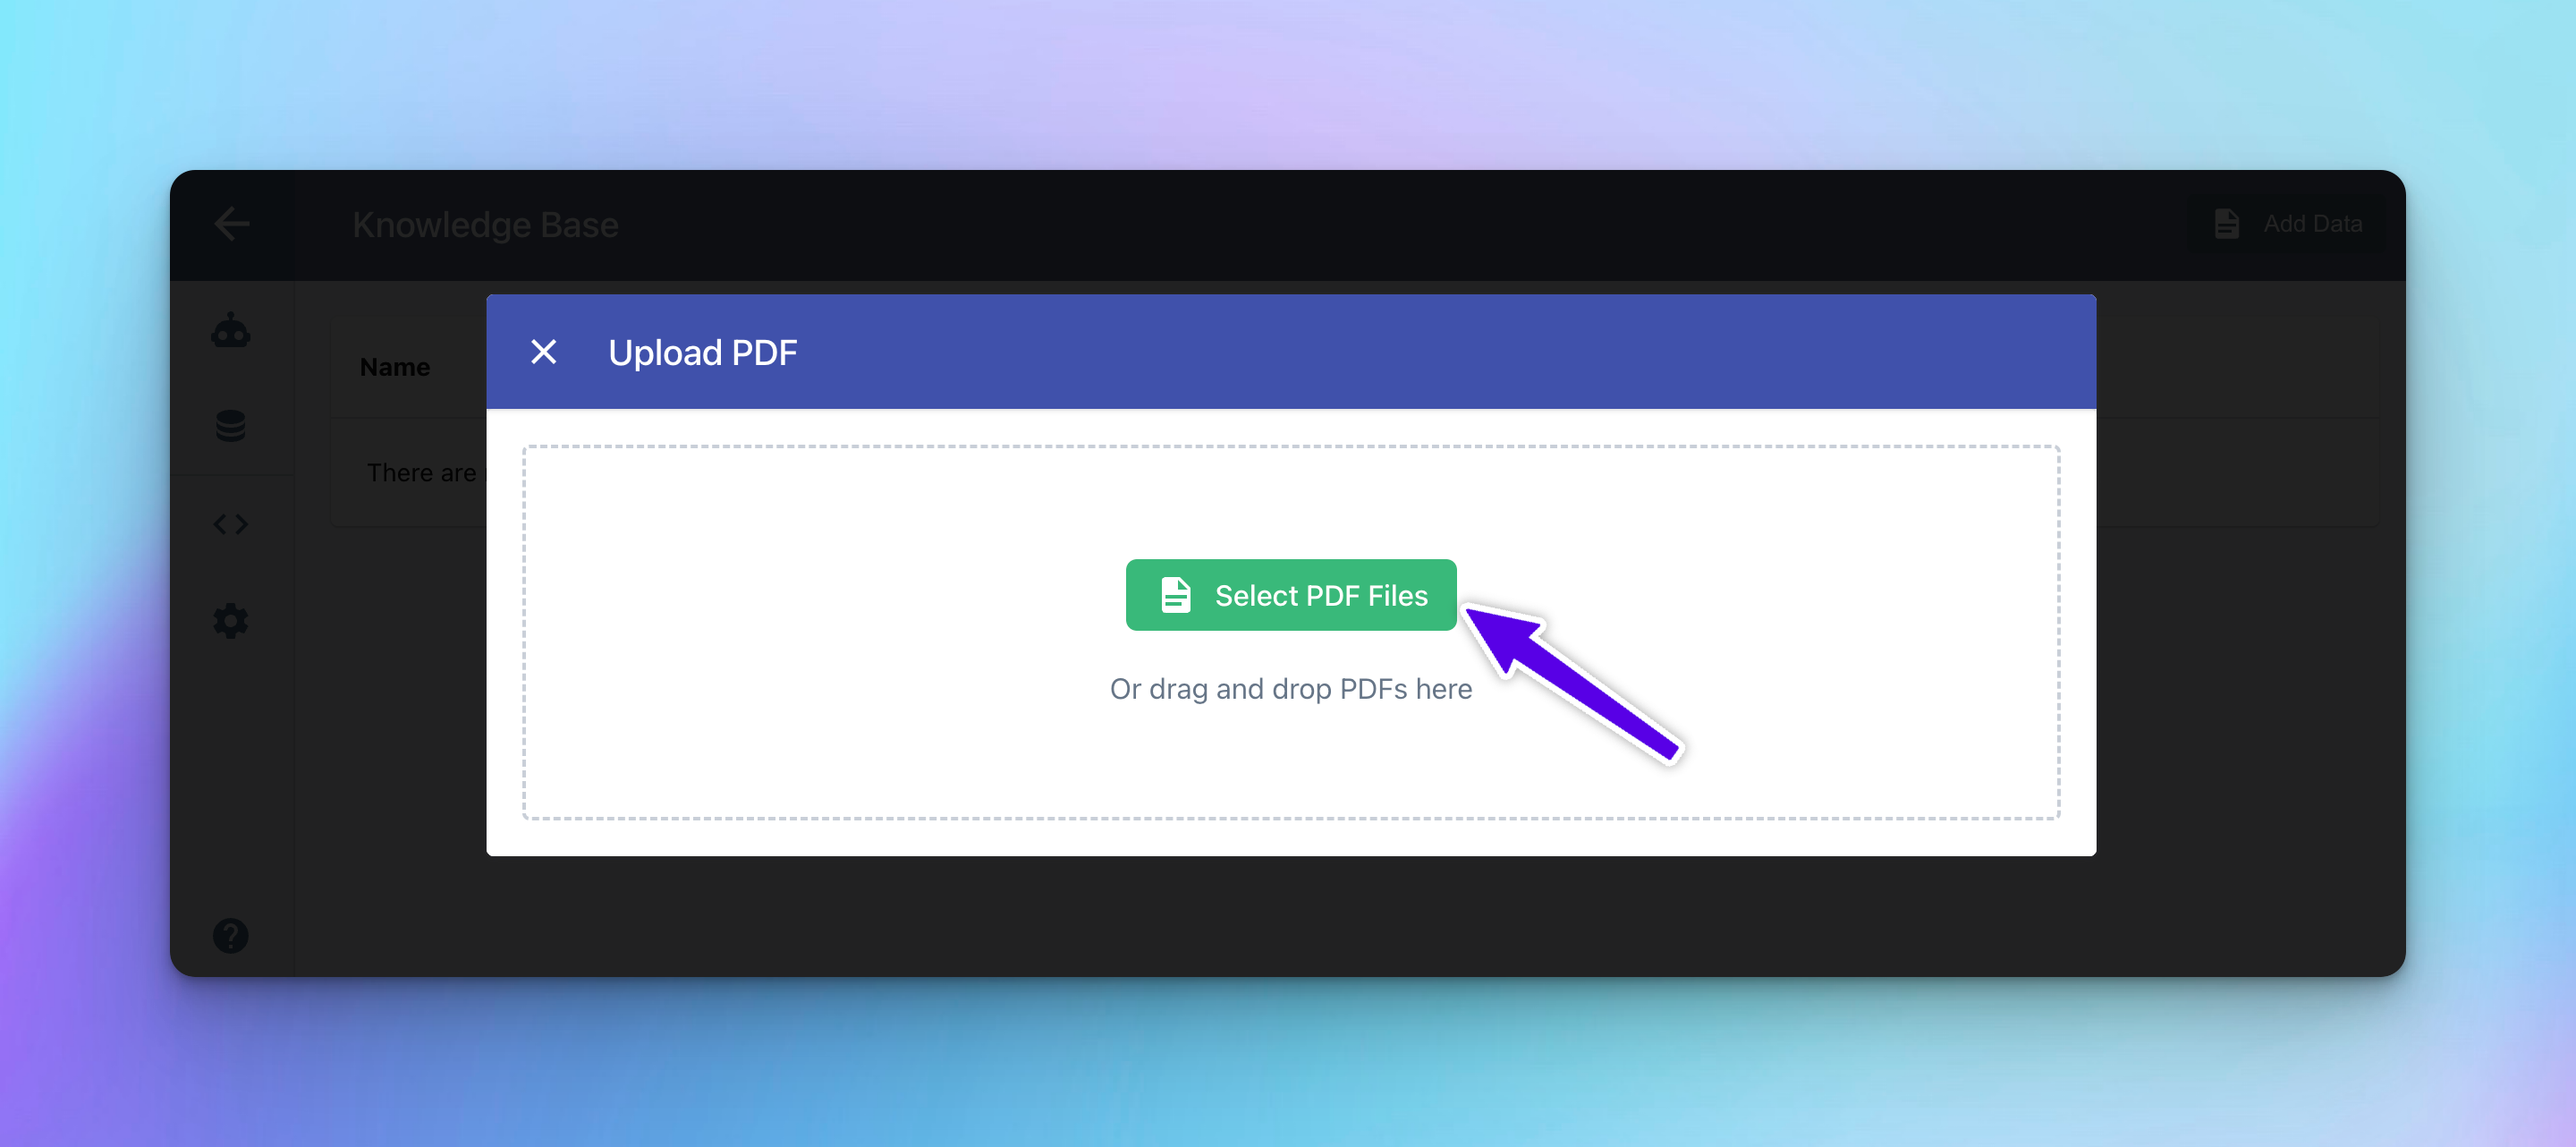
Wait for Processing: After uploading, return to the Data Source Library to view your document. It may take a few minutes for the document to finish processing. During processing, an icon of two arrows in a circle will appear next to the document. Once processed, a PDF icon inside a red square will display, indicating the document is ready to be selected.

Select Your Document: When your document has been processed, select it to finalize its integration into your bot's knowledge base. Your bot can now utilize the information within the document to enhance its responses to user queries.
Integrating Knowledge Base into Bot Flow
After you have uploaded and tagged your documents in the Knowledge Base, the next step is to integrate this data into your bot's conversational flow. This process allows your bot to dynamically utilize the knowledge base during interactions with users.
Designing the Bot Flow
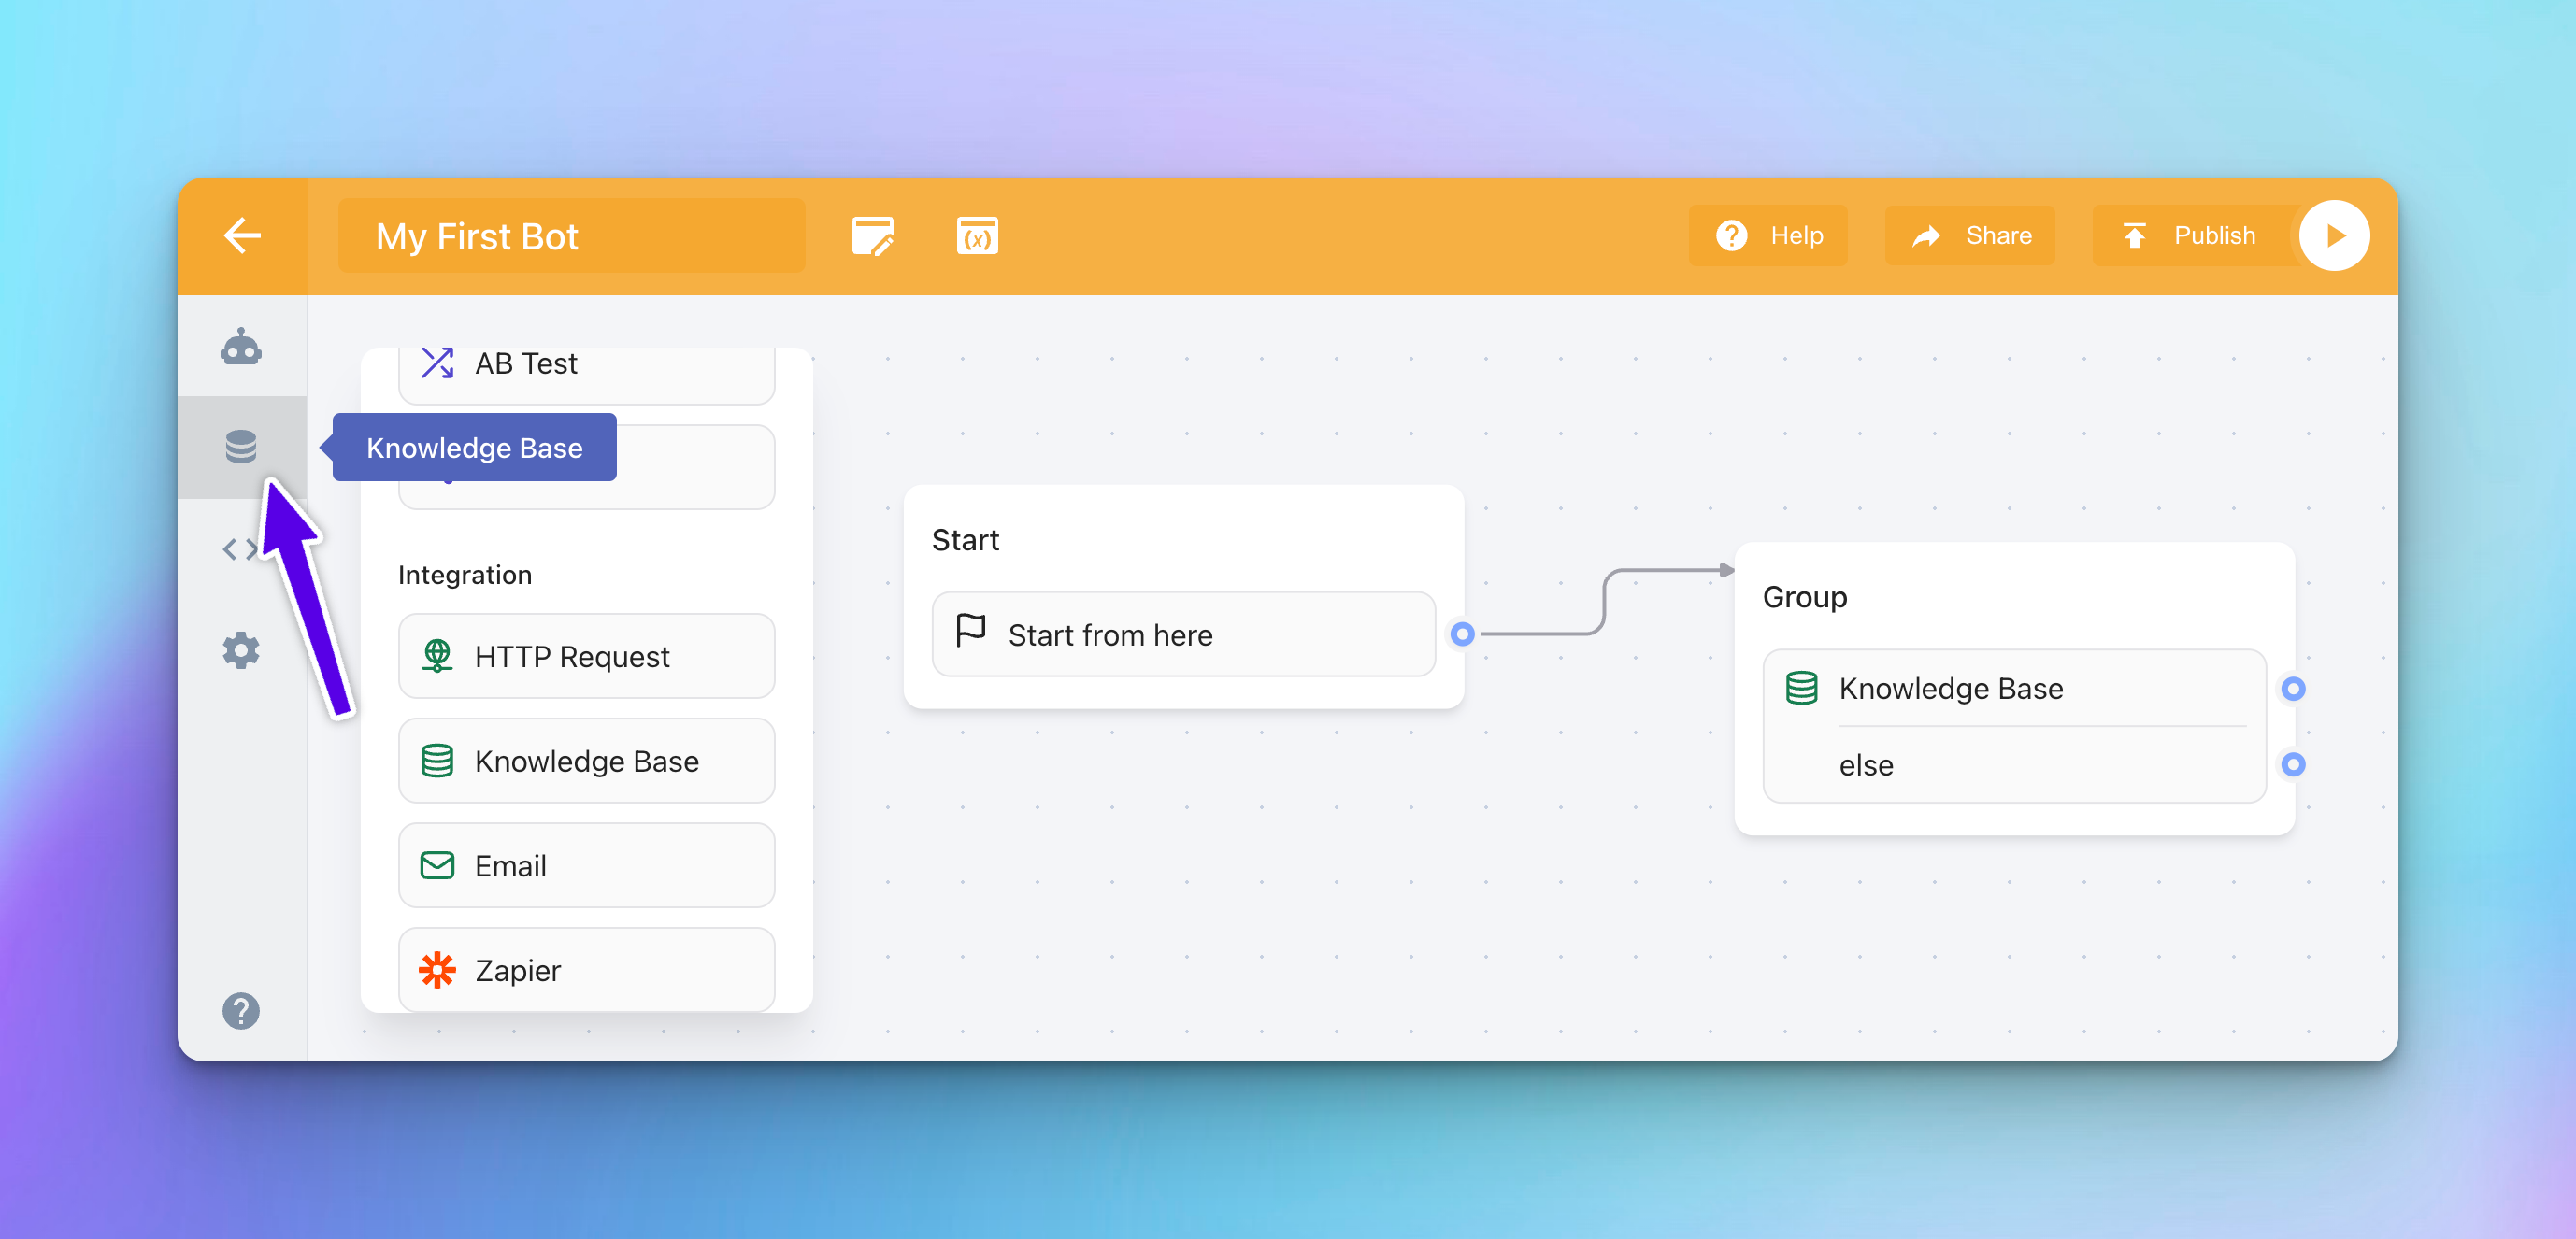
Navigate to Bot Designer: From the sidebar on your bot's detail page, select "Design Bot Flow." This action opens the bot designer, where you can visually construct and customize your bot's conversational pathways.
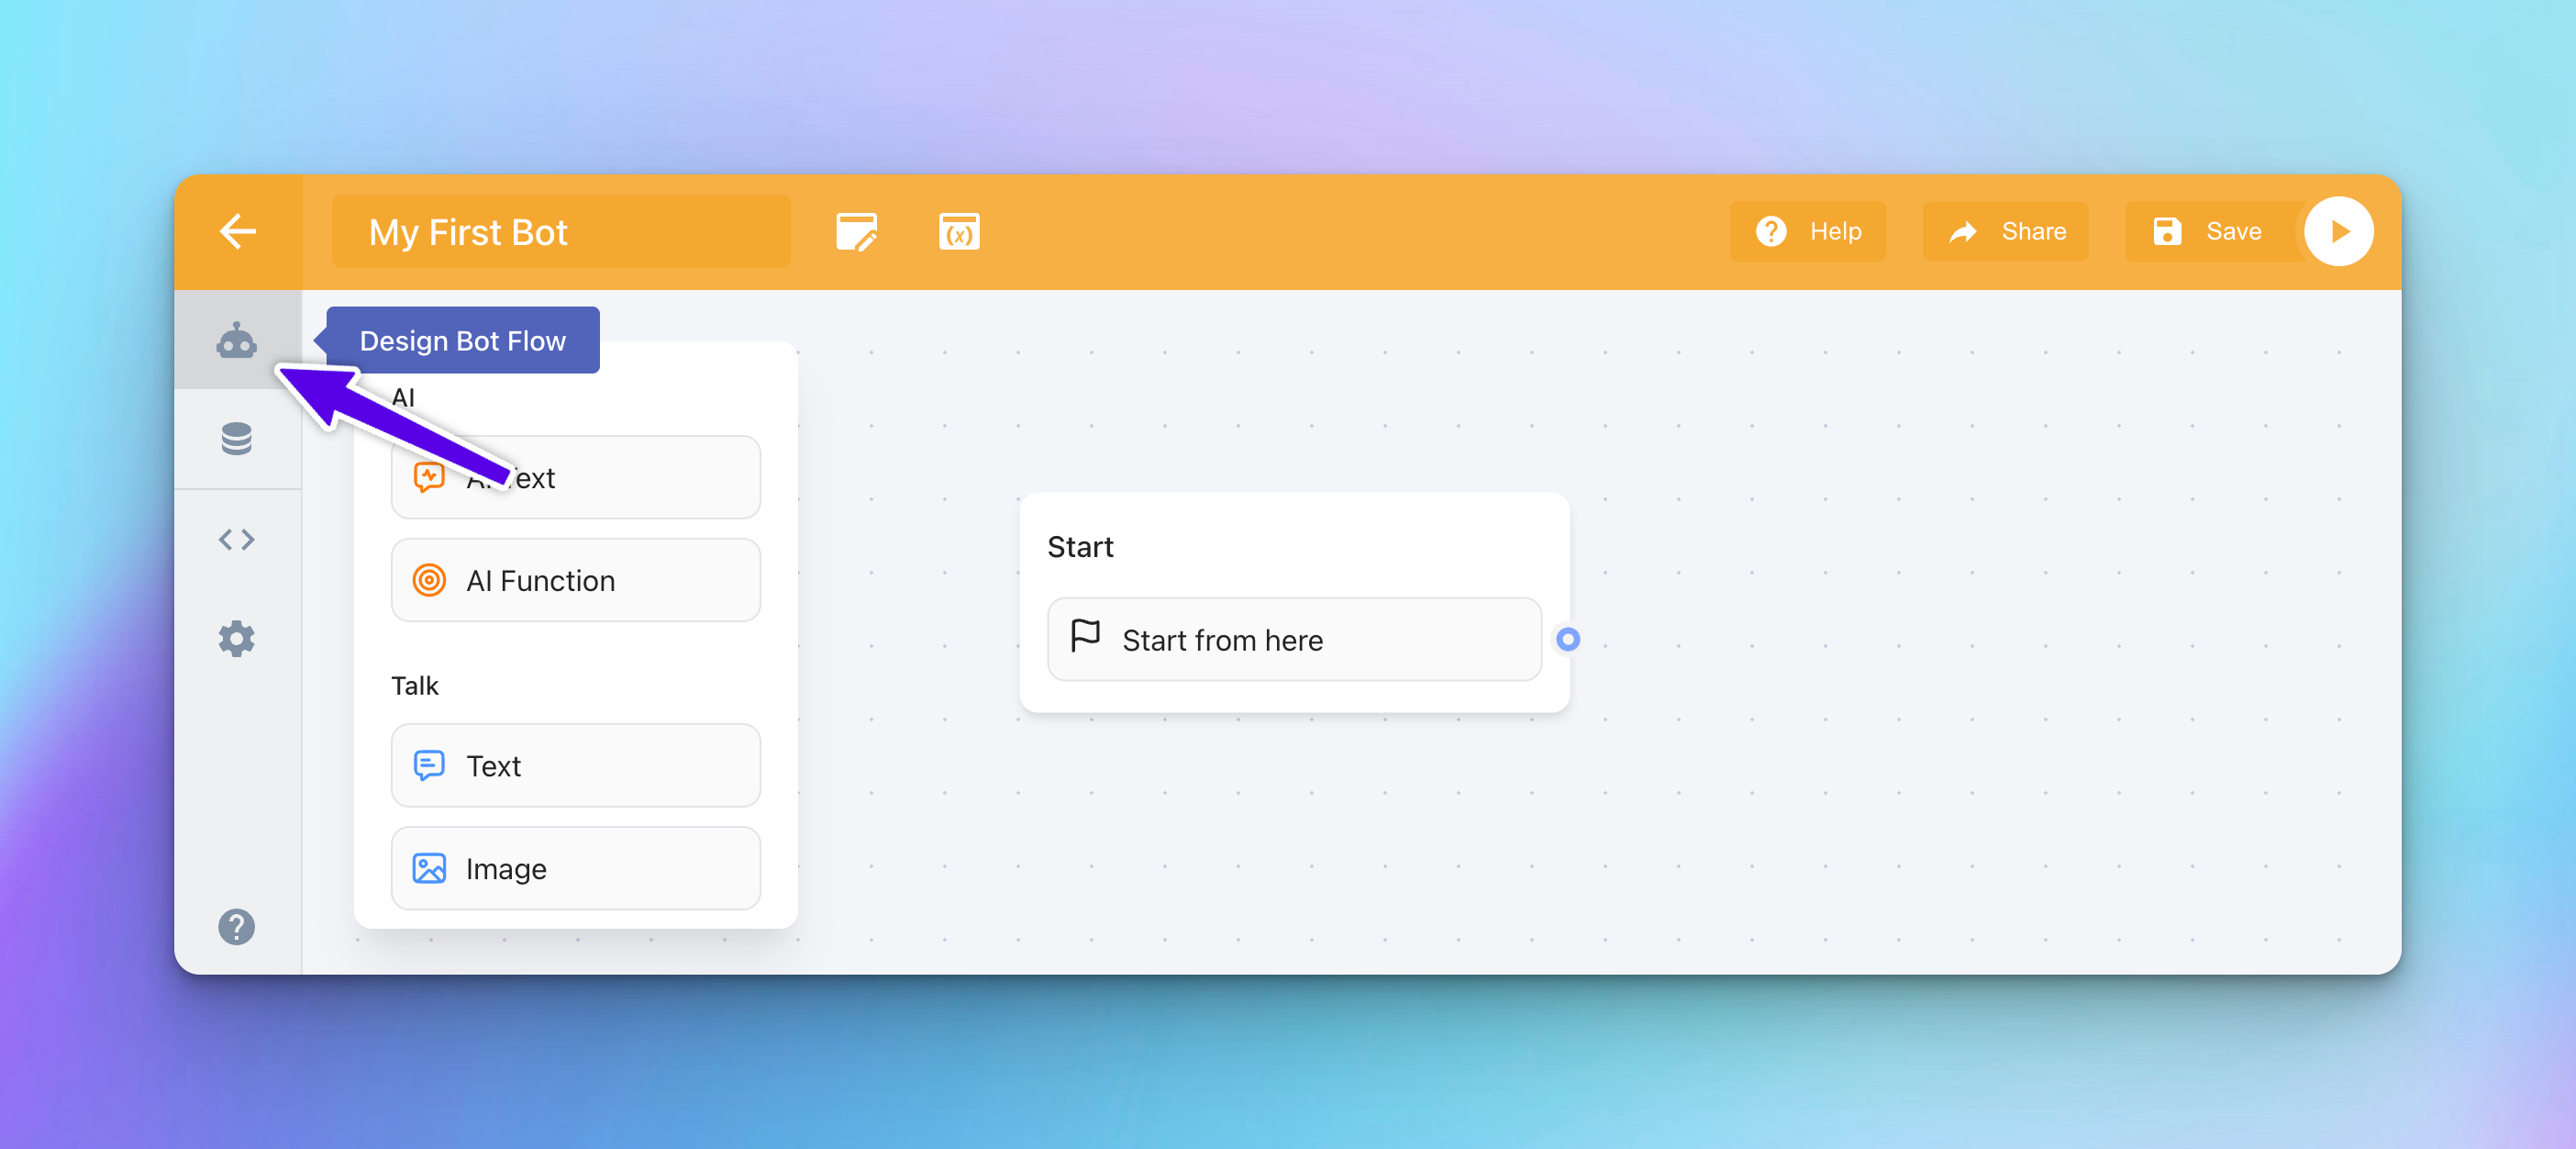
Add Knowledge Base Integration: In the bot designer, you'll find a component or integration called "Knowledge Base" in the sidebar. You can drag and drop this component onto your bot flow canvas at the desired point in the conversation flow.
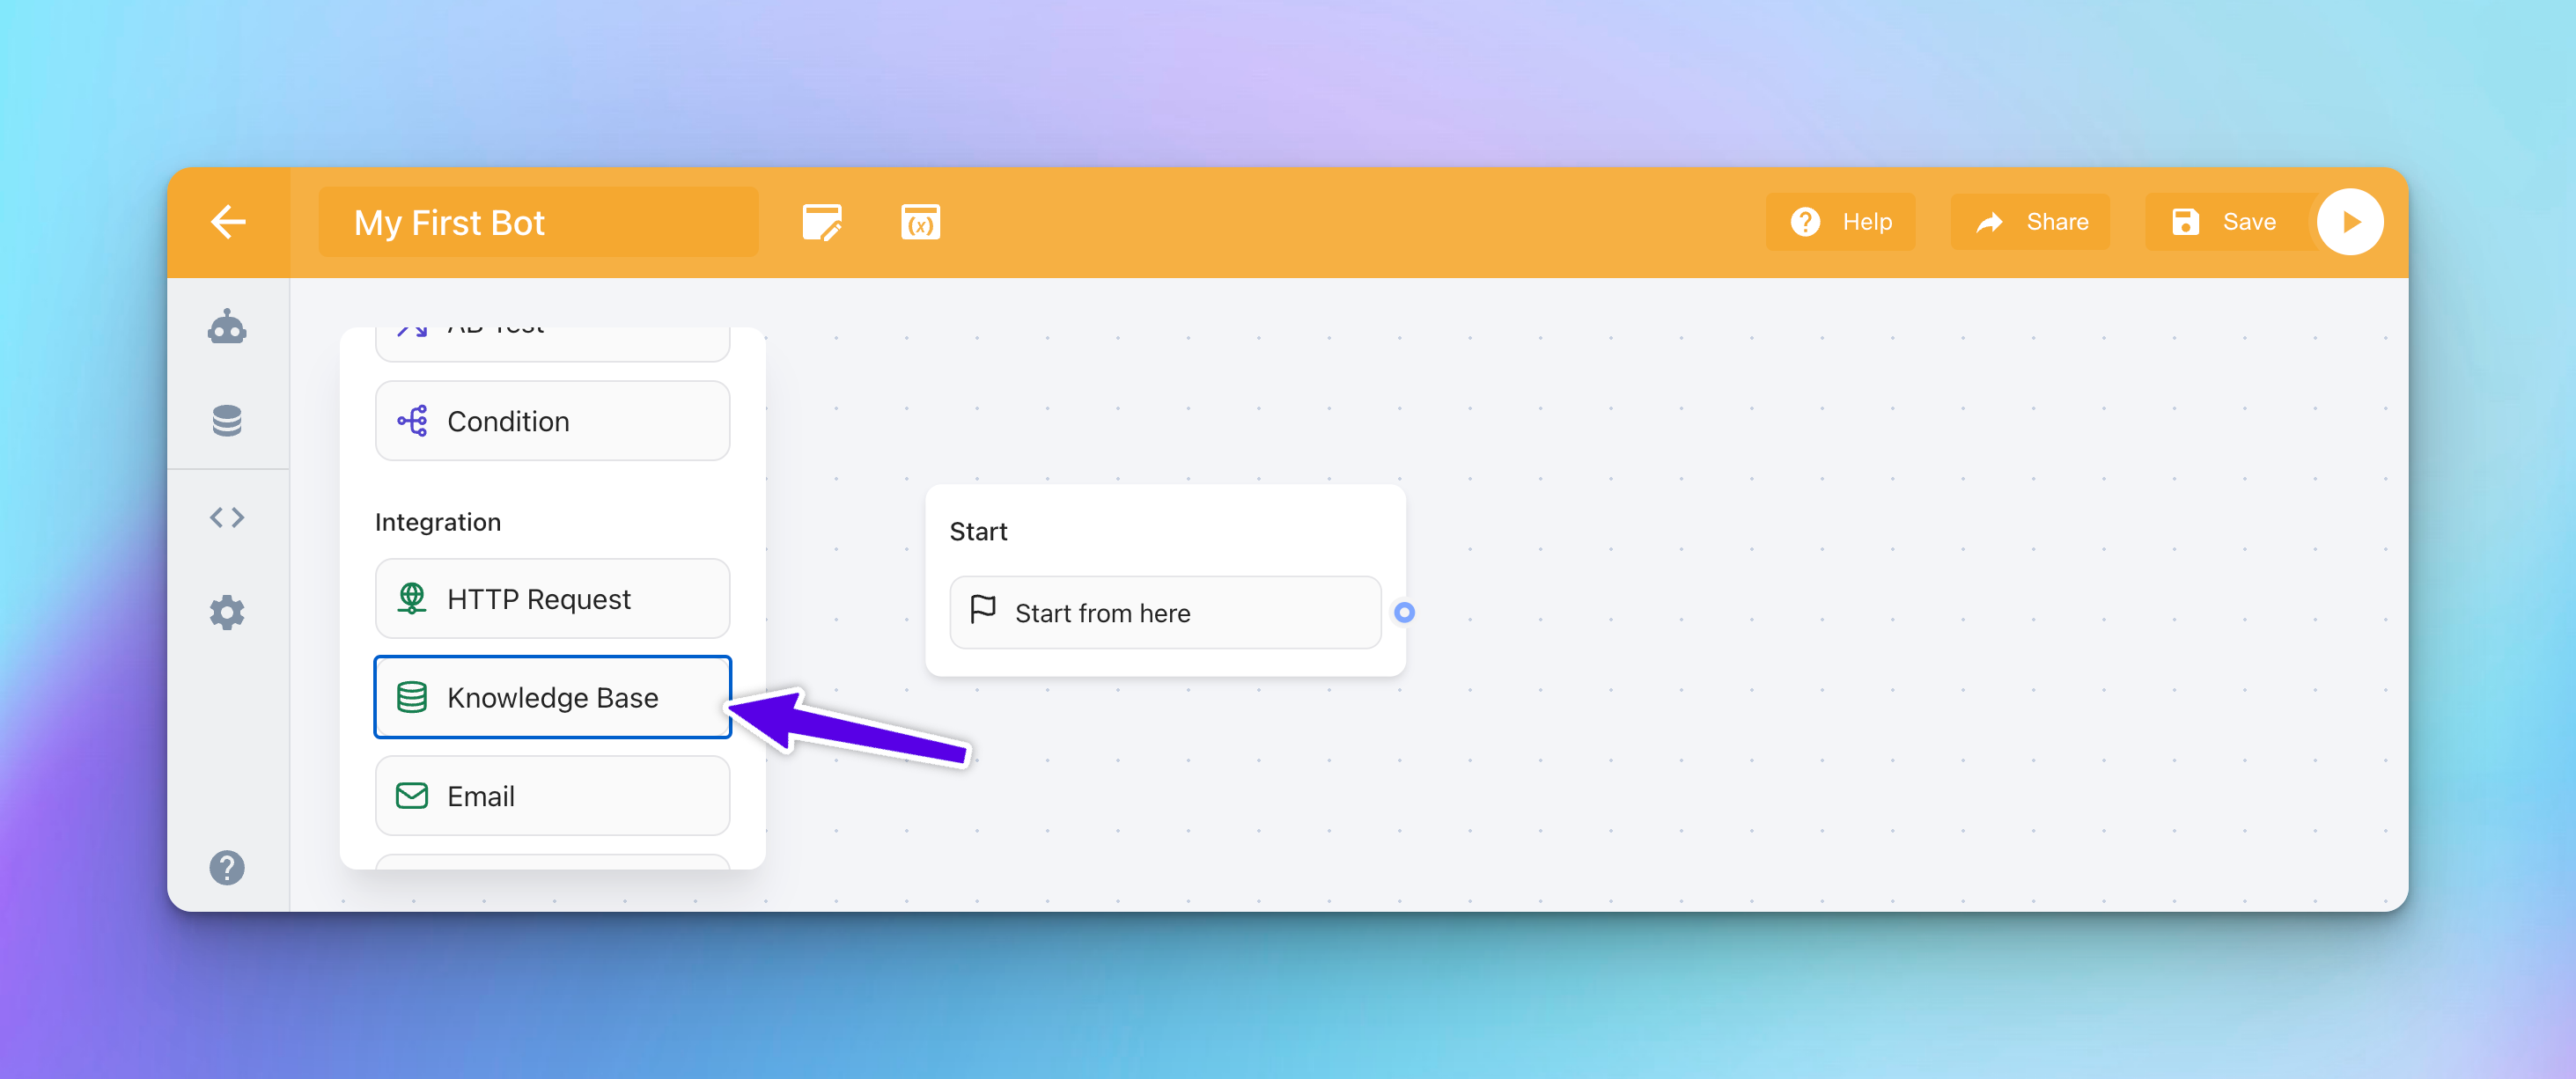
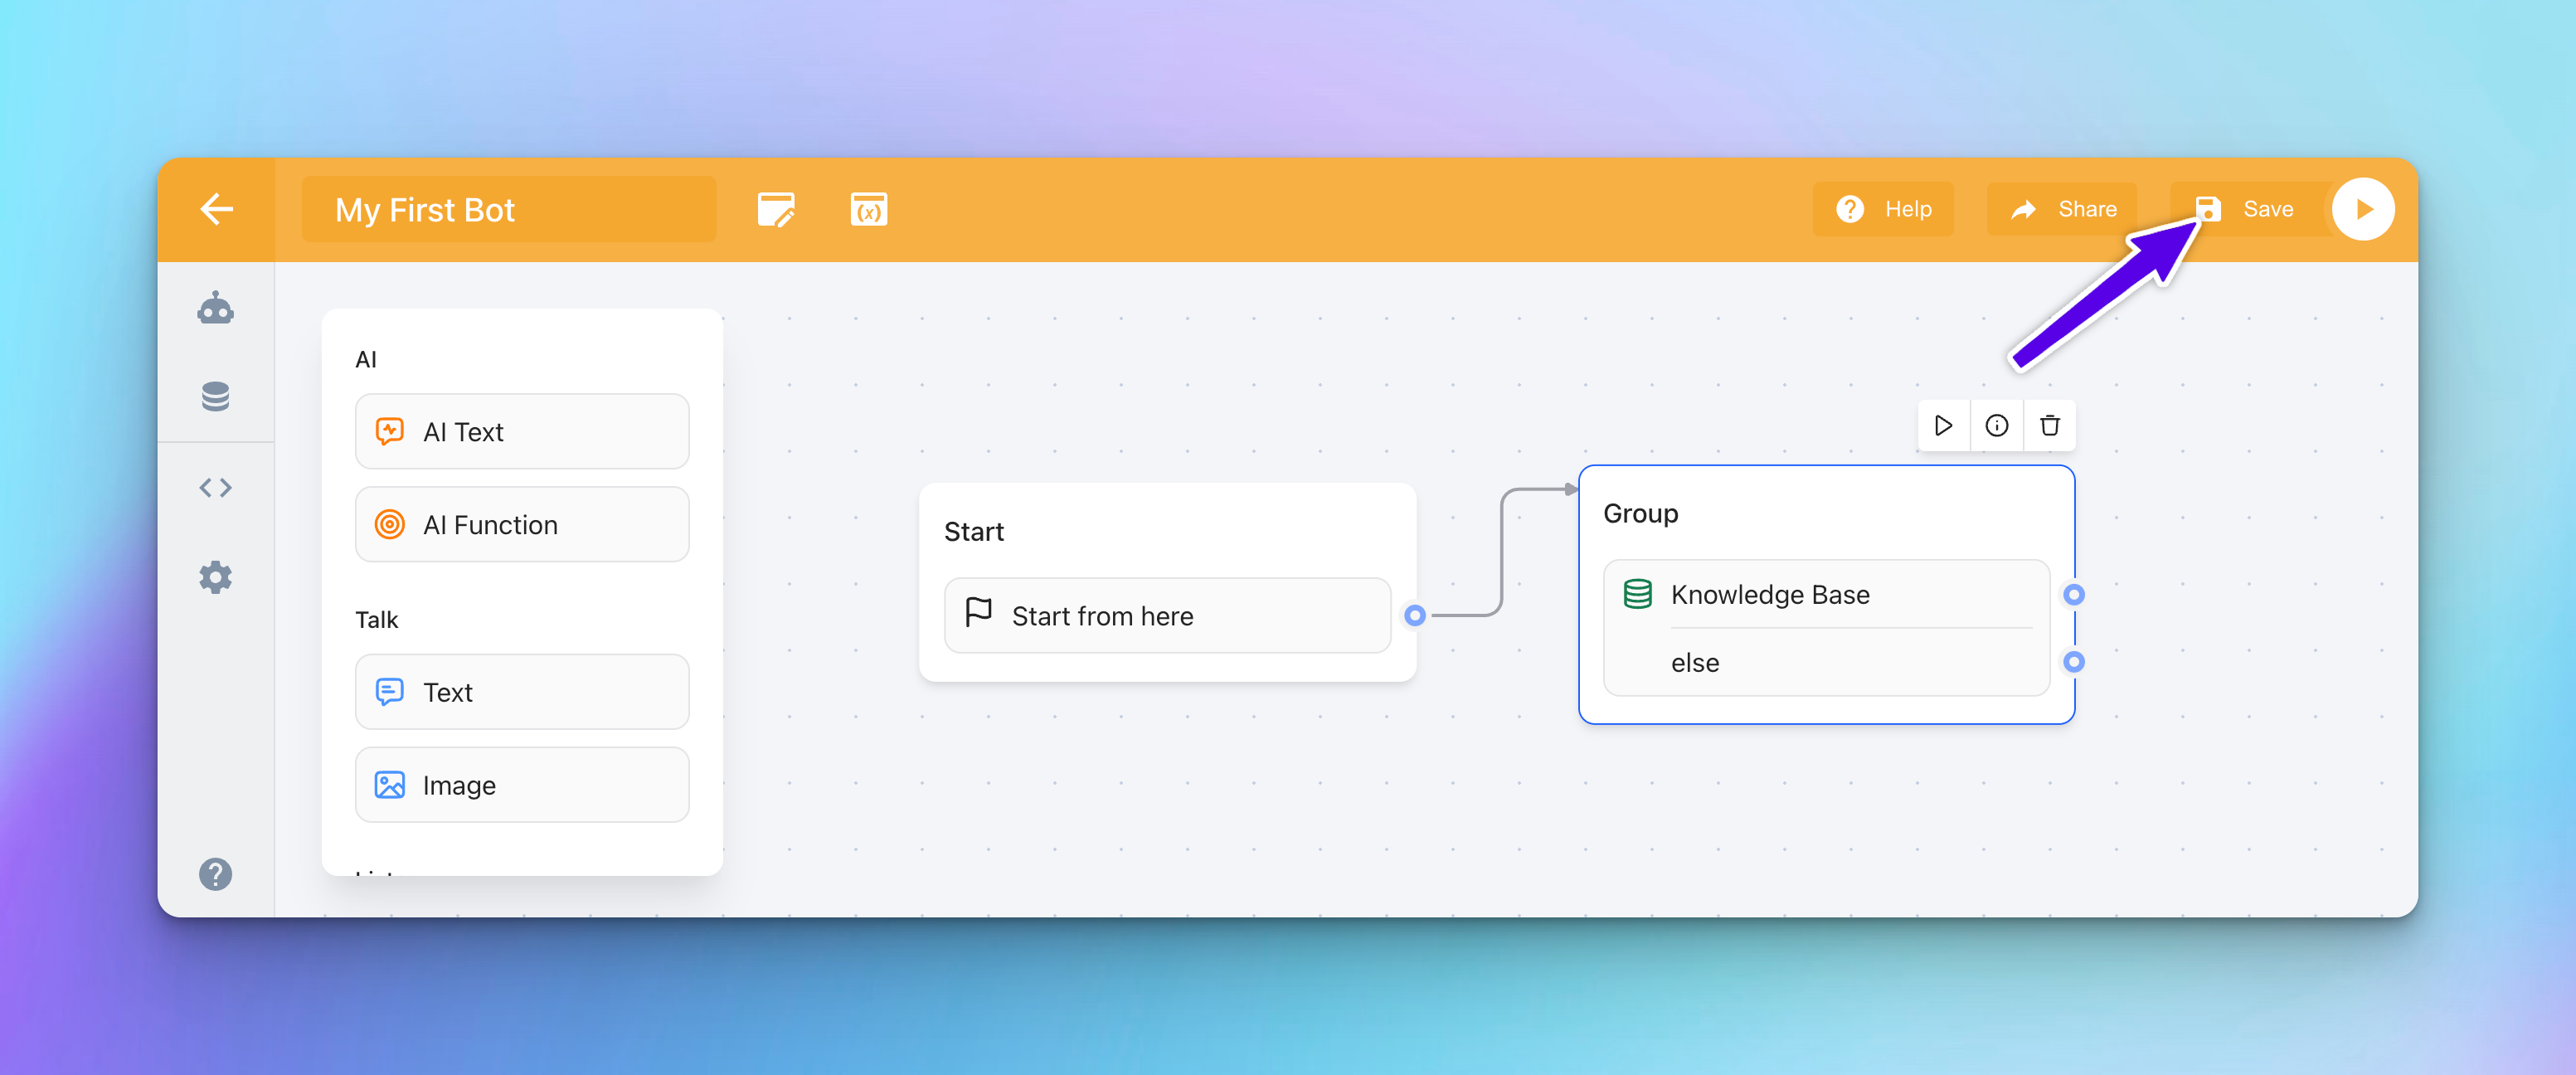
Connect the Nodes: Ensure the knowledge base is effectively integrated into the flow by connecting the nodes. If you want the knowledge base to activate after an initial interaction, such as "Start from here," click and hold the blue dot on the originating node, then drag to the knowledge base group and release.

Pro Tip
Utilizing Tags to Filter Knowledge Base Responses: If you have previously tagged your PDF documents when uploading them to the Knowledge Base, you can use these tags to tailor the bot's responses:
- Click on the "Knowledge Base" component in your bot flow canvas. This will open a settings sidebar on the right.
- In the sidebar, click on "Knowledge Base Options".
- Enter the tags that you want to use for filtering in the provided field.
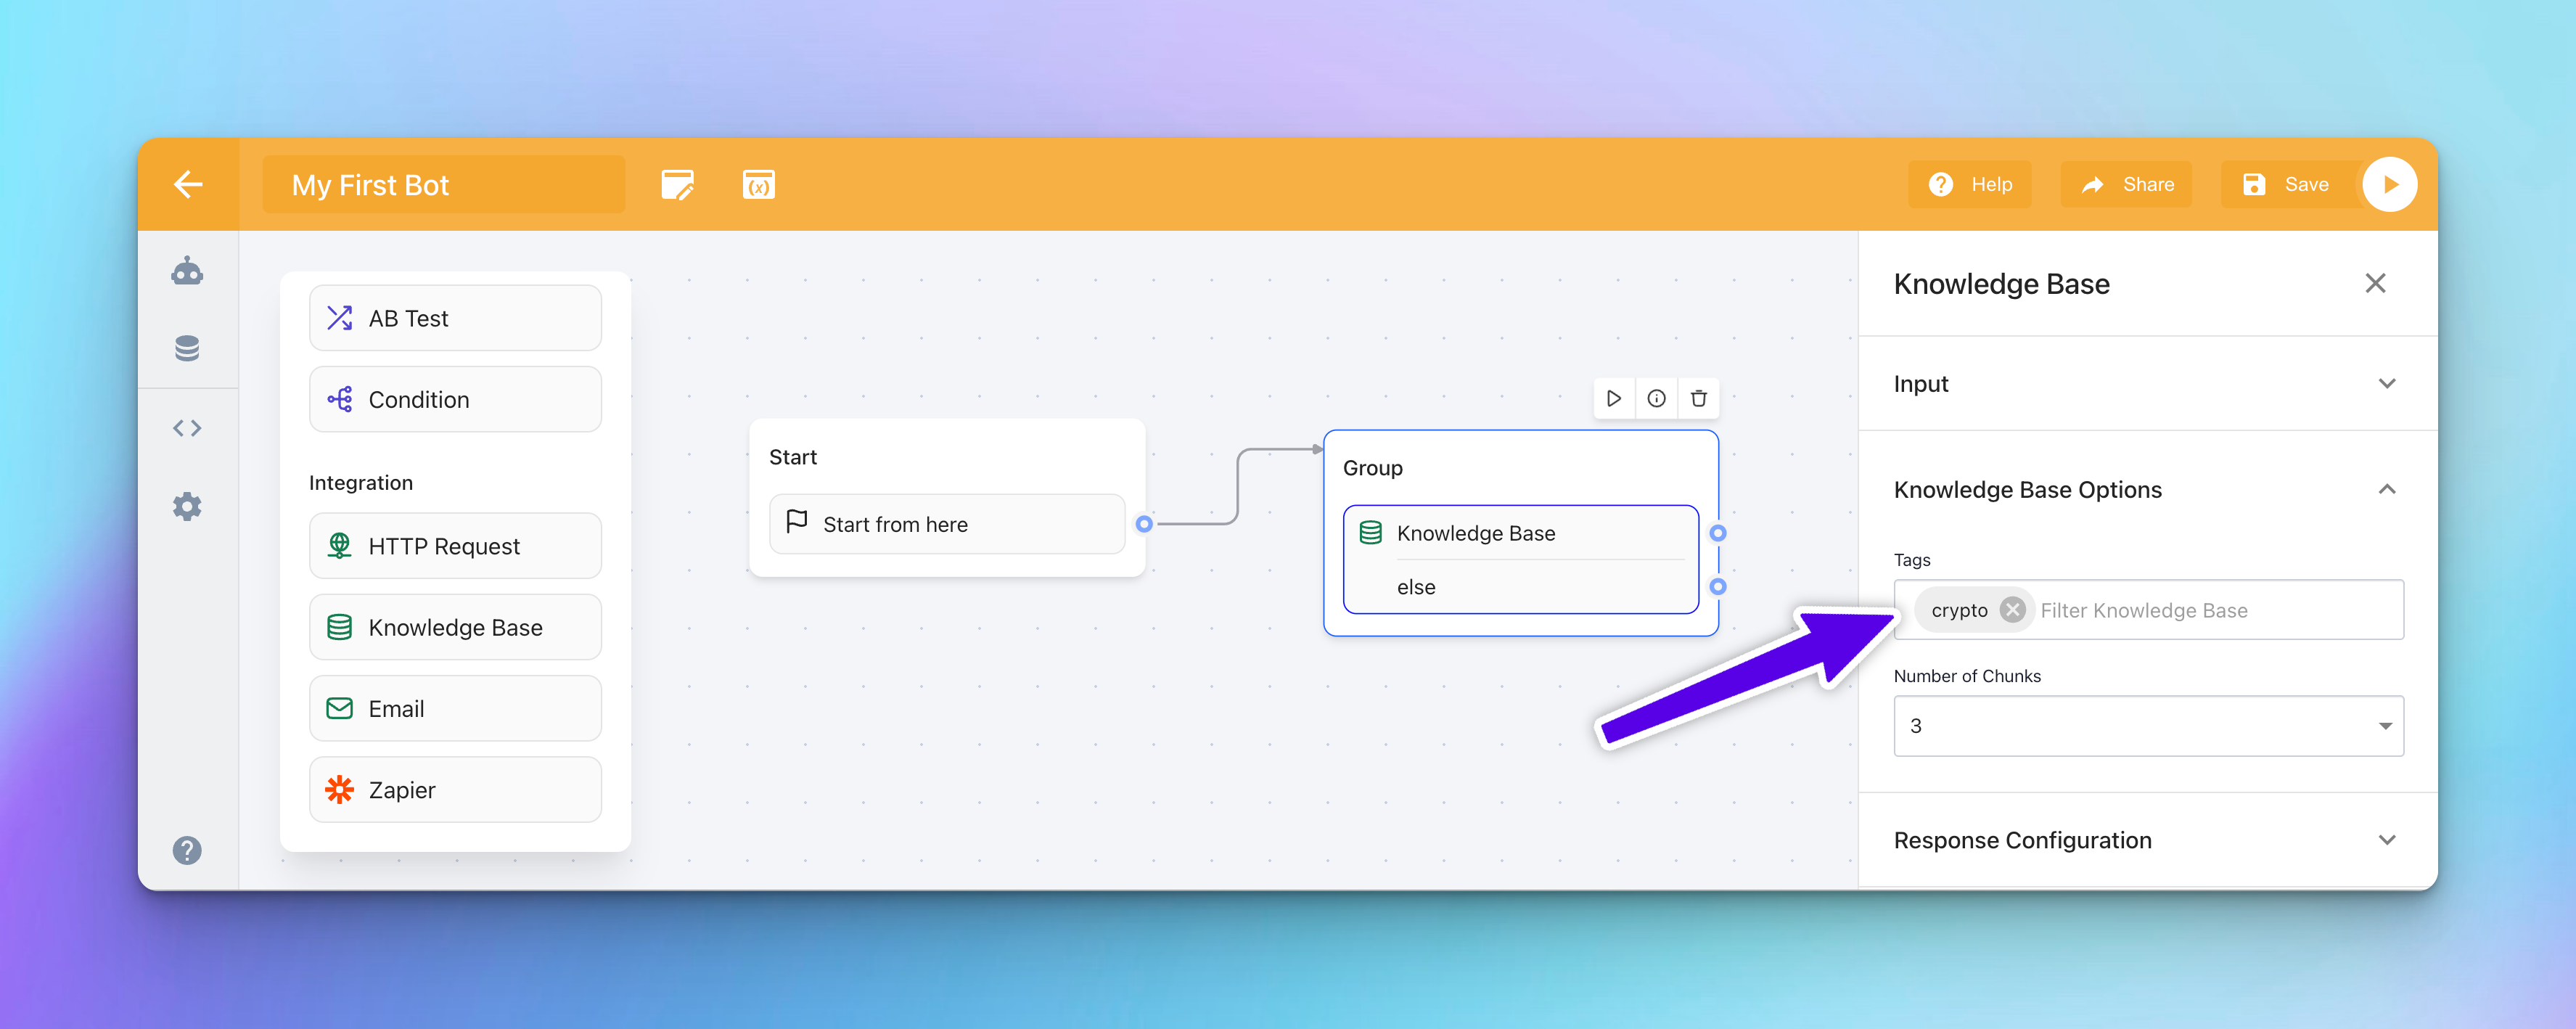
This step ensures that your bot delivers targeted information from specific parts of your knowledge base, enhancing the relevance and effectiveness of its interactions based on the context of the conversation.
Testing Your Knowledge Base Integration
Once you have configured your bot flow and set up the Knowledge Base with the desired tags for filtering, it's important to test the functionality to ensure everything works as expected.
Save Your Flow: After making all necessary changes in the bot designer, click the "Save" button located on the top right side of the interface to save your bot flow.
Test Your Bot: To preview how your bot will interact with users using the integrated Knowledge Base, click the "Play" icon, also found on the top right side of the screen. This will launch a preview window where you can interact with your bot as a user would, allowing you to see firsthand how the bot utilizes the knowledge base in conversation.
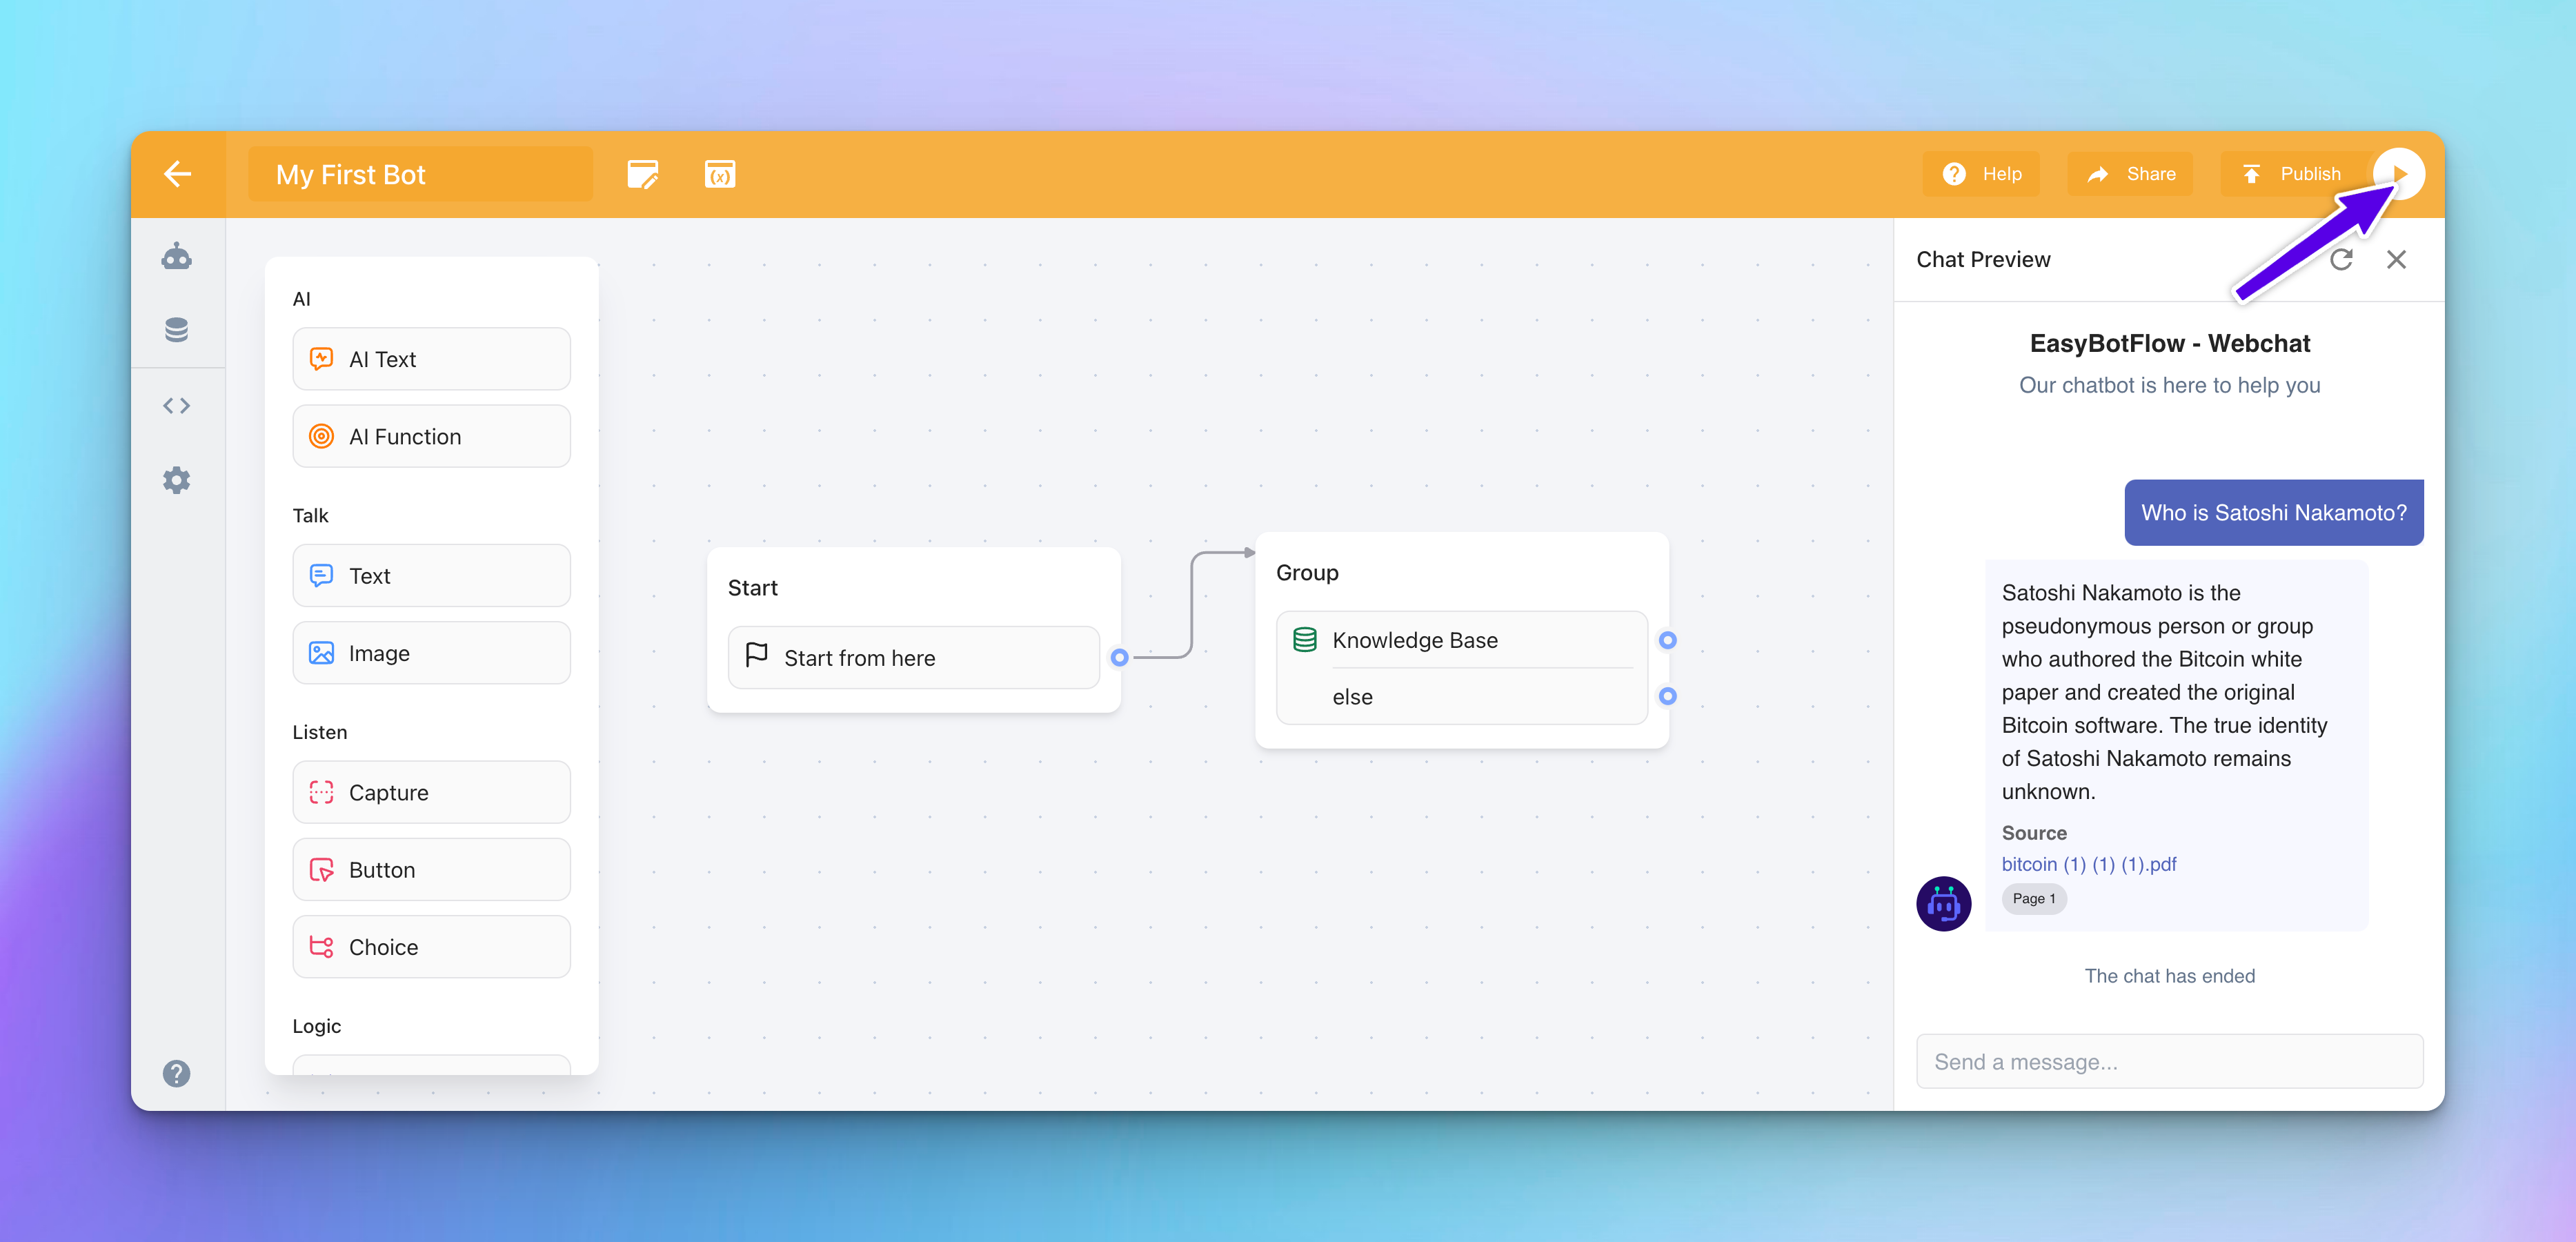
Testing your setup helps identify any adjustments needed and confirms that your bot can accurately retrieve and use data from the Knowledge Base to answer user queries based on the specified tags. This ensures that your bot is ready to provide a responsive and engaging user experience.
By following these steps, you ensure a thorough setup and testing phase, maximizing the effectiveness and reliability of your AI chatbot’s interactions.