Elements
Automate Your Bot Workflows with Zapier Integration
Integrating Zapier with your EasyBotFlow bot opens up a multitude of possibilities for automating workflows and connecting your bot to a vast directory of other software applications available through Zapier. This guide provides a step-by-step example of how to use the Zapier element within EasyBotFlow to automate data capture and storage, using Airtable as an example.
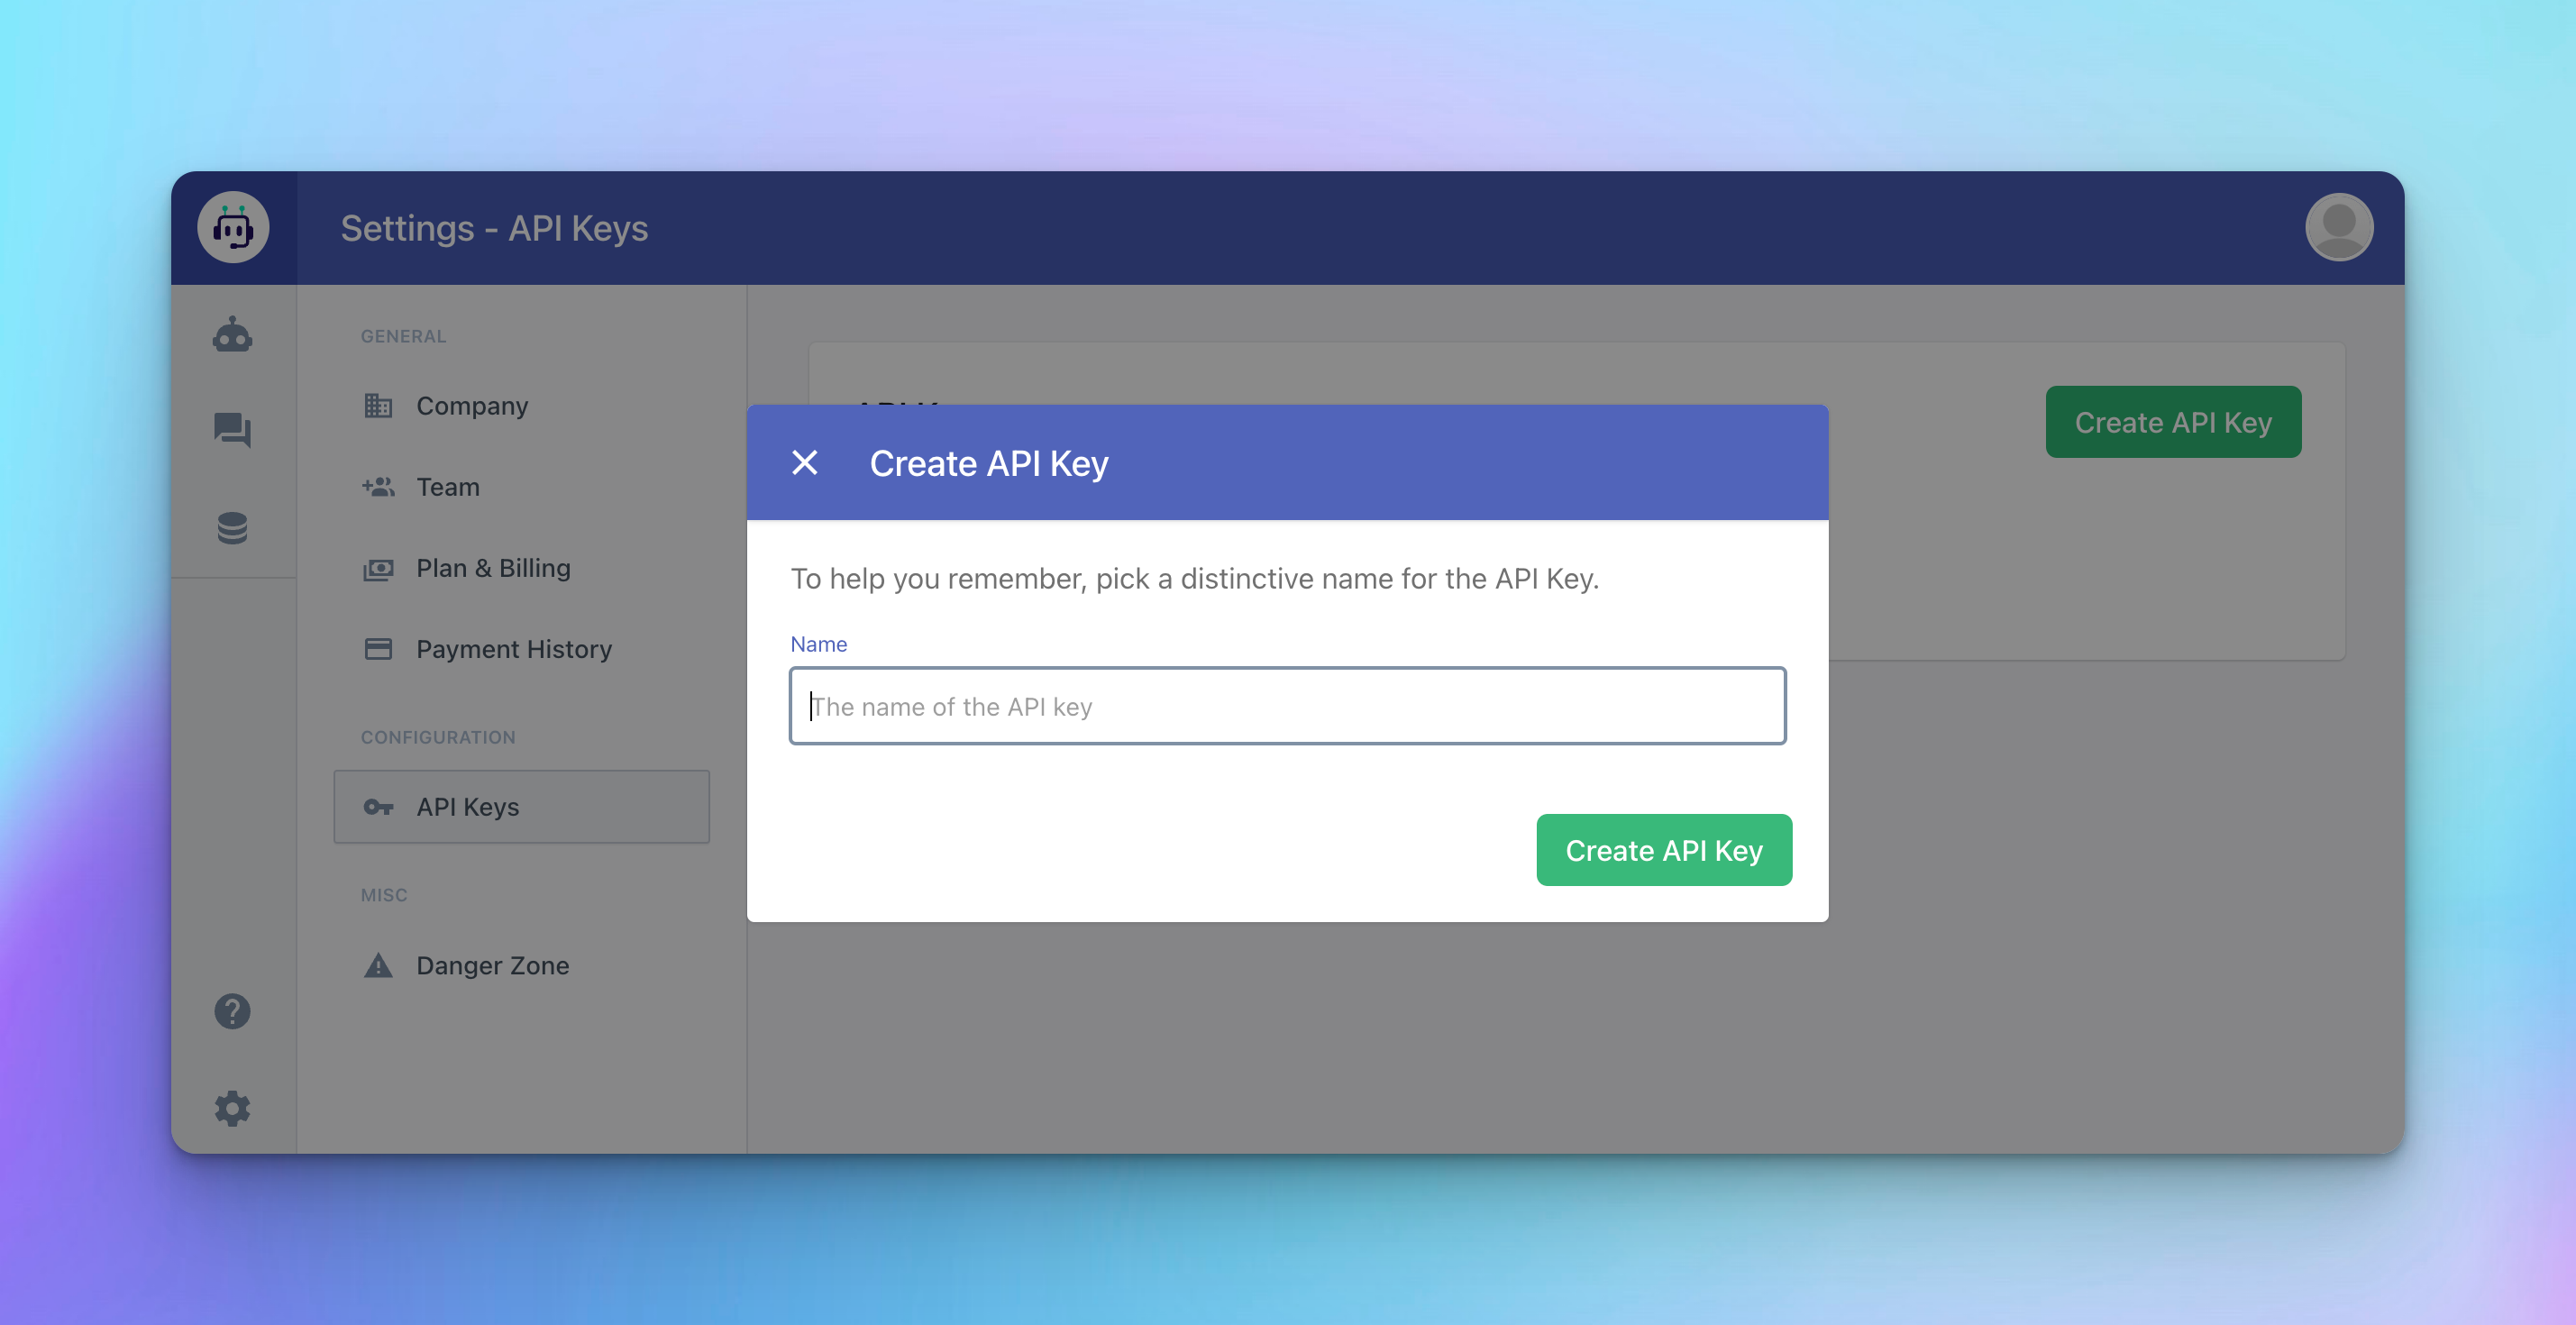
Create an API Key
To integrate Zapier with EasyBotFlow, you first need an API key:
- Go to your main dashboard in EasyBotFlow.
- Click on the settings icon located at the bottom left of your screen.
- Select "API Keys".
- Click the green button "Create API Key".
- Name your API key (e.g., "Zapier Integration"). Remember, you will only see and be able to copy the key once, so save it somewhere secure.
Create Your Bot
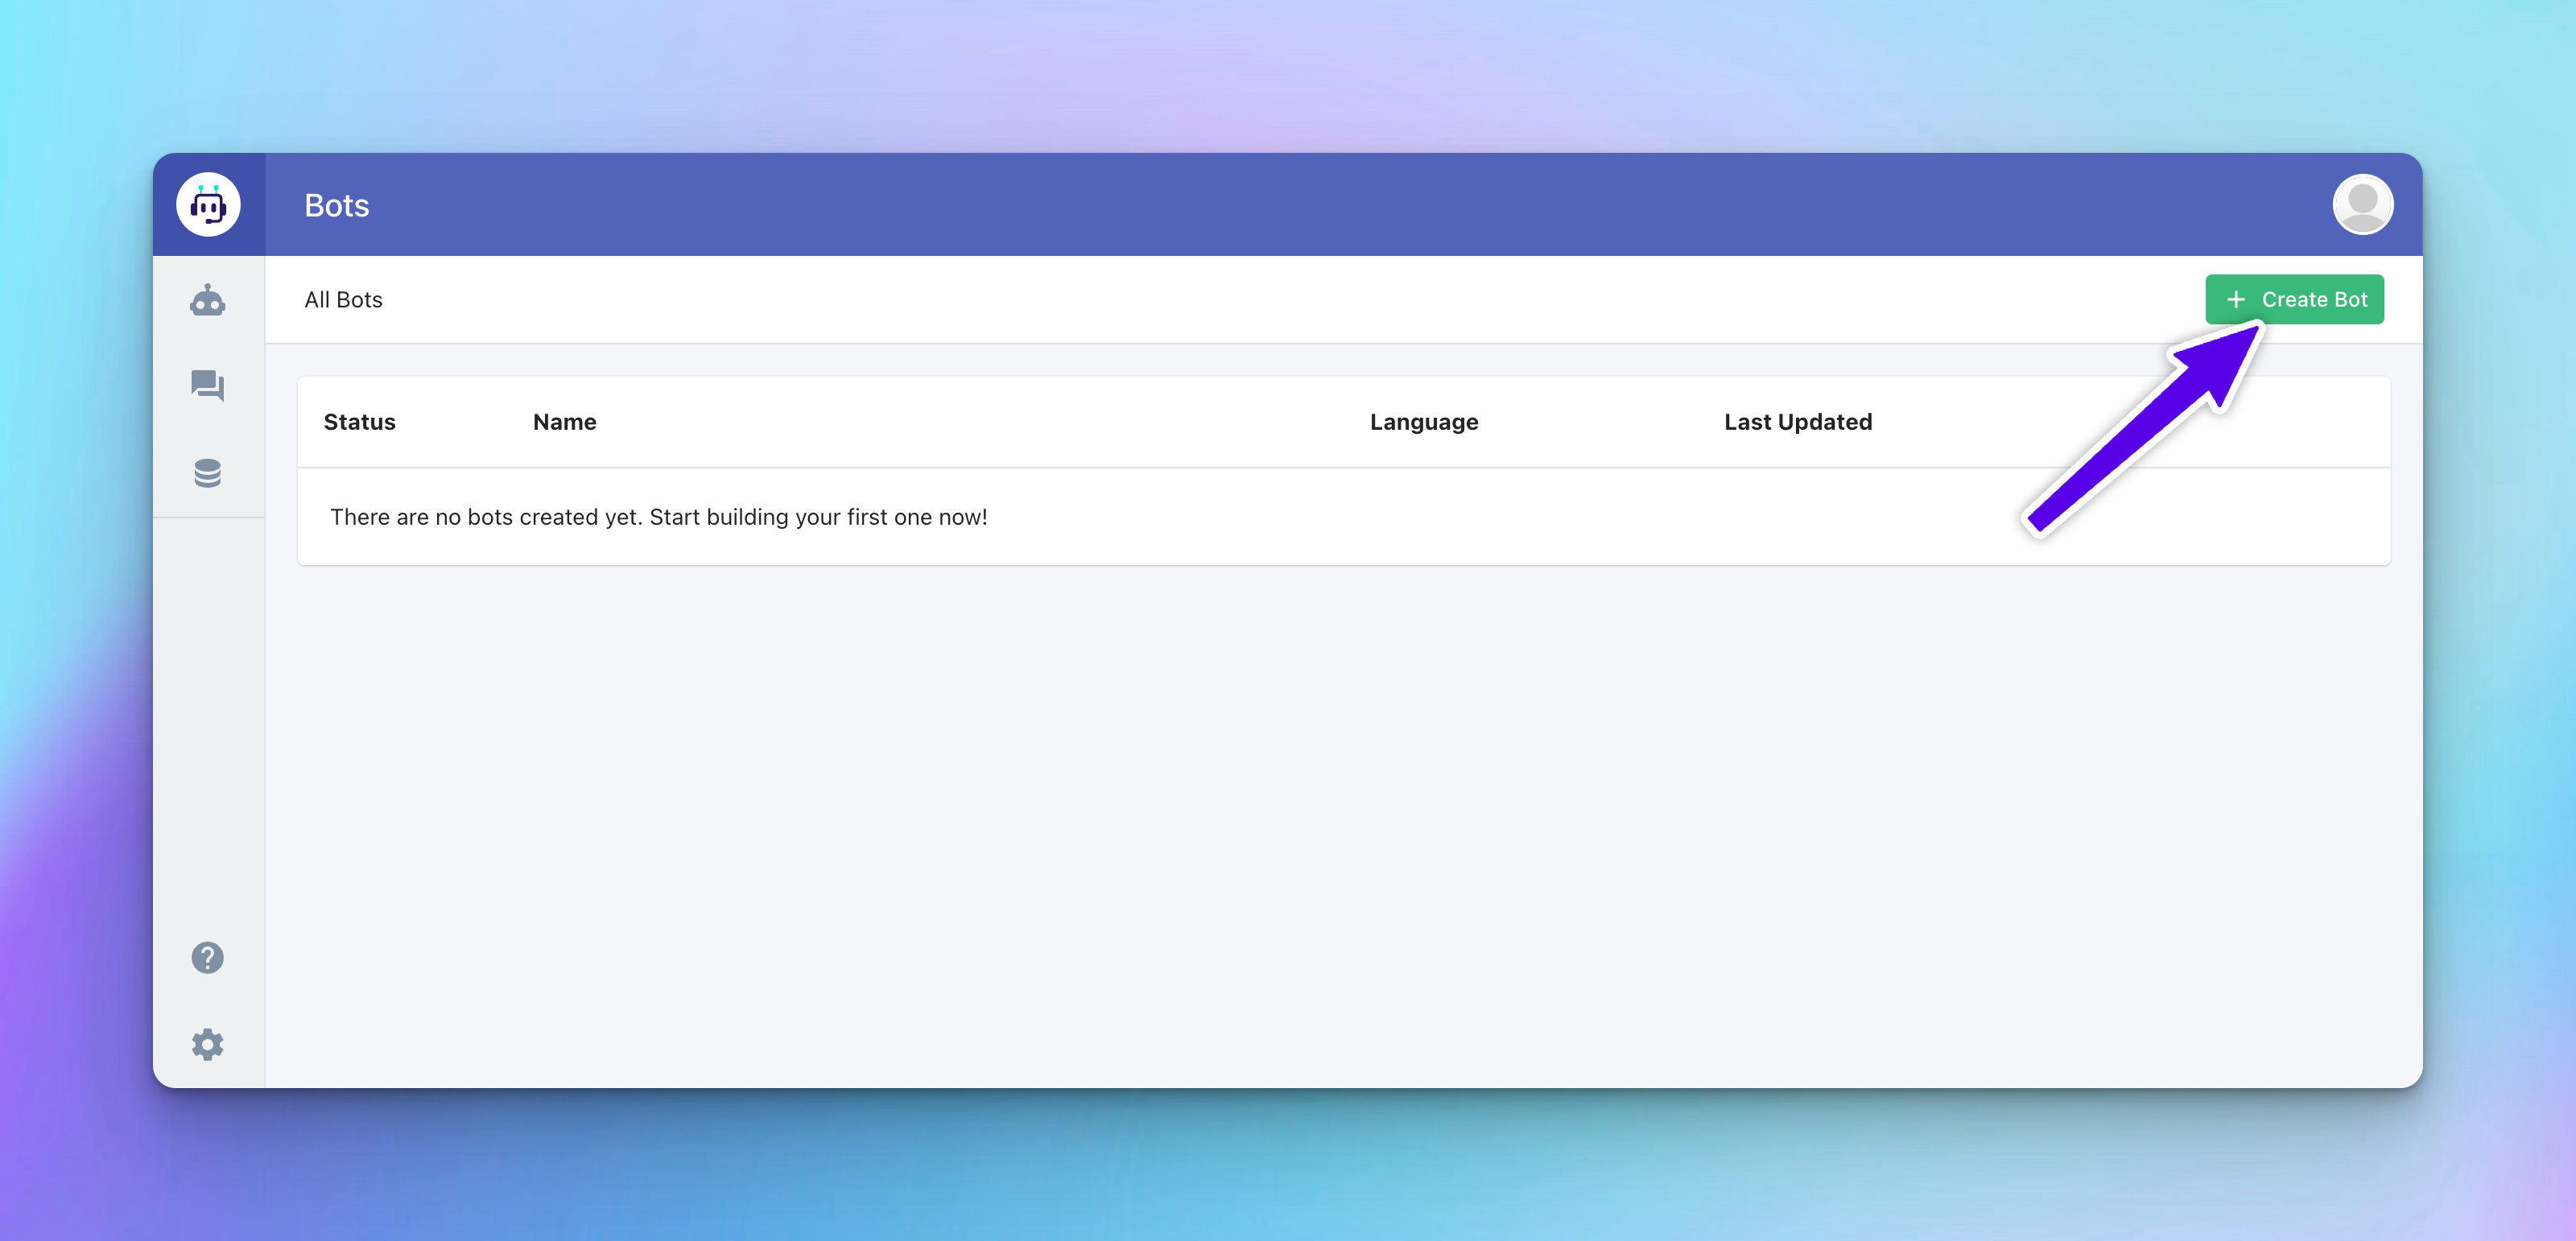
To integrate your bot with Zapier for automation, start by creating the bot itself in EasyBotFlow:
- Go to the Bots Overview Page: Access the overview page where you manage all your bots.
- Create a New Bot: Click the green "+ Create Bot" button.
- Name Your Bot: Assign a name to your bot, such as "Contact Bot".
Set Up a Simple Bot Flow for Integration with Zapier
Set up a basic bot flow that will trigger Zapier actions:
- Text: "Hi, We would like to get to know you? What is your name?"
- Capture: Collect entire reply in
{name} - Zapier: Trigger Zapier
- Text: "Thank you {name}, what is your email address?"
- Capture: Collect entire reply in
{email} - Zapier: Trigger Zapier
- Text: "It was really nice to get to know you! We will be in contact soon!"
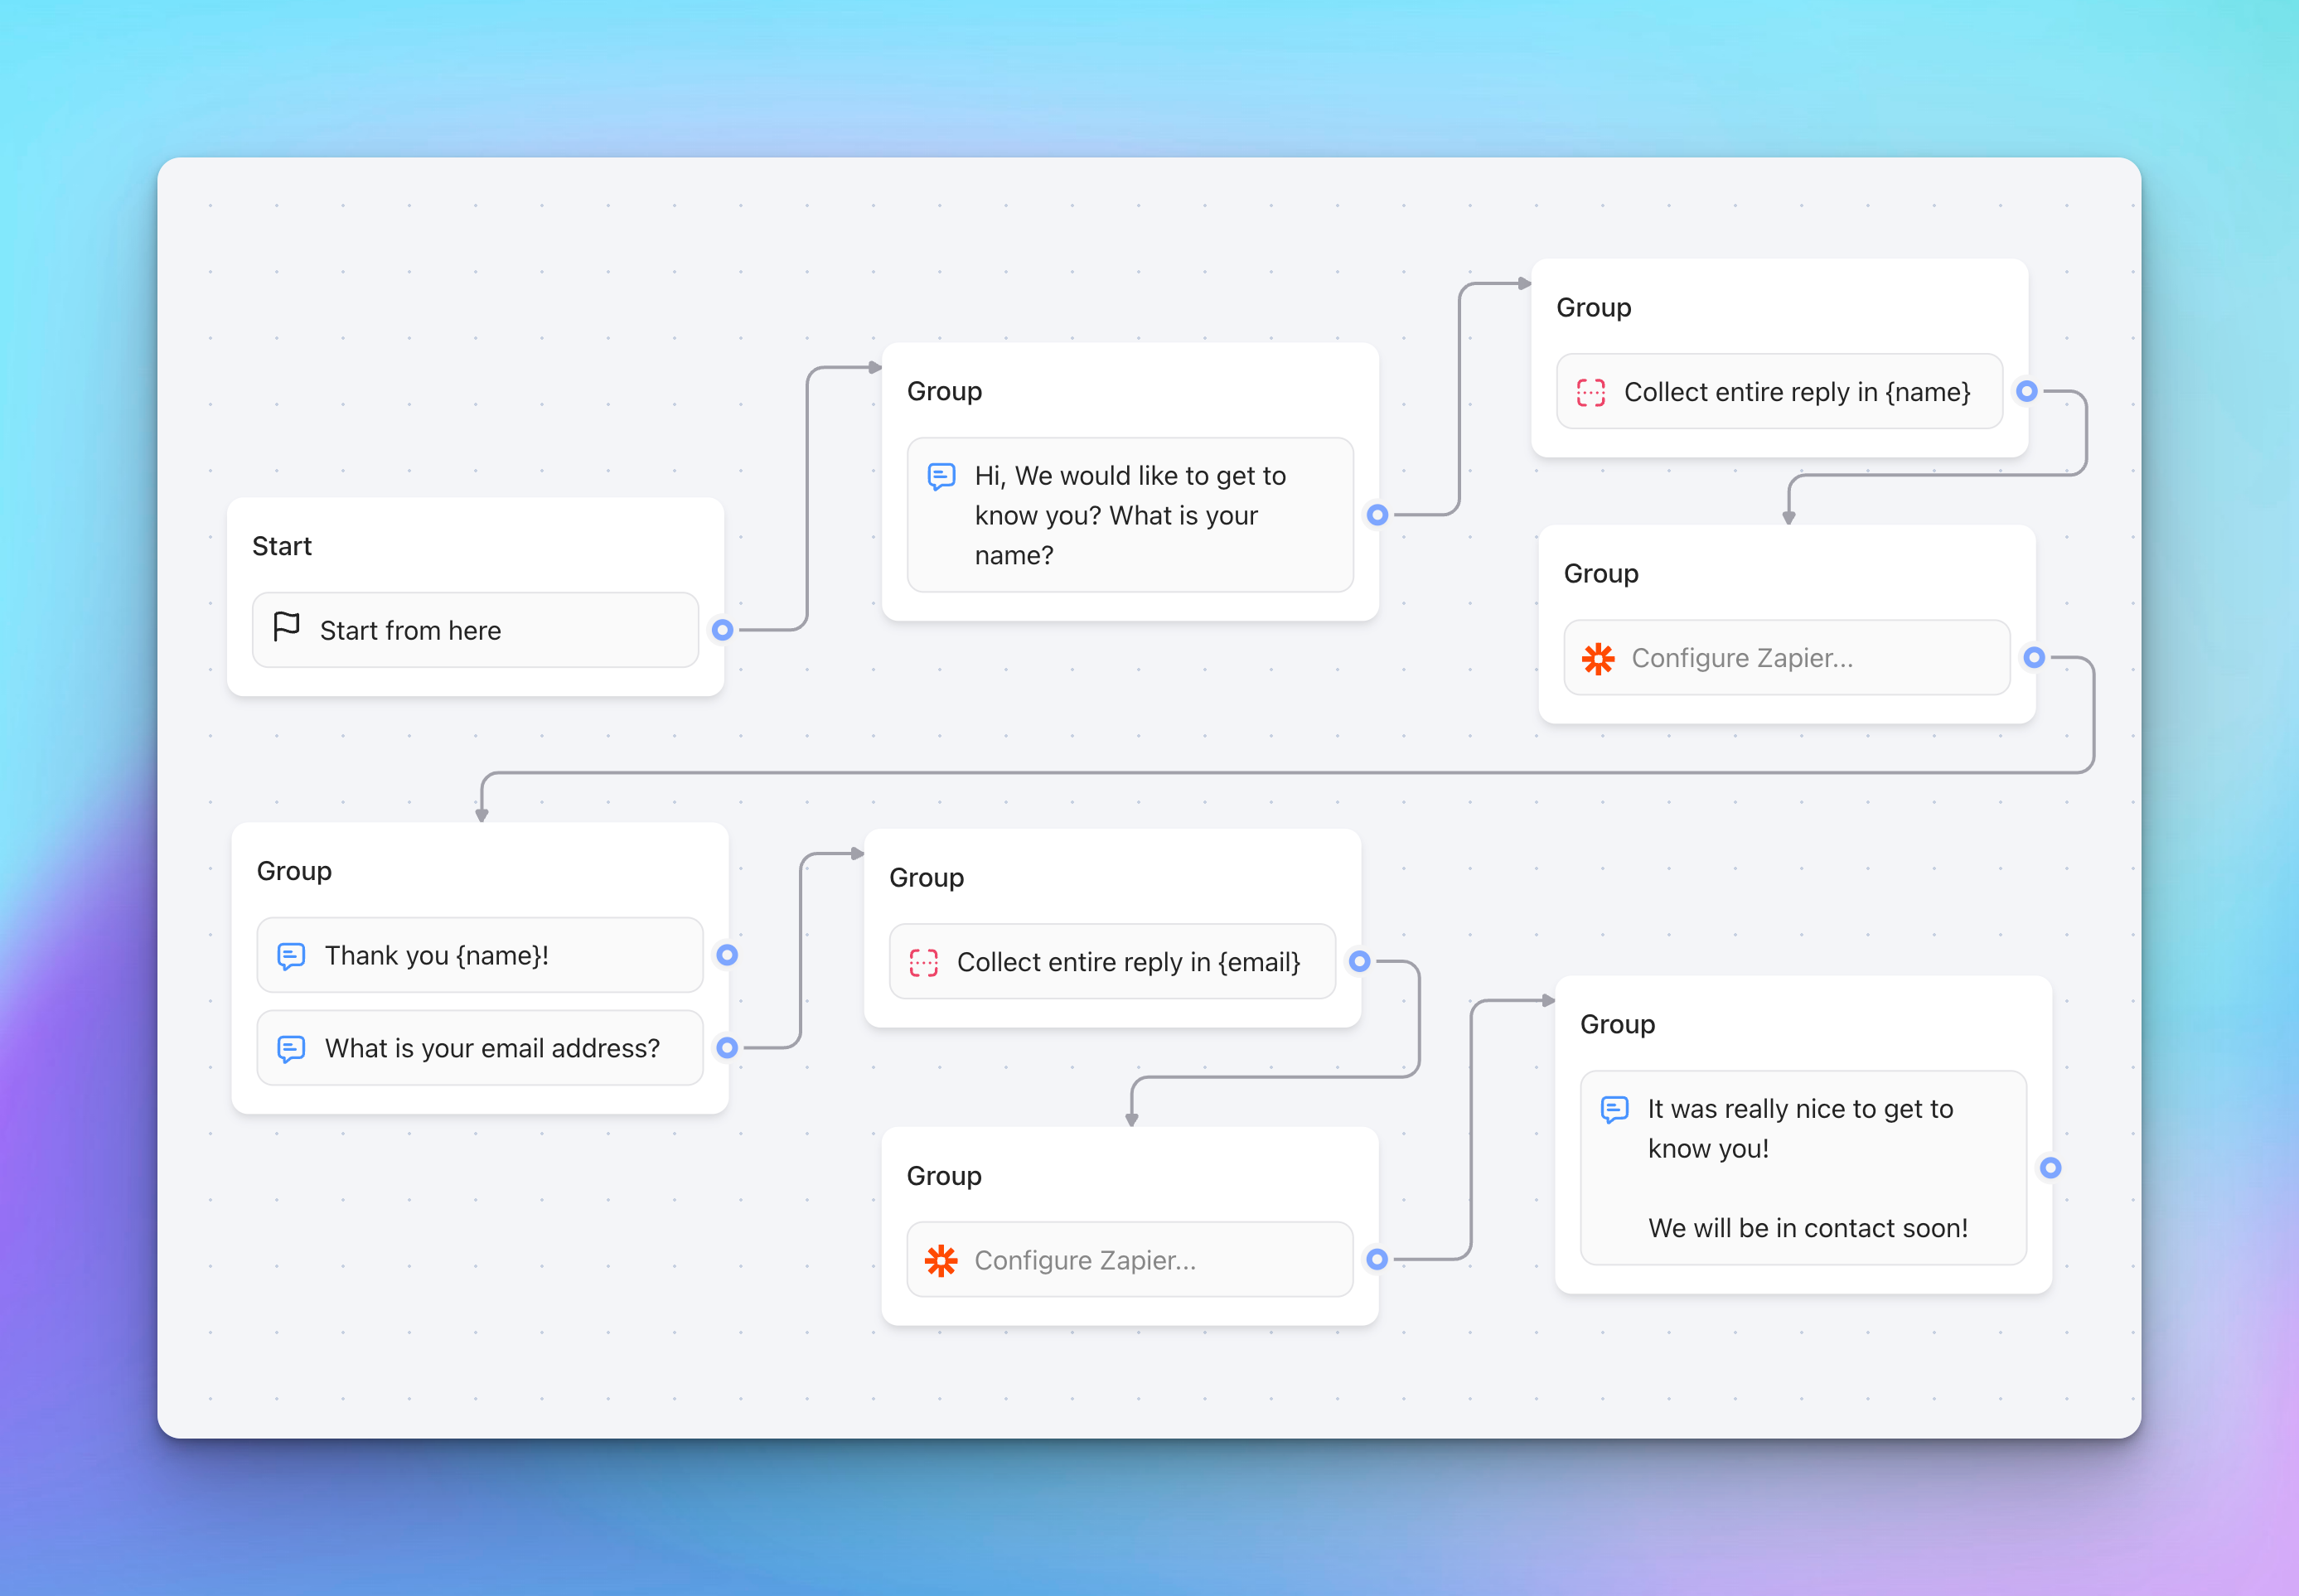
This flow is designed to capture user names and email addresses and uses Zapier to send this data to Airtable.
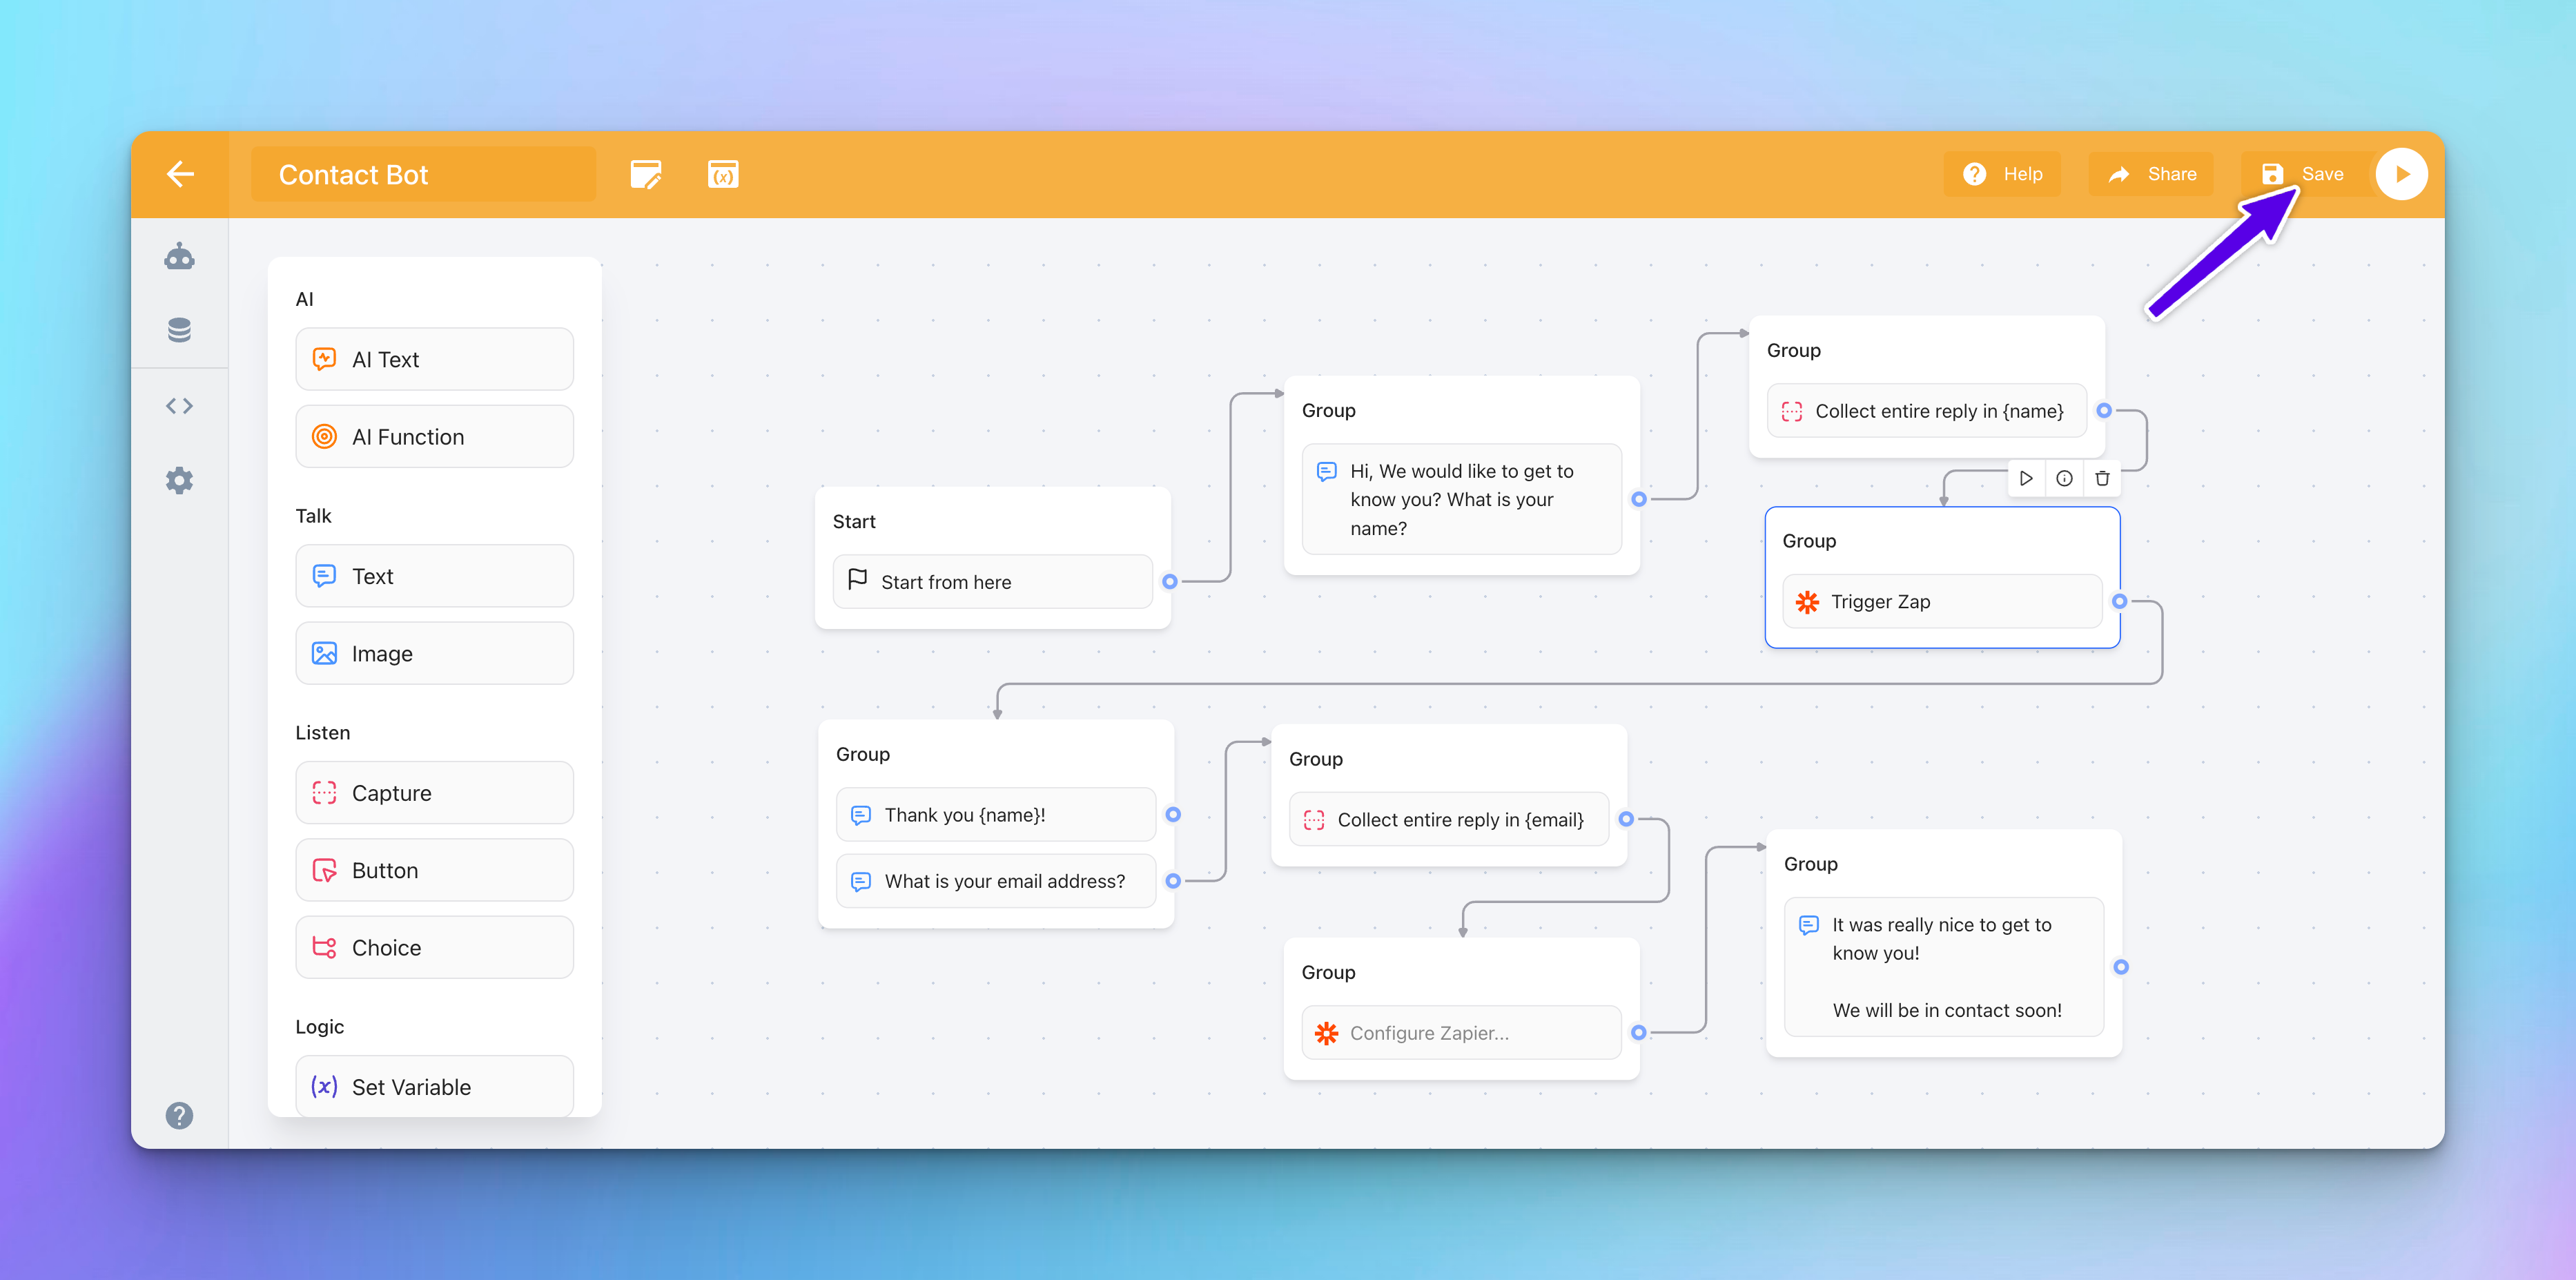
Important: Save After Adding Zapier Elements
Be sure to save your bot flow immediately after adding or configuring any Zapier elements. This is crucial for ensuring that the changes are recognized by the Zapier platform when setting up triggers. Not saving after these changes may result in the inability to find or connect the Zapier elements properly in subsequent steps. Saving ensures that your bot flow updates are properly synced and accessible in Zapier.
Set Up an Airtable
Prepare your Airtable to receive data:
Sign up or log into Airtable.
Create a new table by clicking the button at the bottom left of your Airtable dashboard and selecting "Start from scratch".
Rename your Airtable base to "EasyBotFlow Data".
Change your table name to "Contact Information".
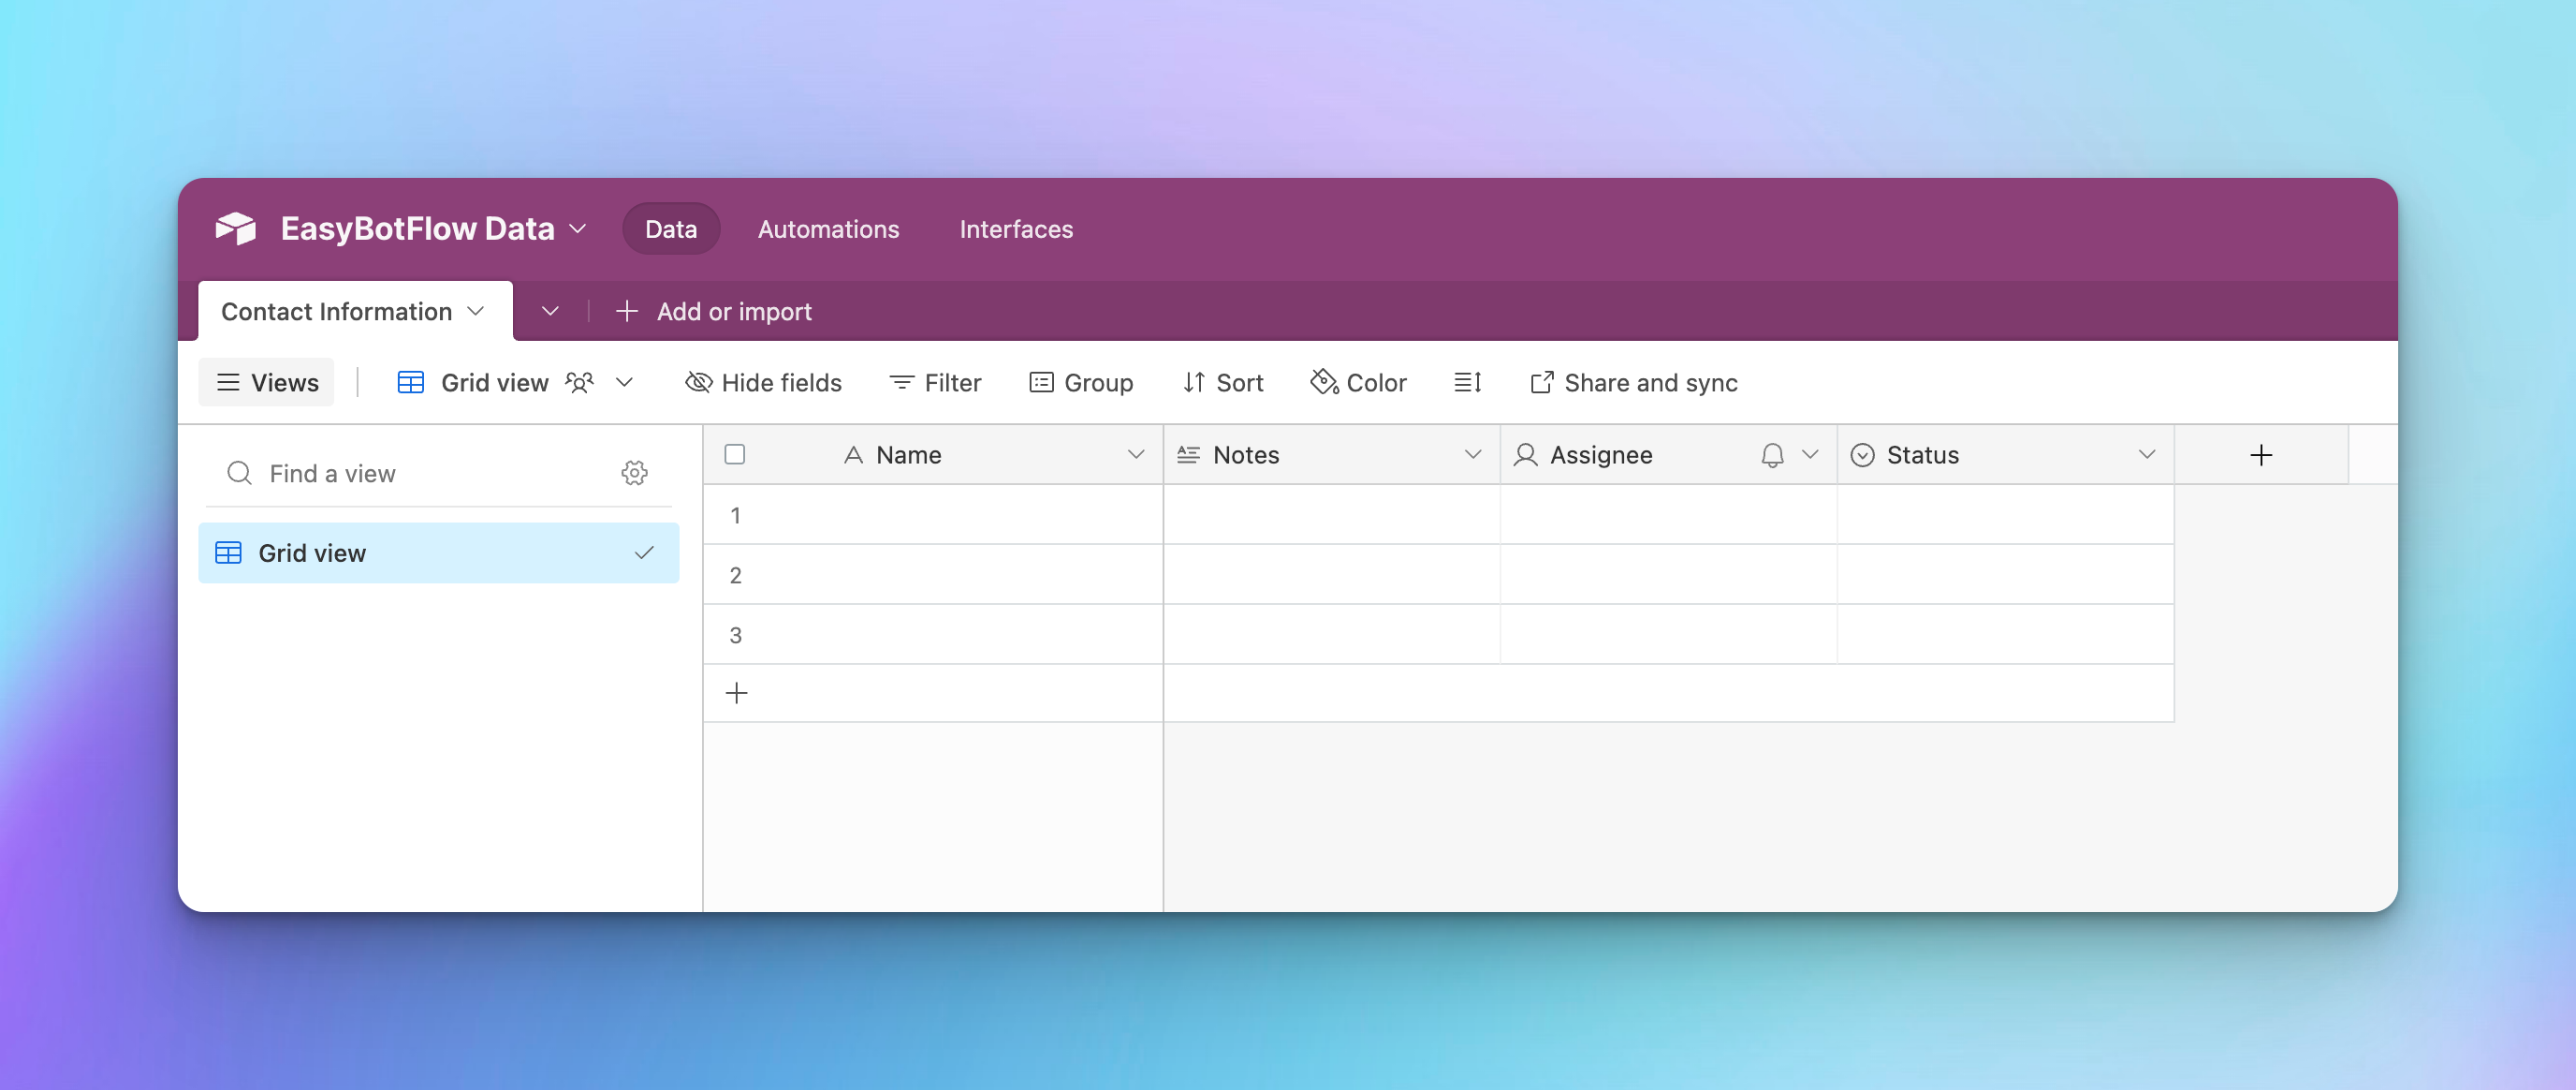
Configure the columns:
- Change the first column name to "ID".
- Delete the columns "Notes", "Assignee", and "Status".
- Add two new fields named "Name" and "Email", both set to "Single line text".
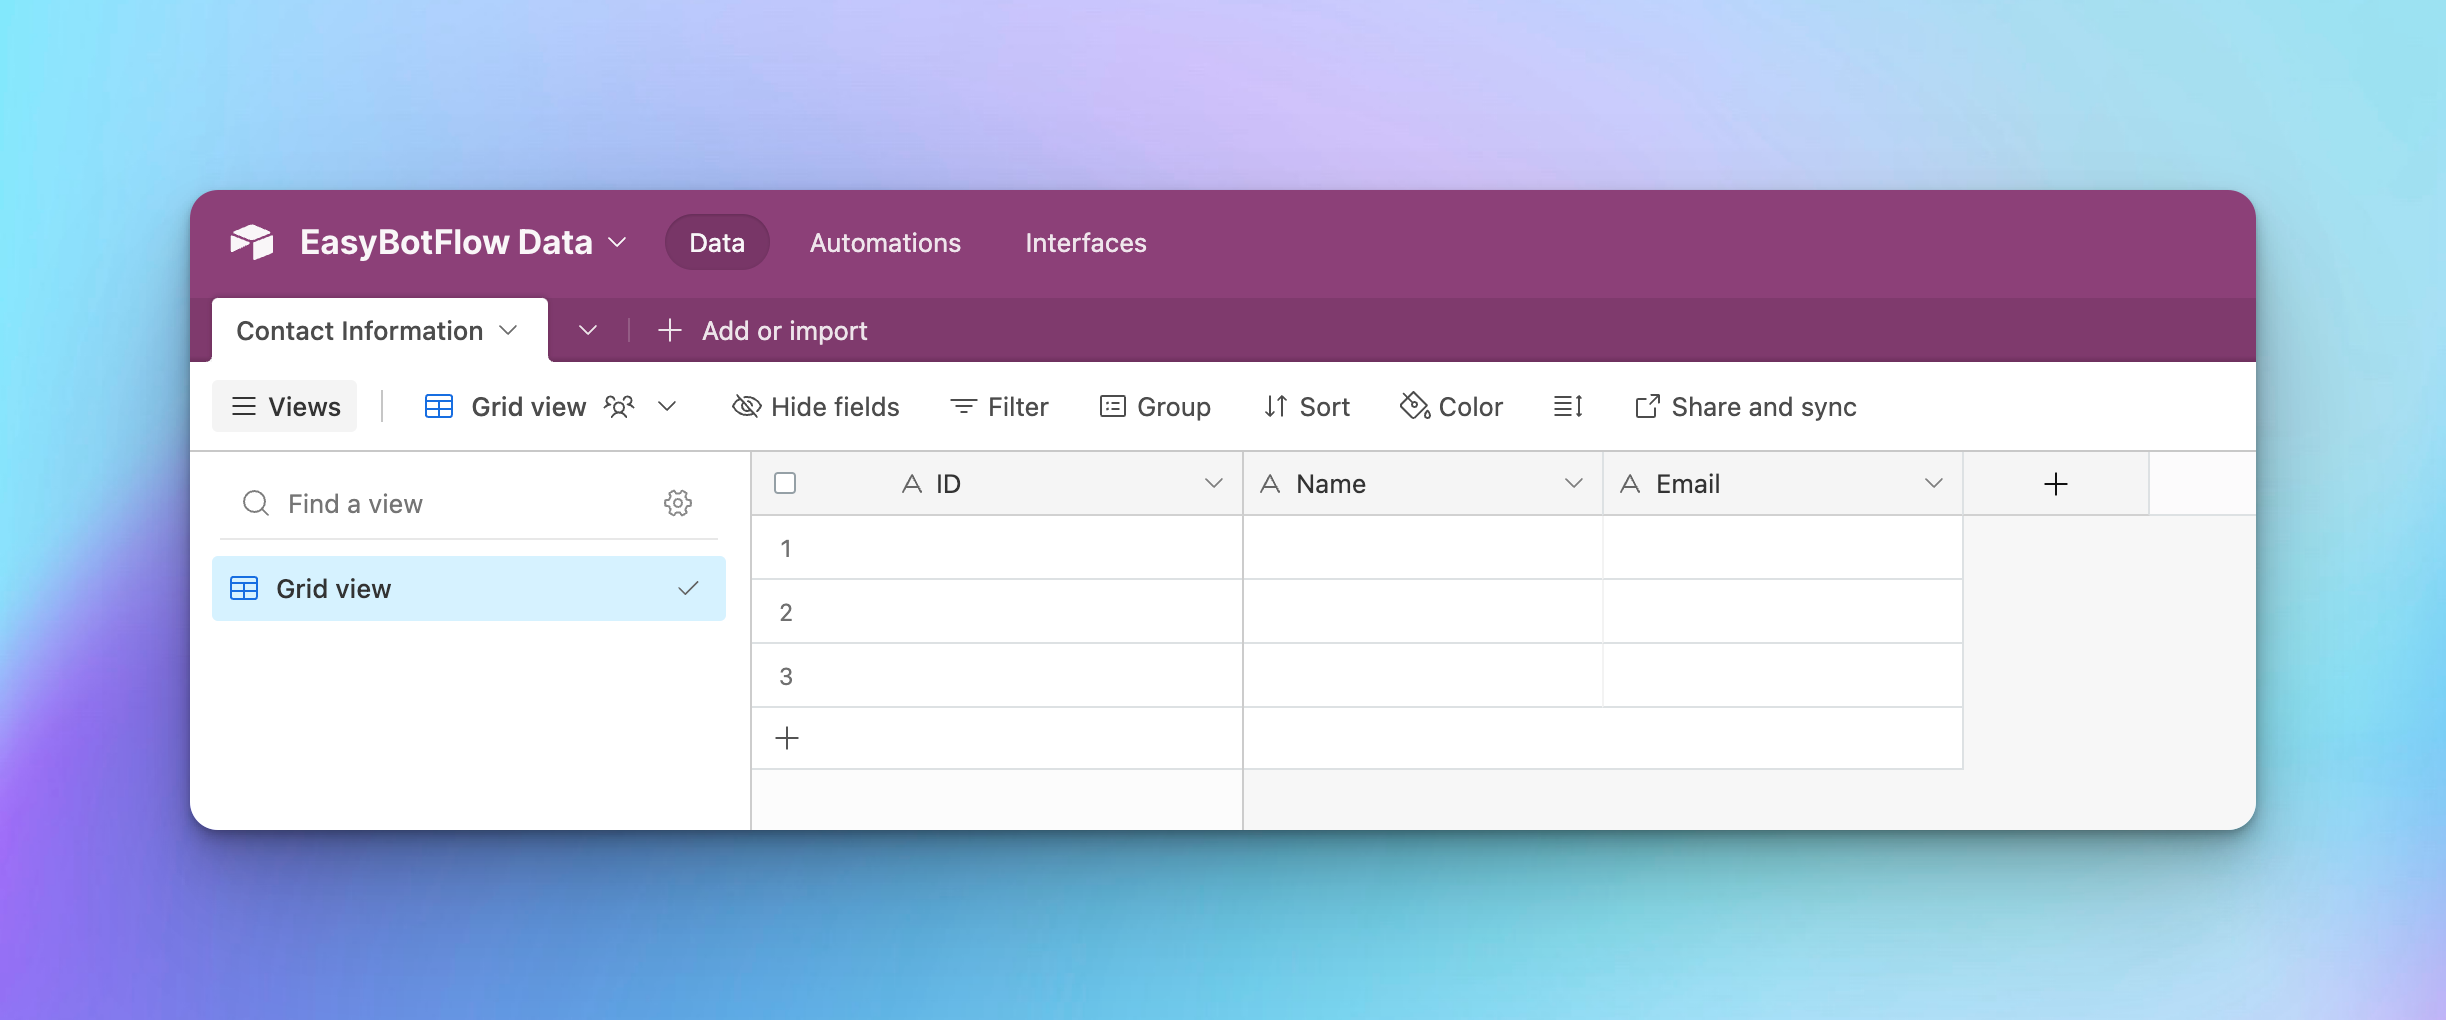
Connect EasyBotFlow with Airtable Through Zapier
This section guides you through linking EasyBotFlow to Airtable using Zapier, starting from setting up the trigger to configuring the action to save data.
Set Up the Trigger
Visit your Zapier dashboard at Zapier Dashboard.
Click on the orange button "+ Create" and select "Zaps" from the dropdown.
Click on "1. Trigger".
Search and select "EasyBotFlow".
Choose the event "Integration Step Triggered" and click the blue button "Continue".
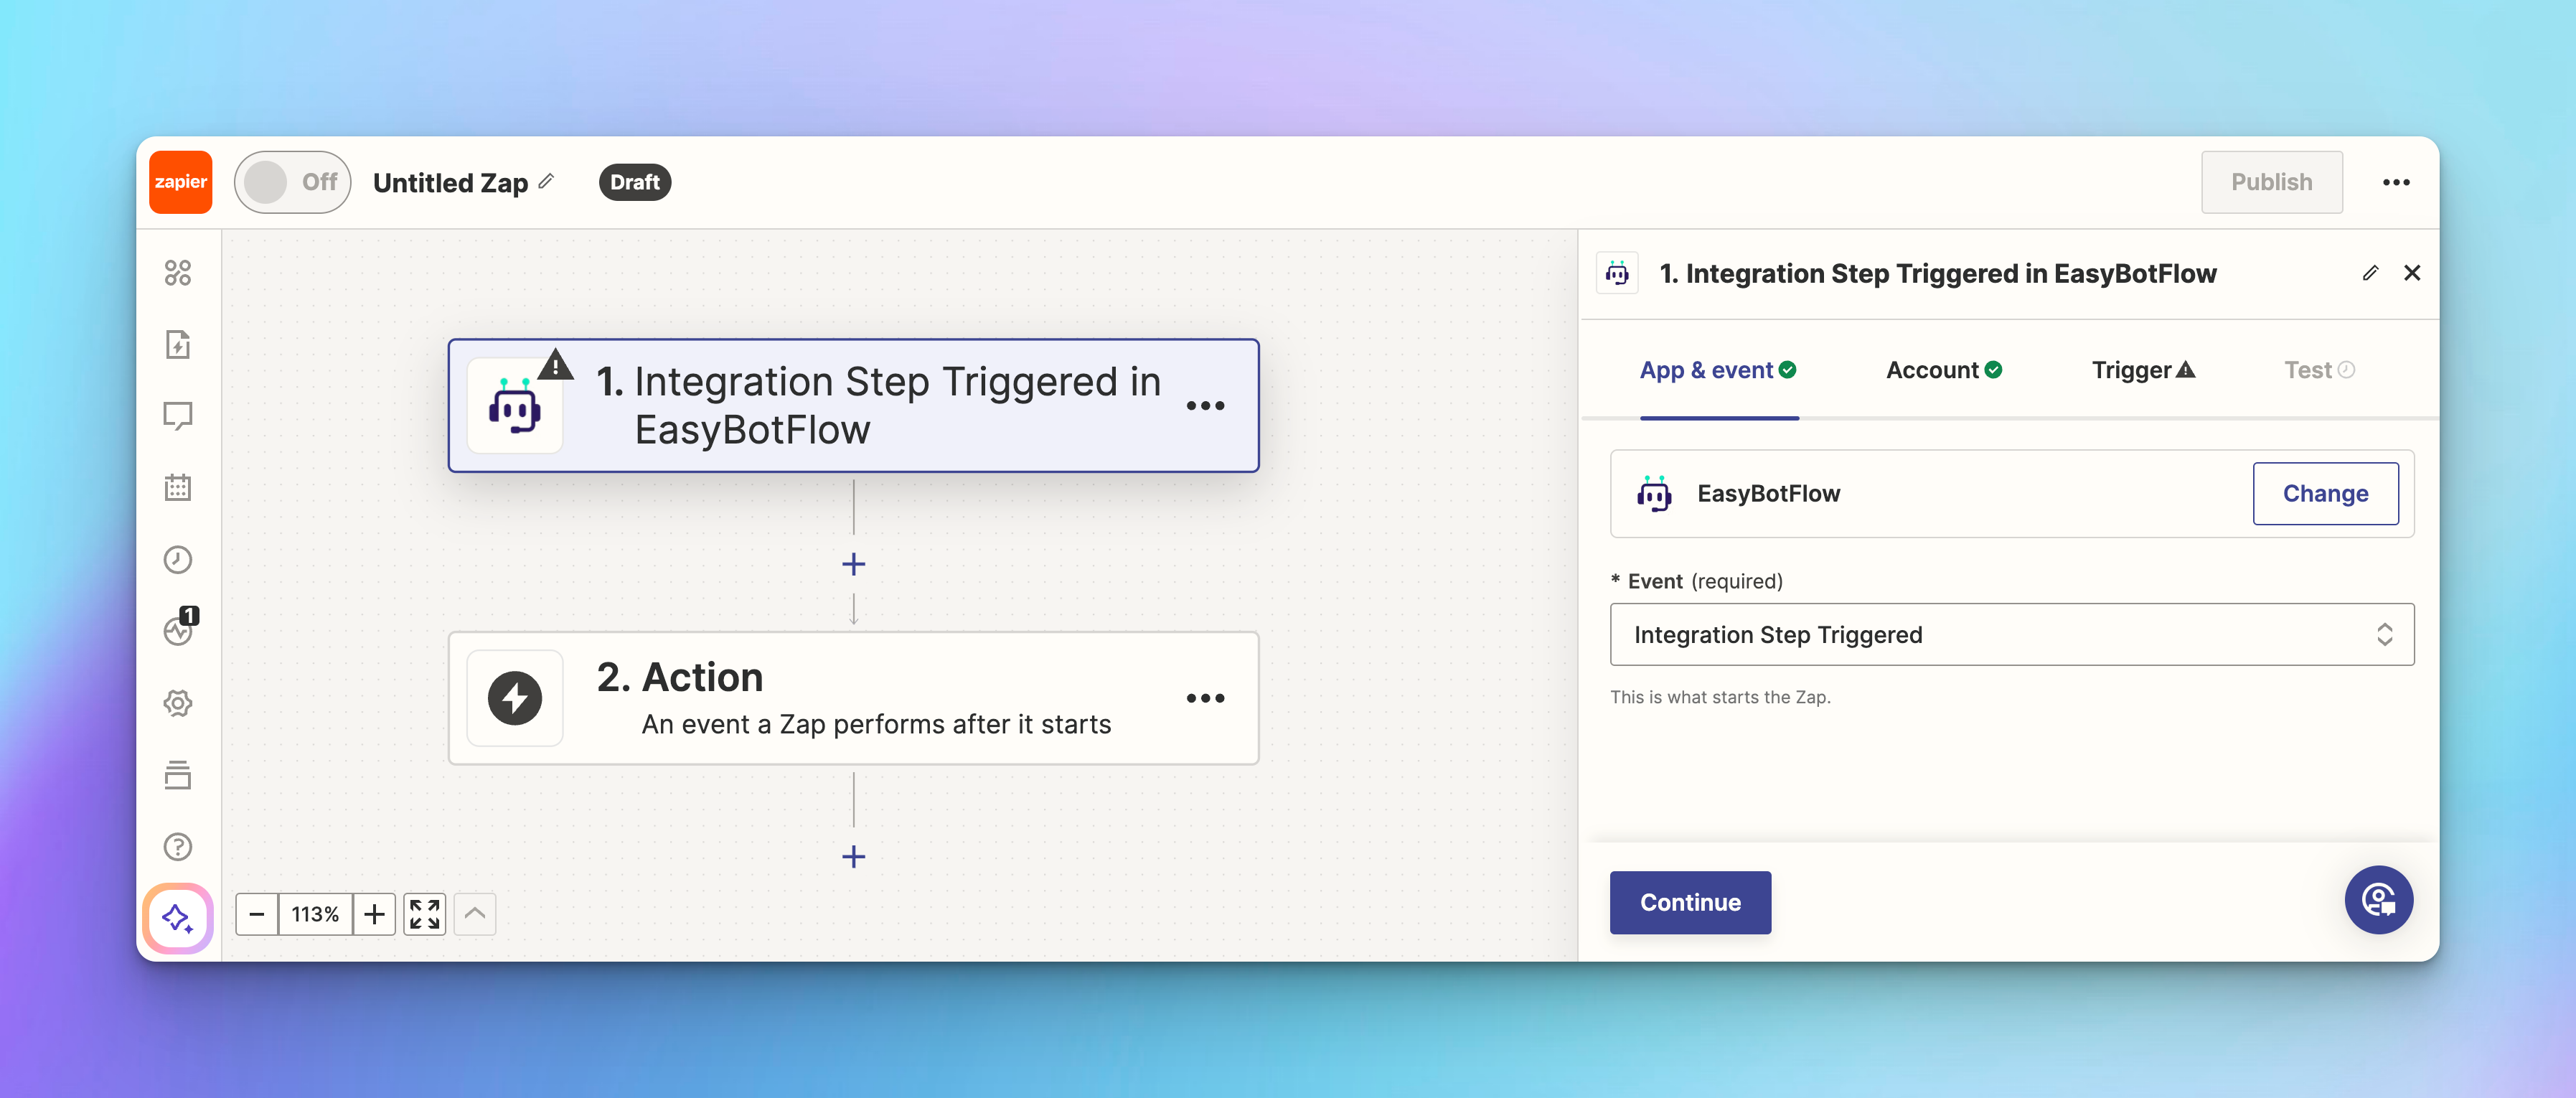
Authenticate your EasyBotFlow account:
- Click "Sign in".
- Enter your API key when prompted: "Allow Zapier to access your EasyBotFlow (1.0.0) Account?"
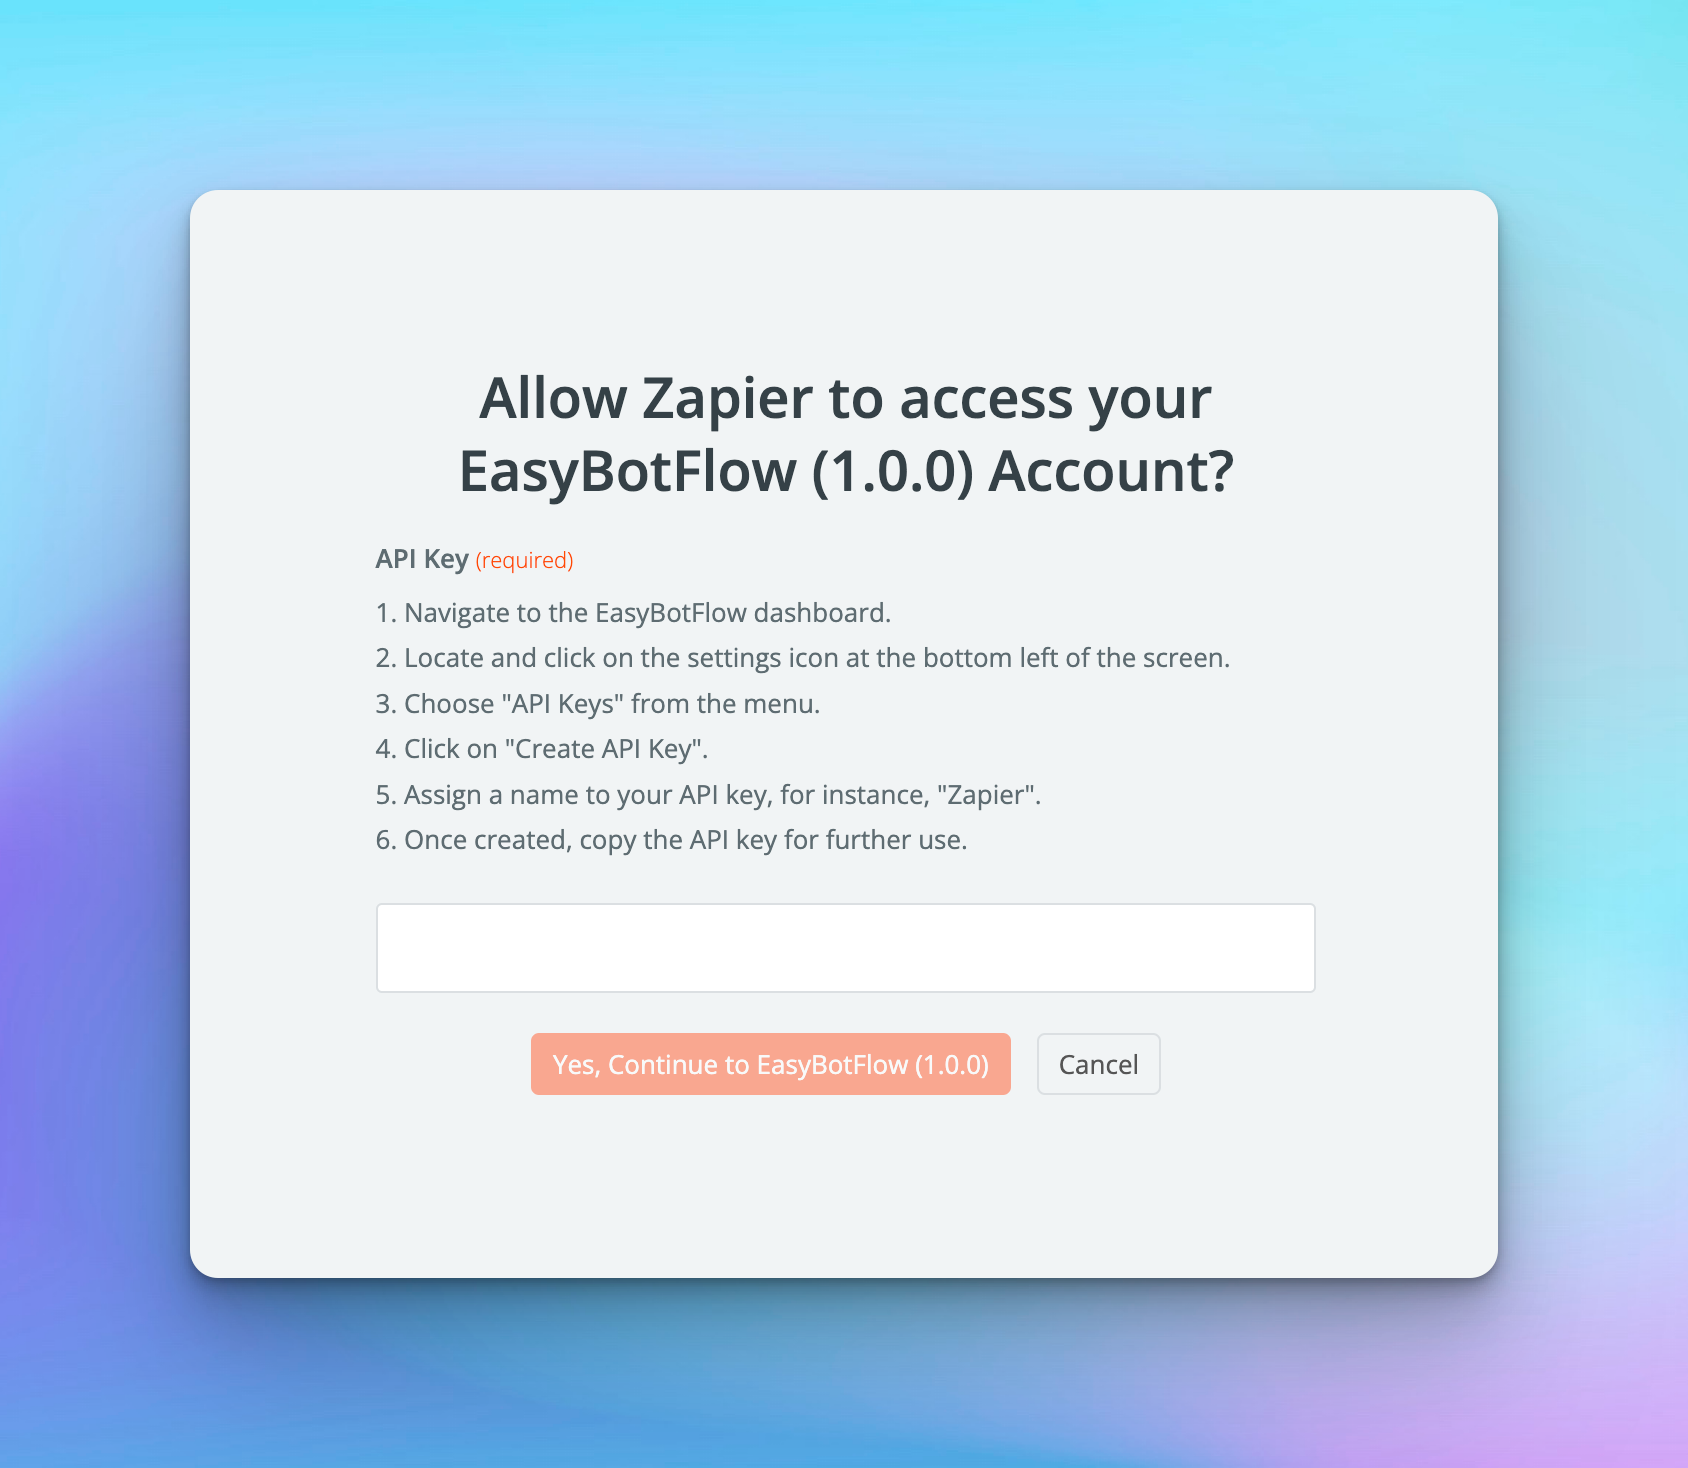
Select Your Bot:
- Choose the bot you created, in this case, "Contact Bot".
- Select the specific integration element in your flow, which is "ZAPIER_1". You can confirm the name of the Zapier element by clicking on it in your bot flow.
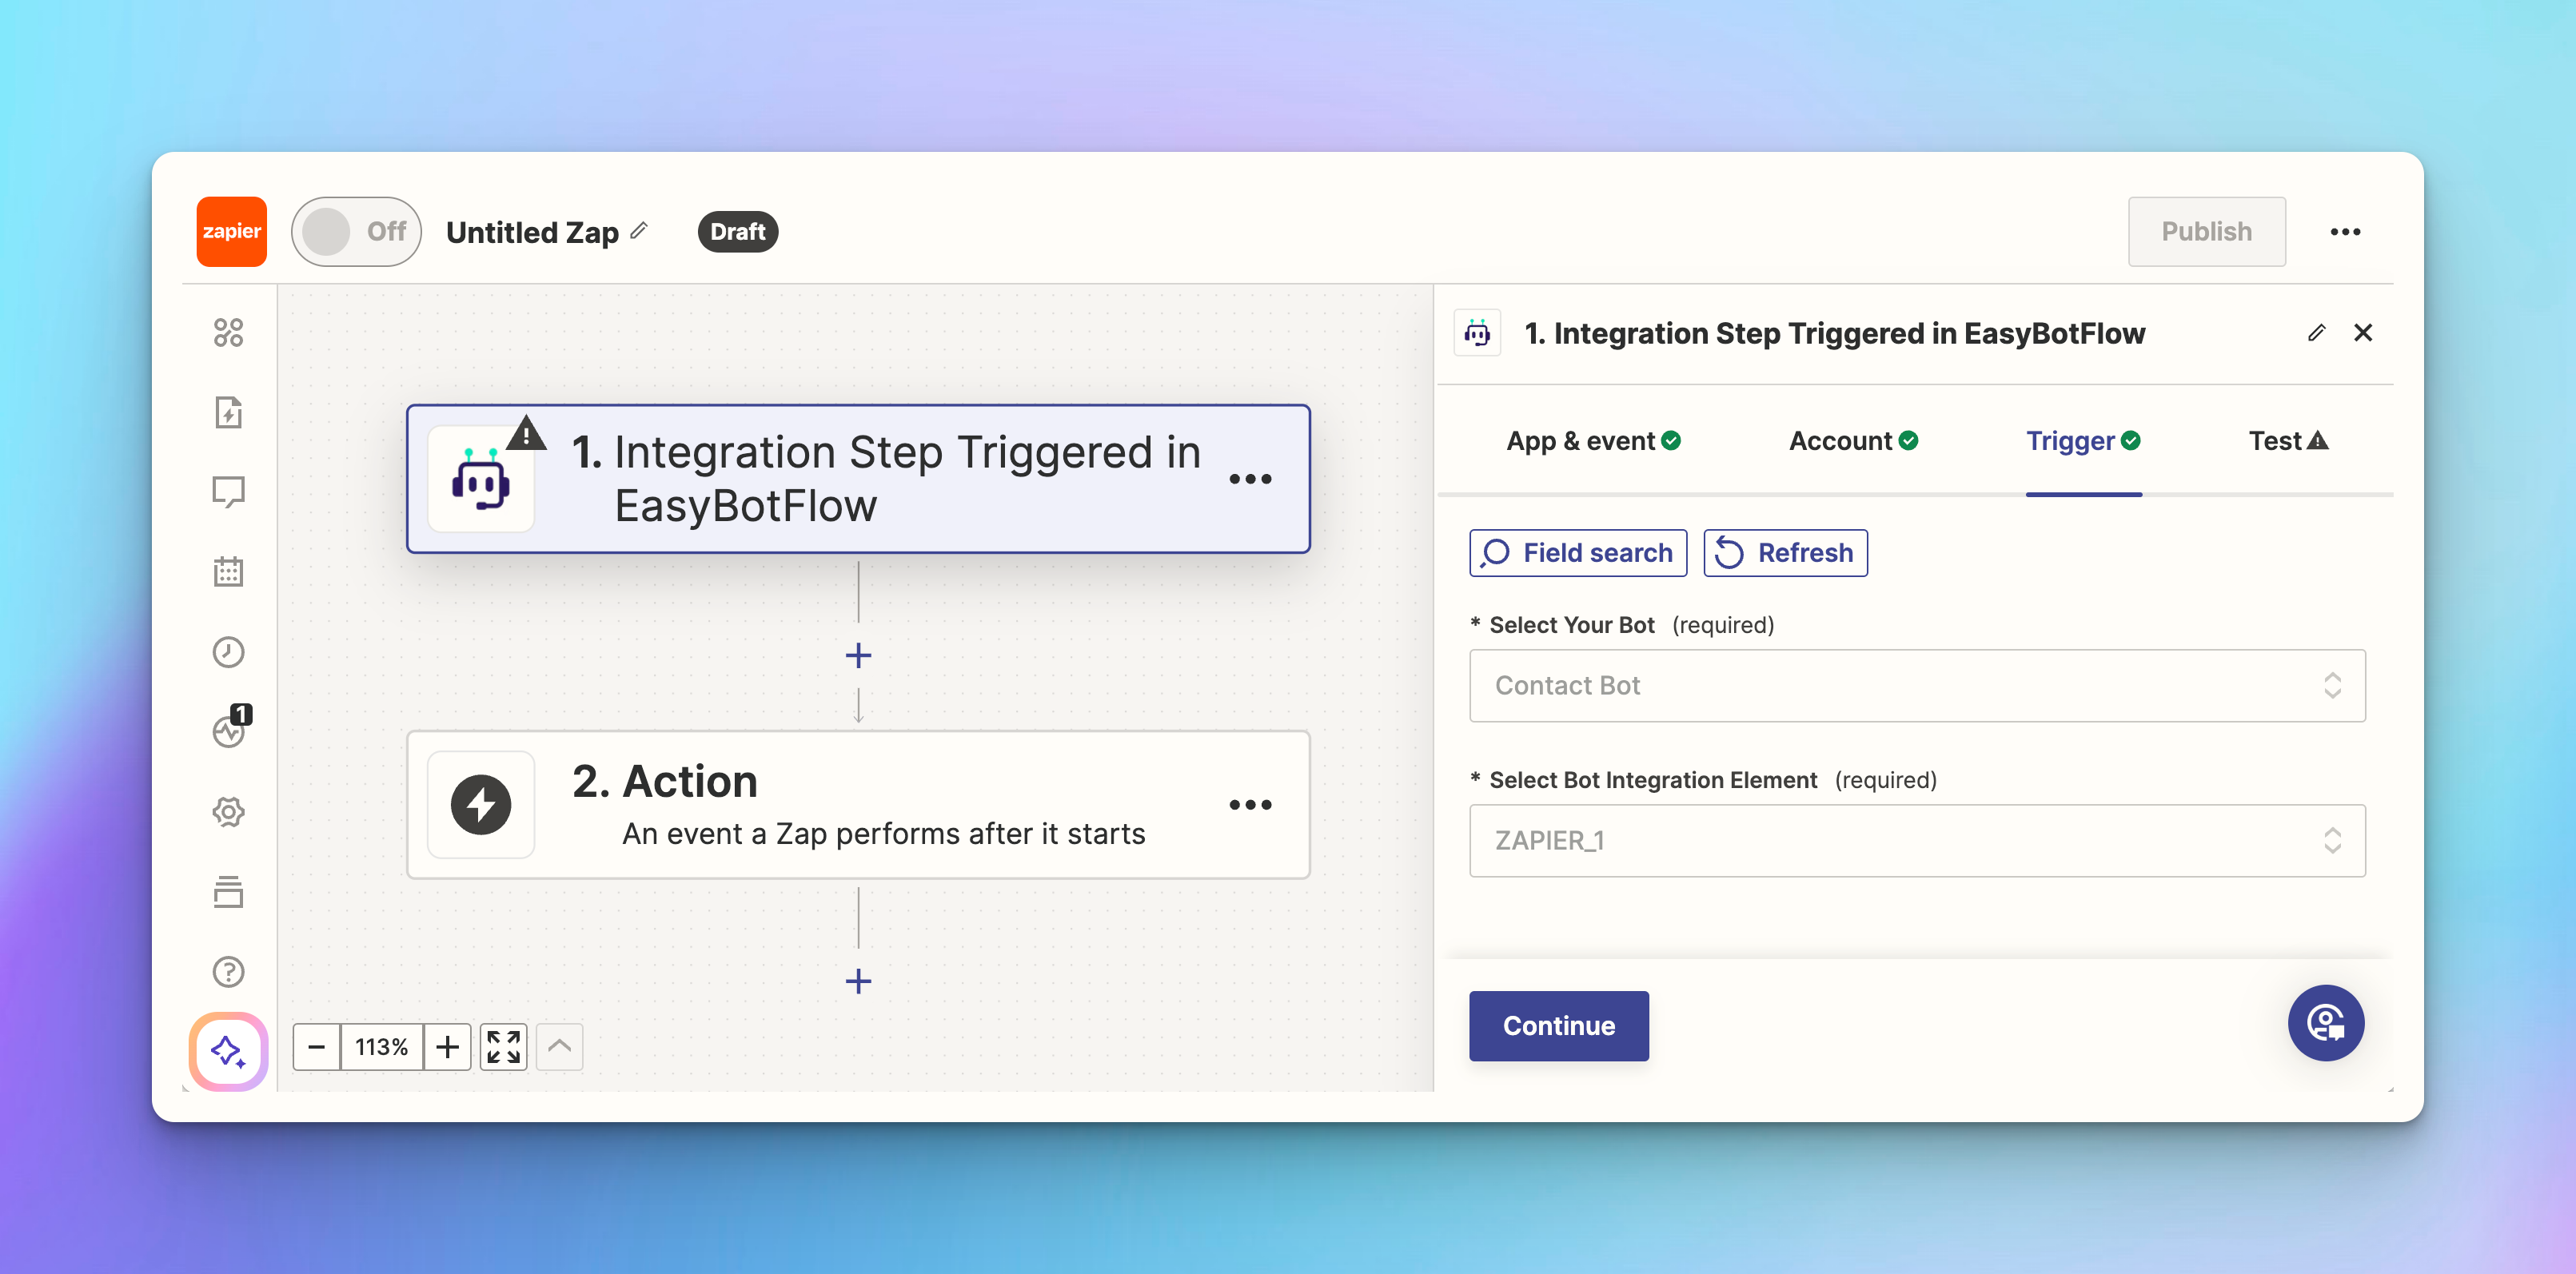
After selecting the trigger, click the blue button "Continue".
Test your trigger:
- Click the blue button "Test trigger". This will show an example of the fields available from your bot. For this setup, ensure you see the fields "Email", "Name", and "Conversation Id".
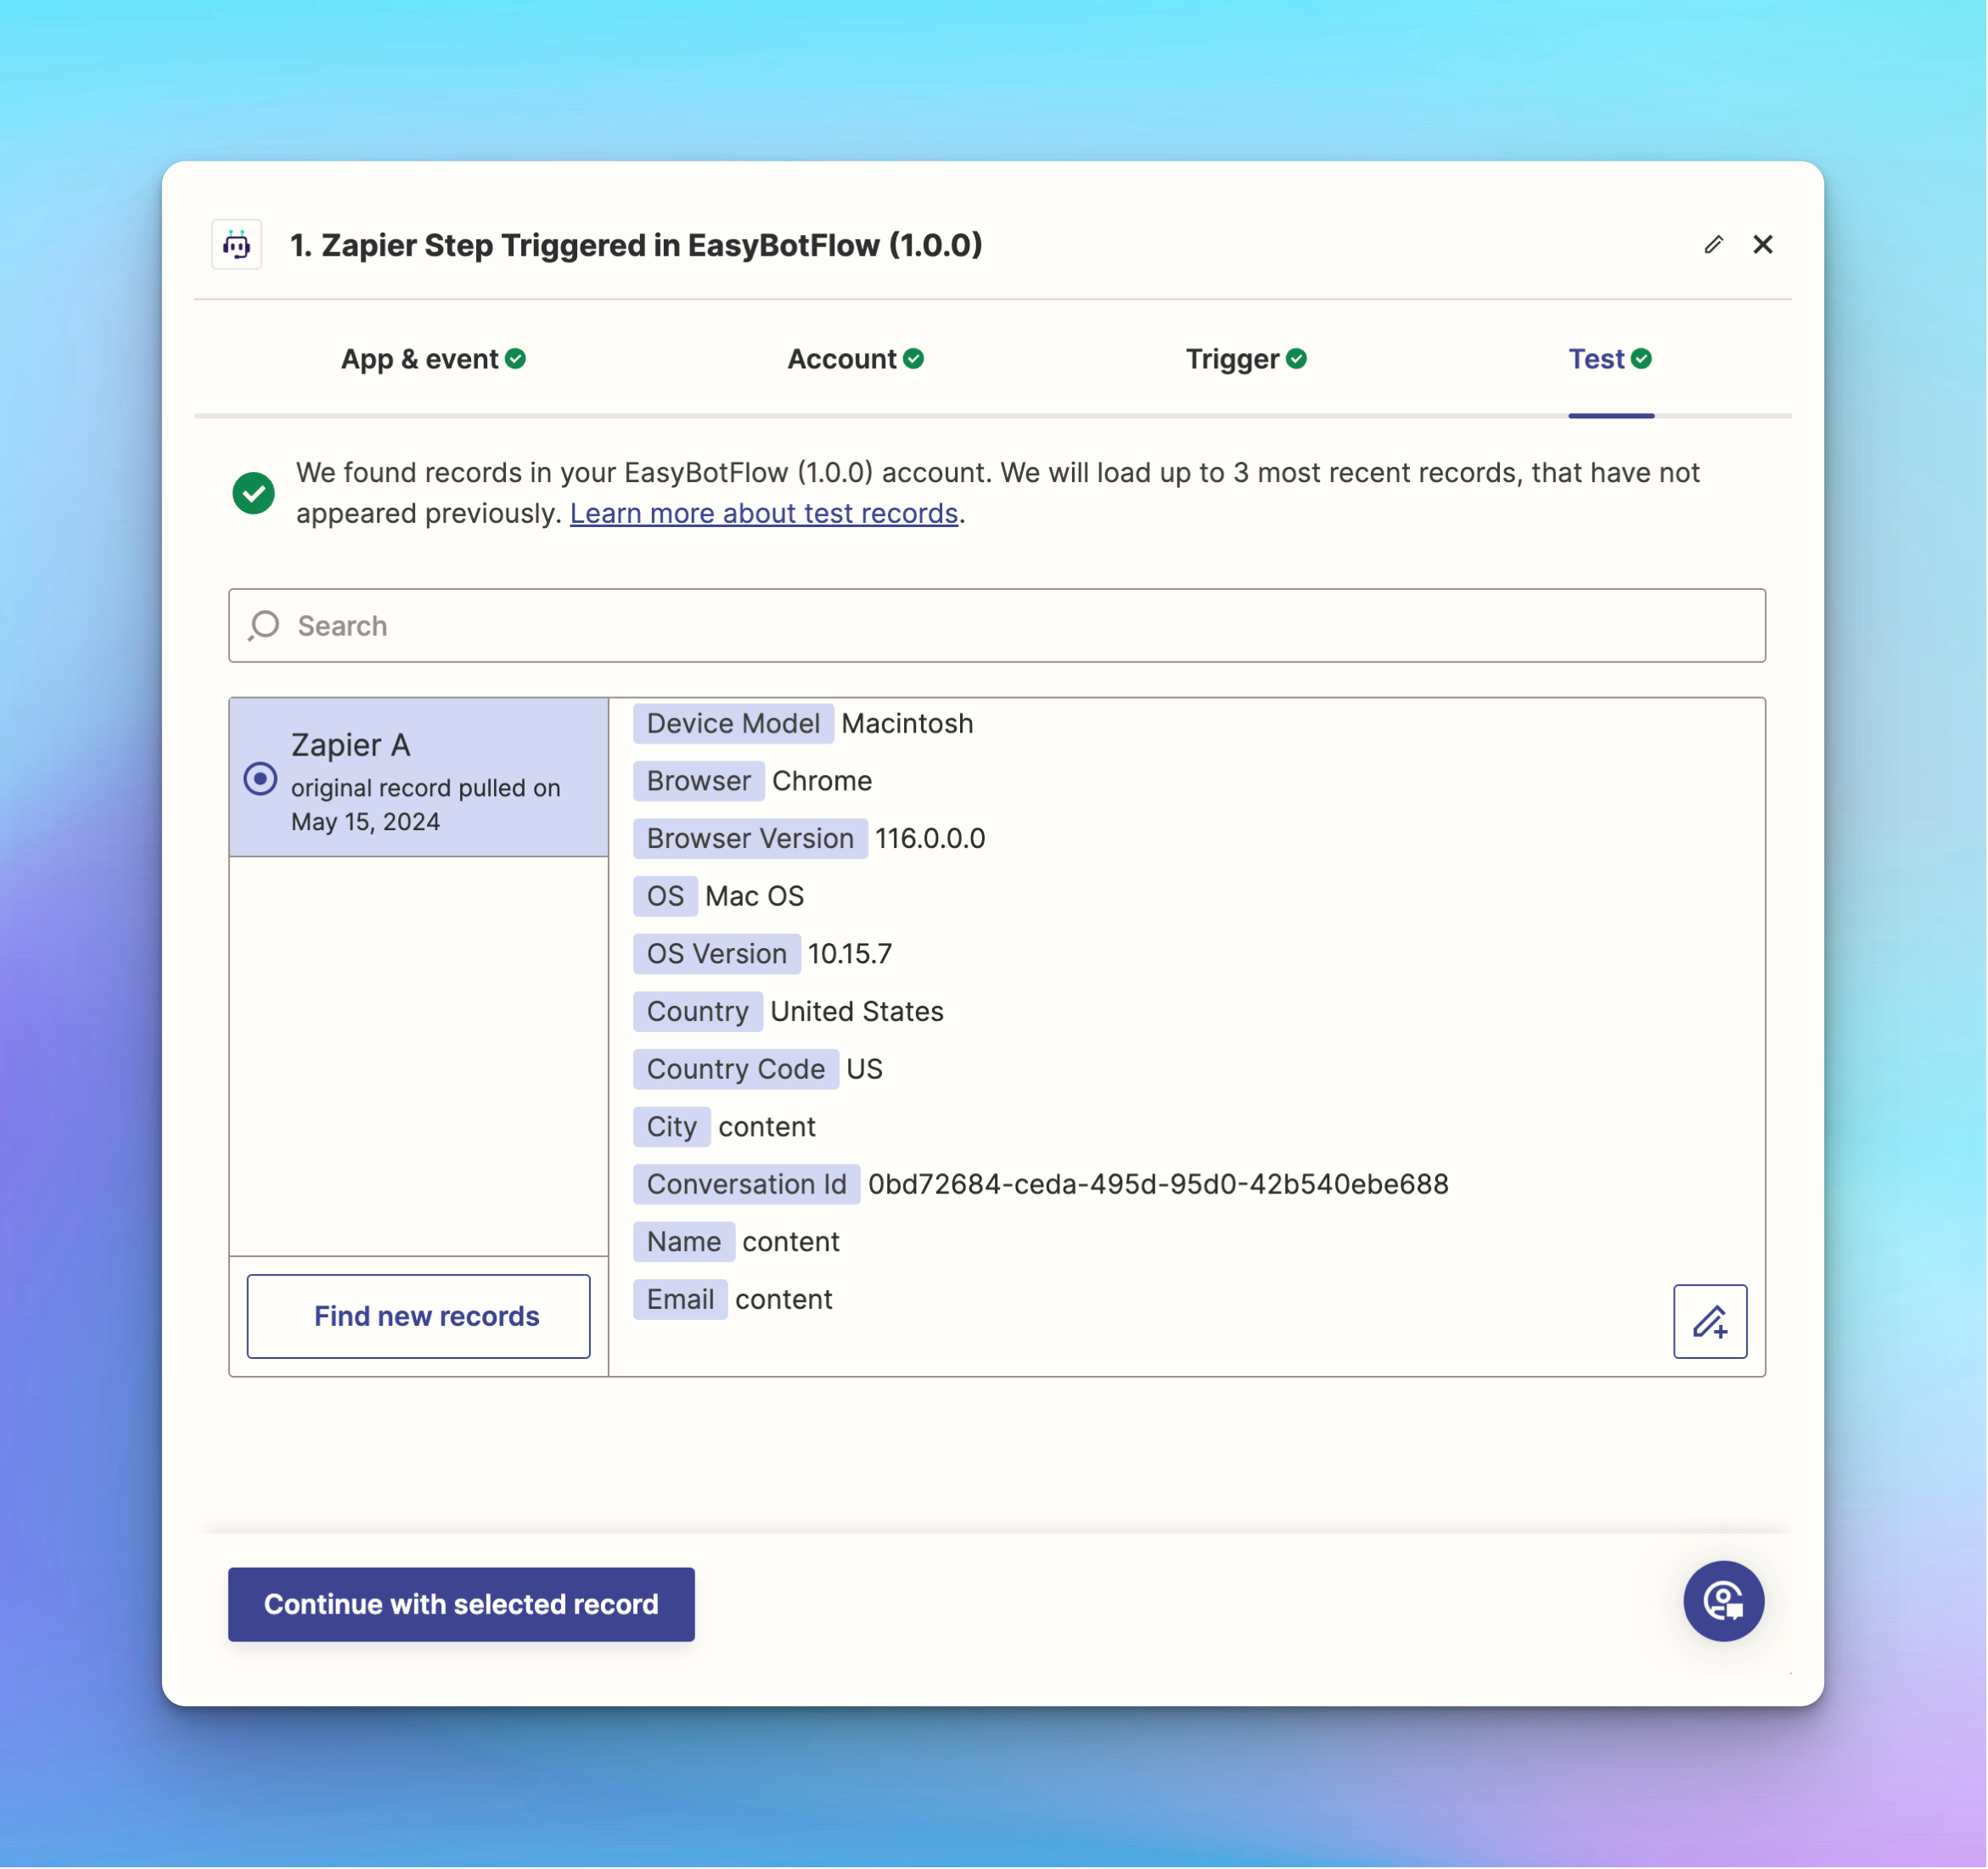
After testing the trigger, click the blue button "Continue with selected record".
Set Up the Action to Save Data in Airtable
Search for "Airtable" in the Zapier search box.
Choose the event "Create or Update Record" and click the blue "Continue" button.
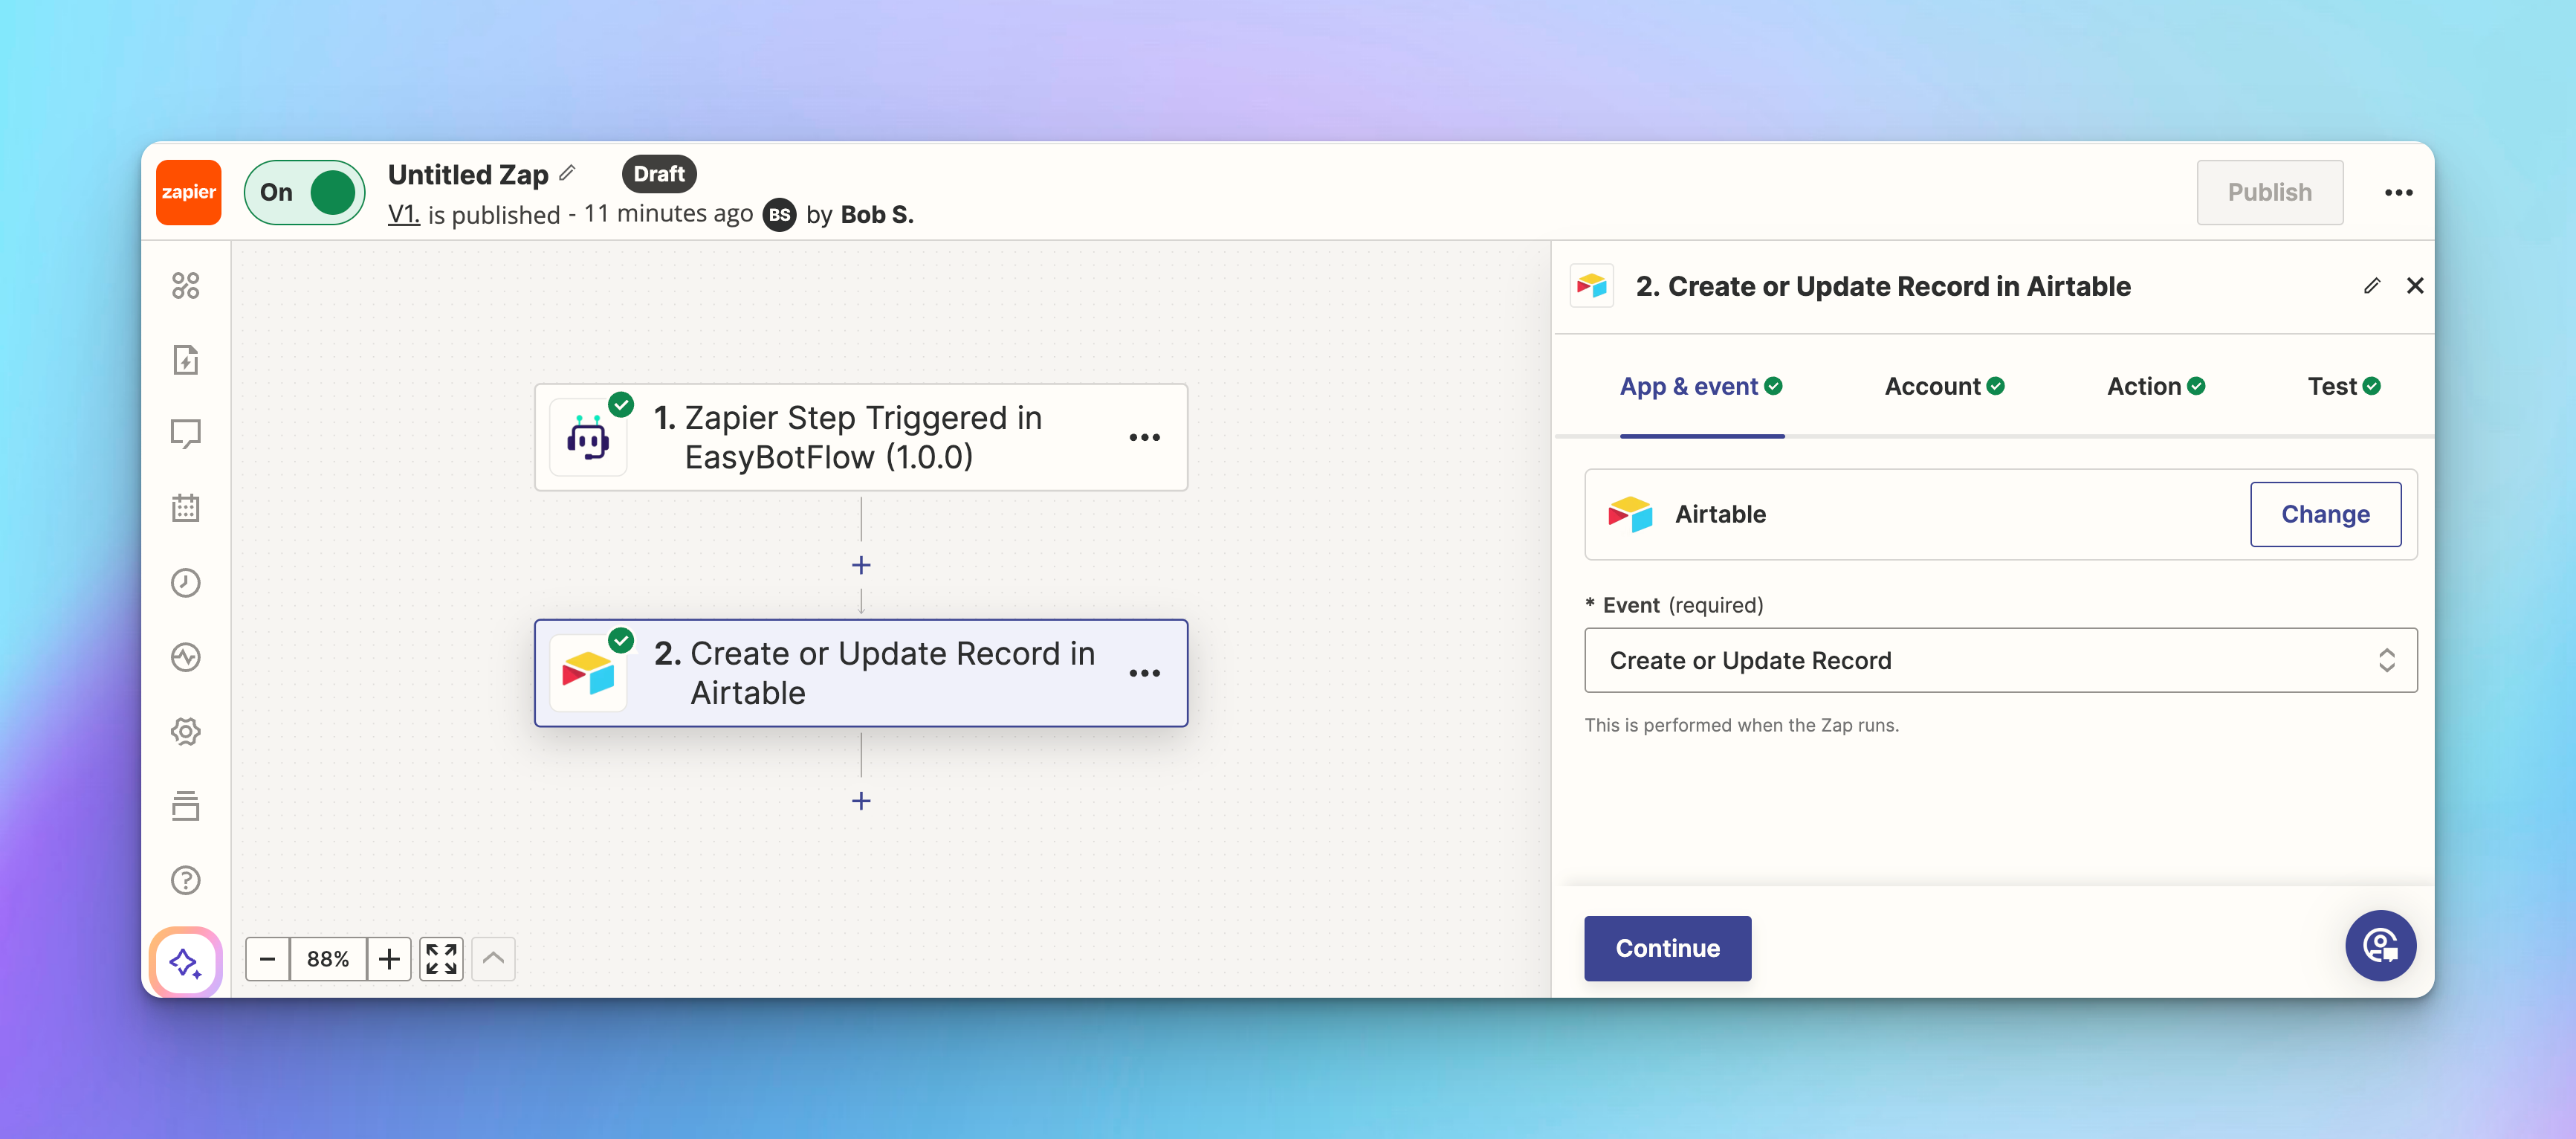
Connect Airtable:
- Click on the "Sign in" button. A popup will request Airtable access.
- You can select the base that Zapier can access or opt for "All current and future bases in this workspace".
- After selecting, click "Grant access" and then back in Zapier, click the blue "Continue" button.
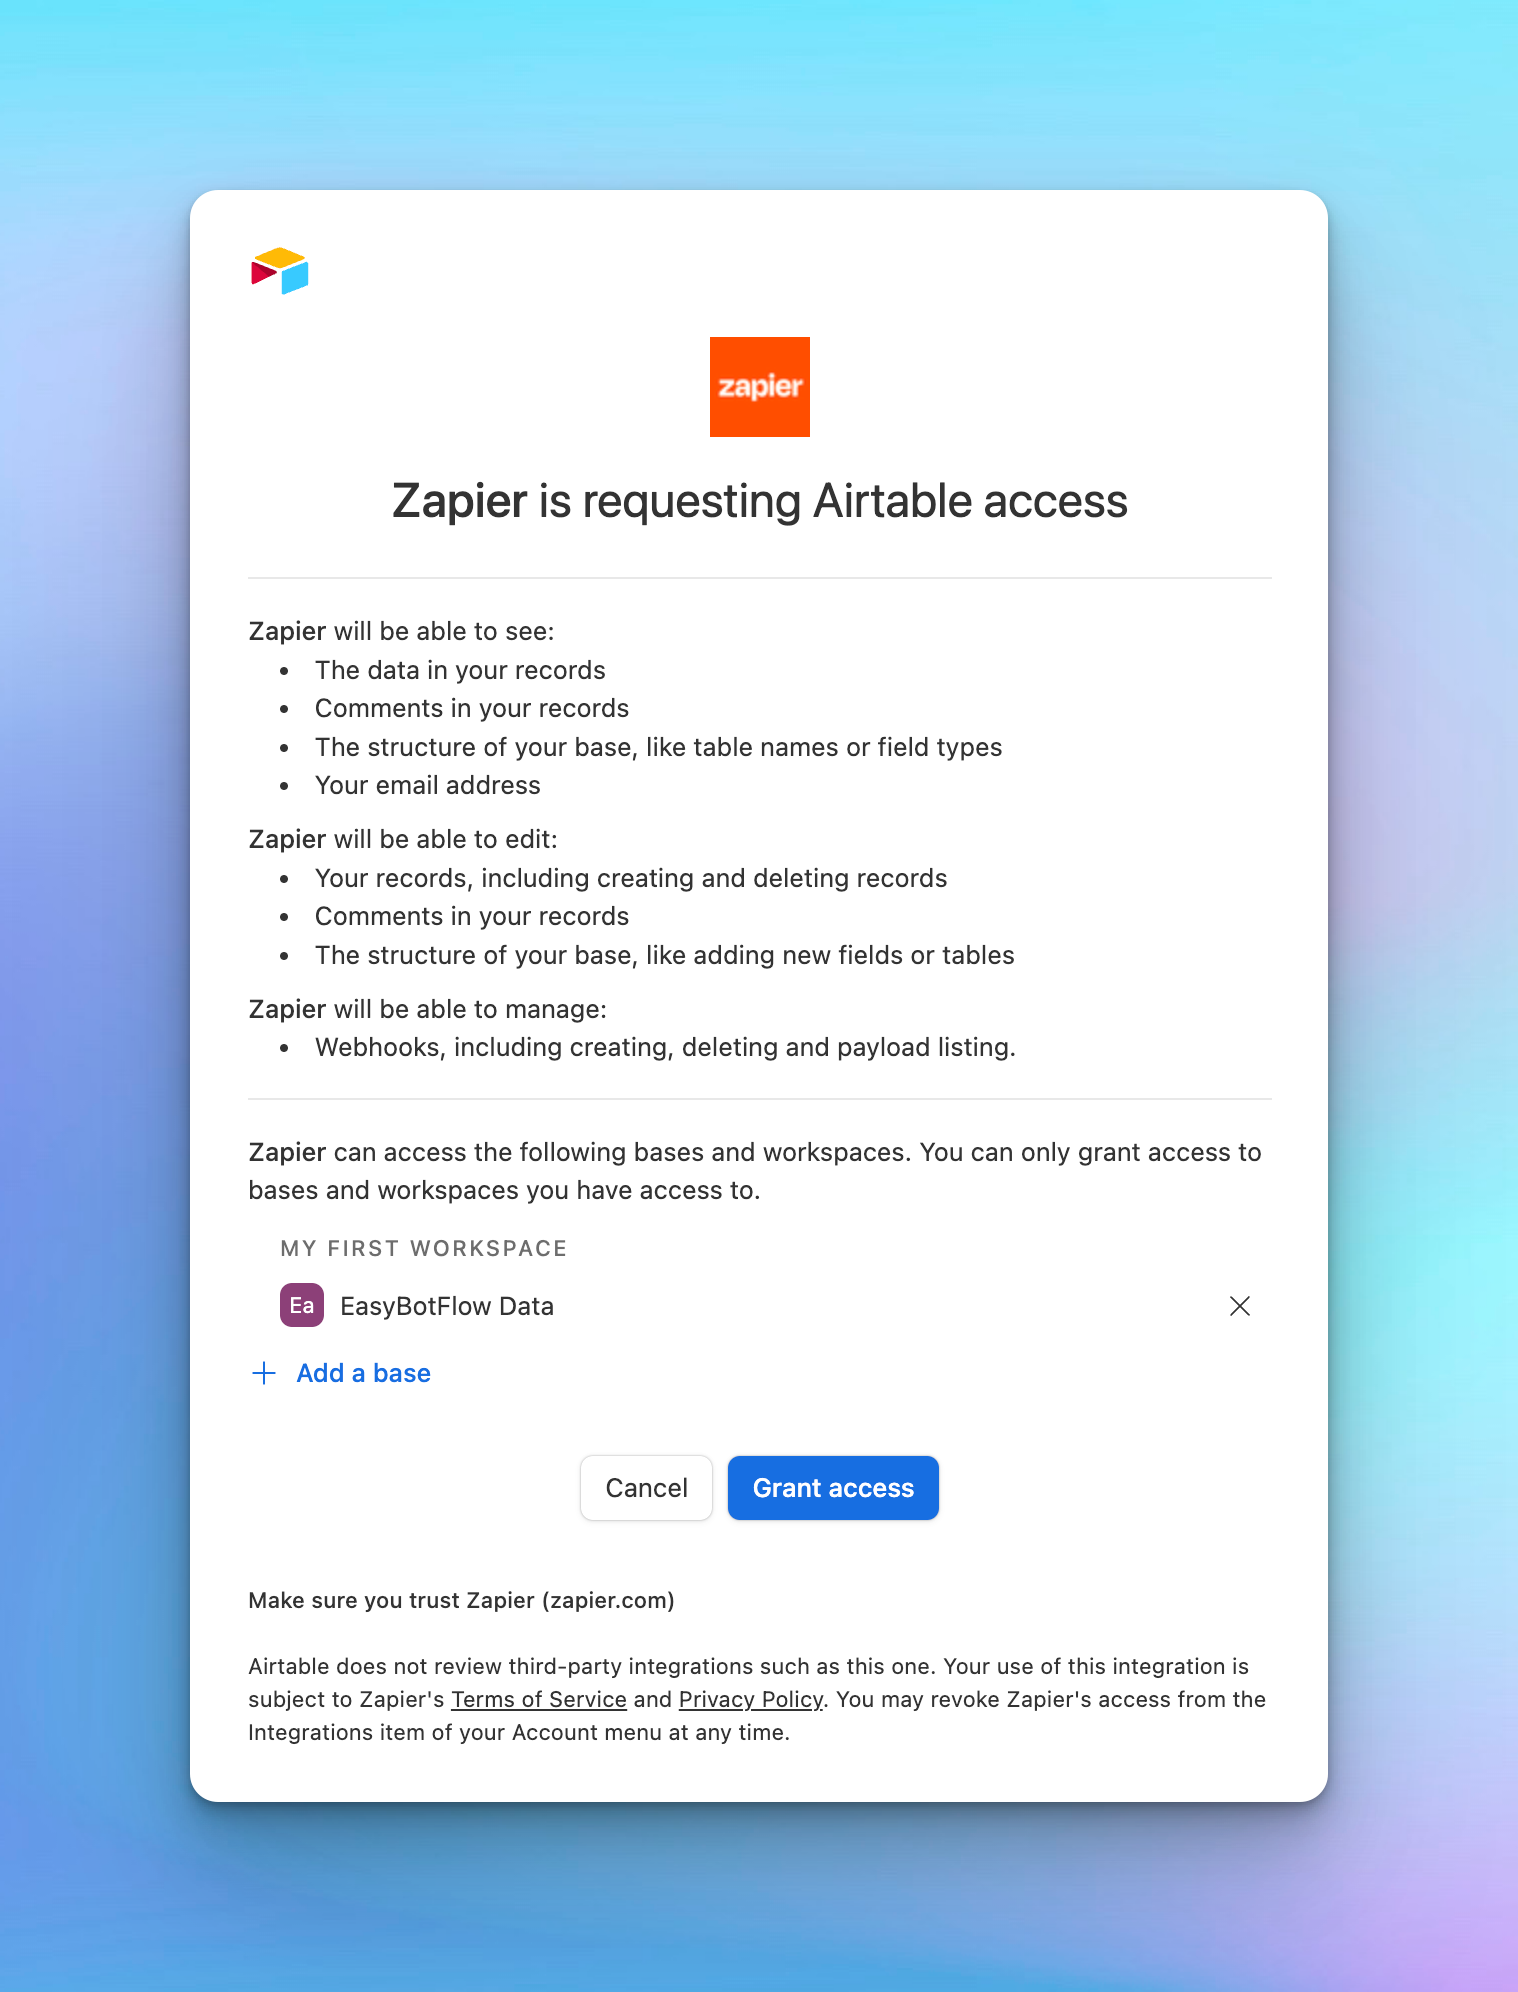
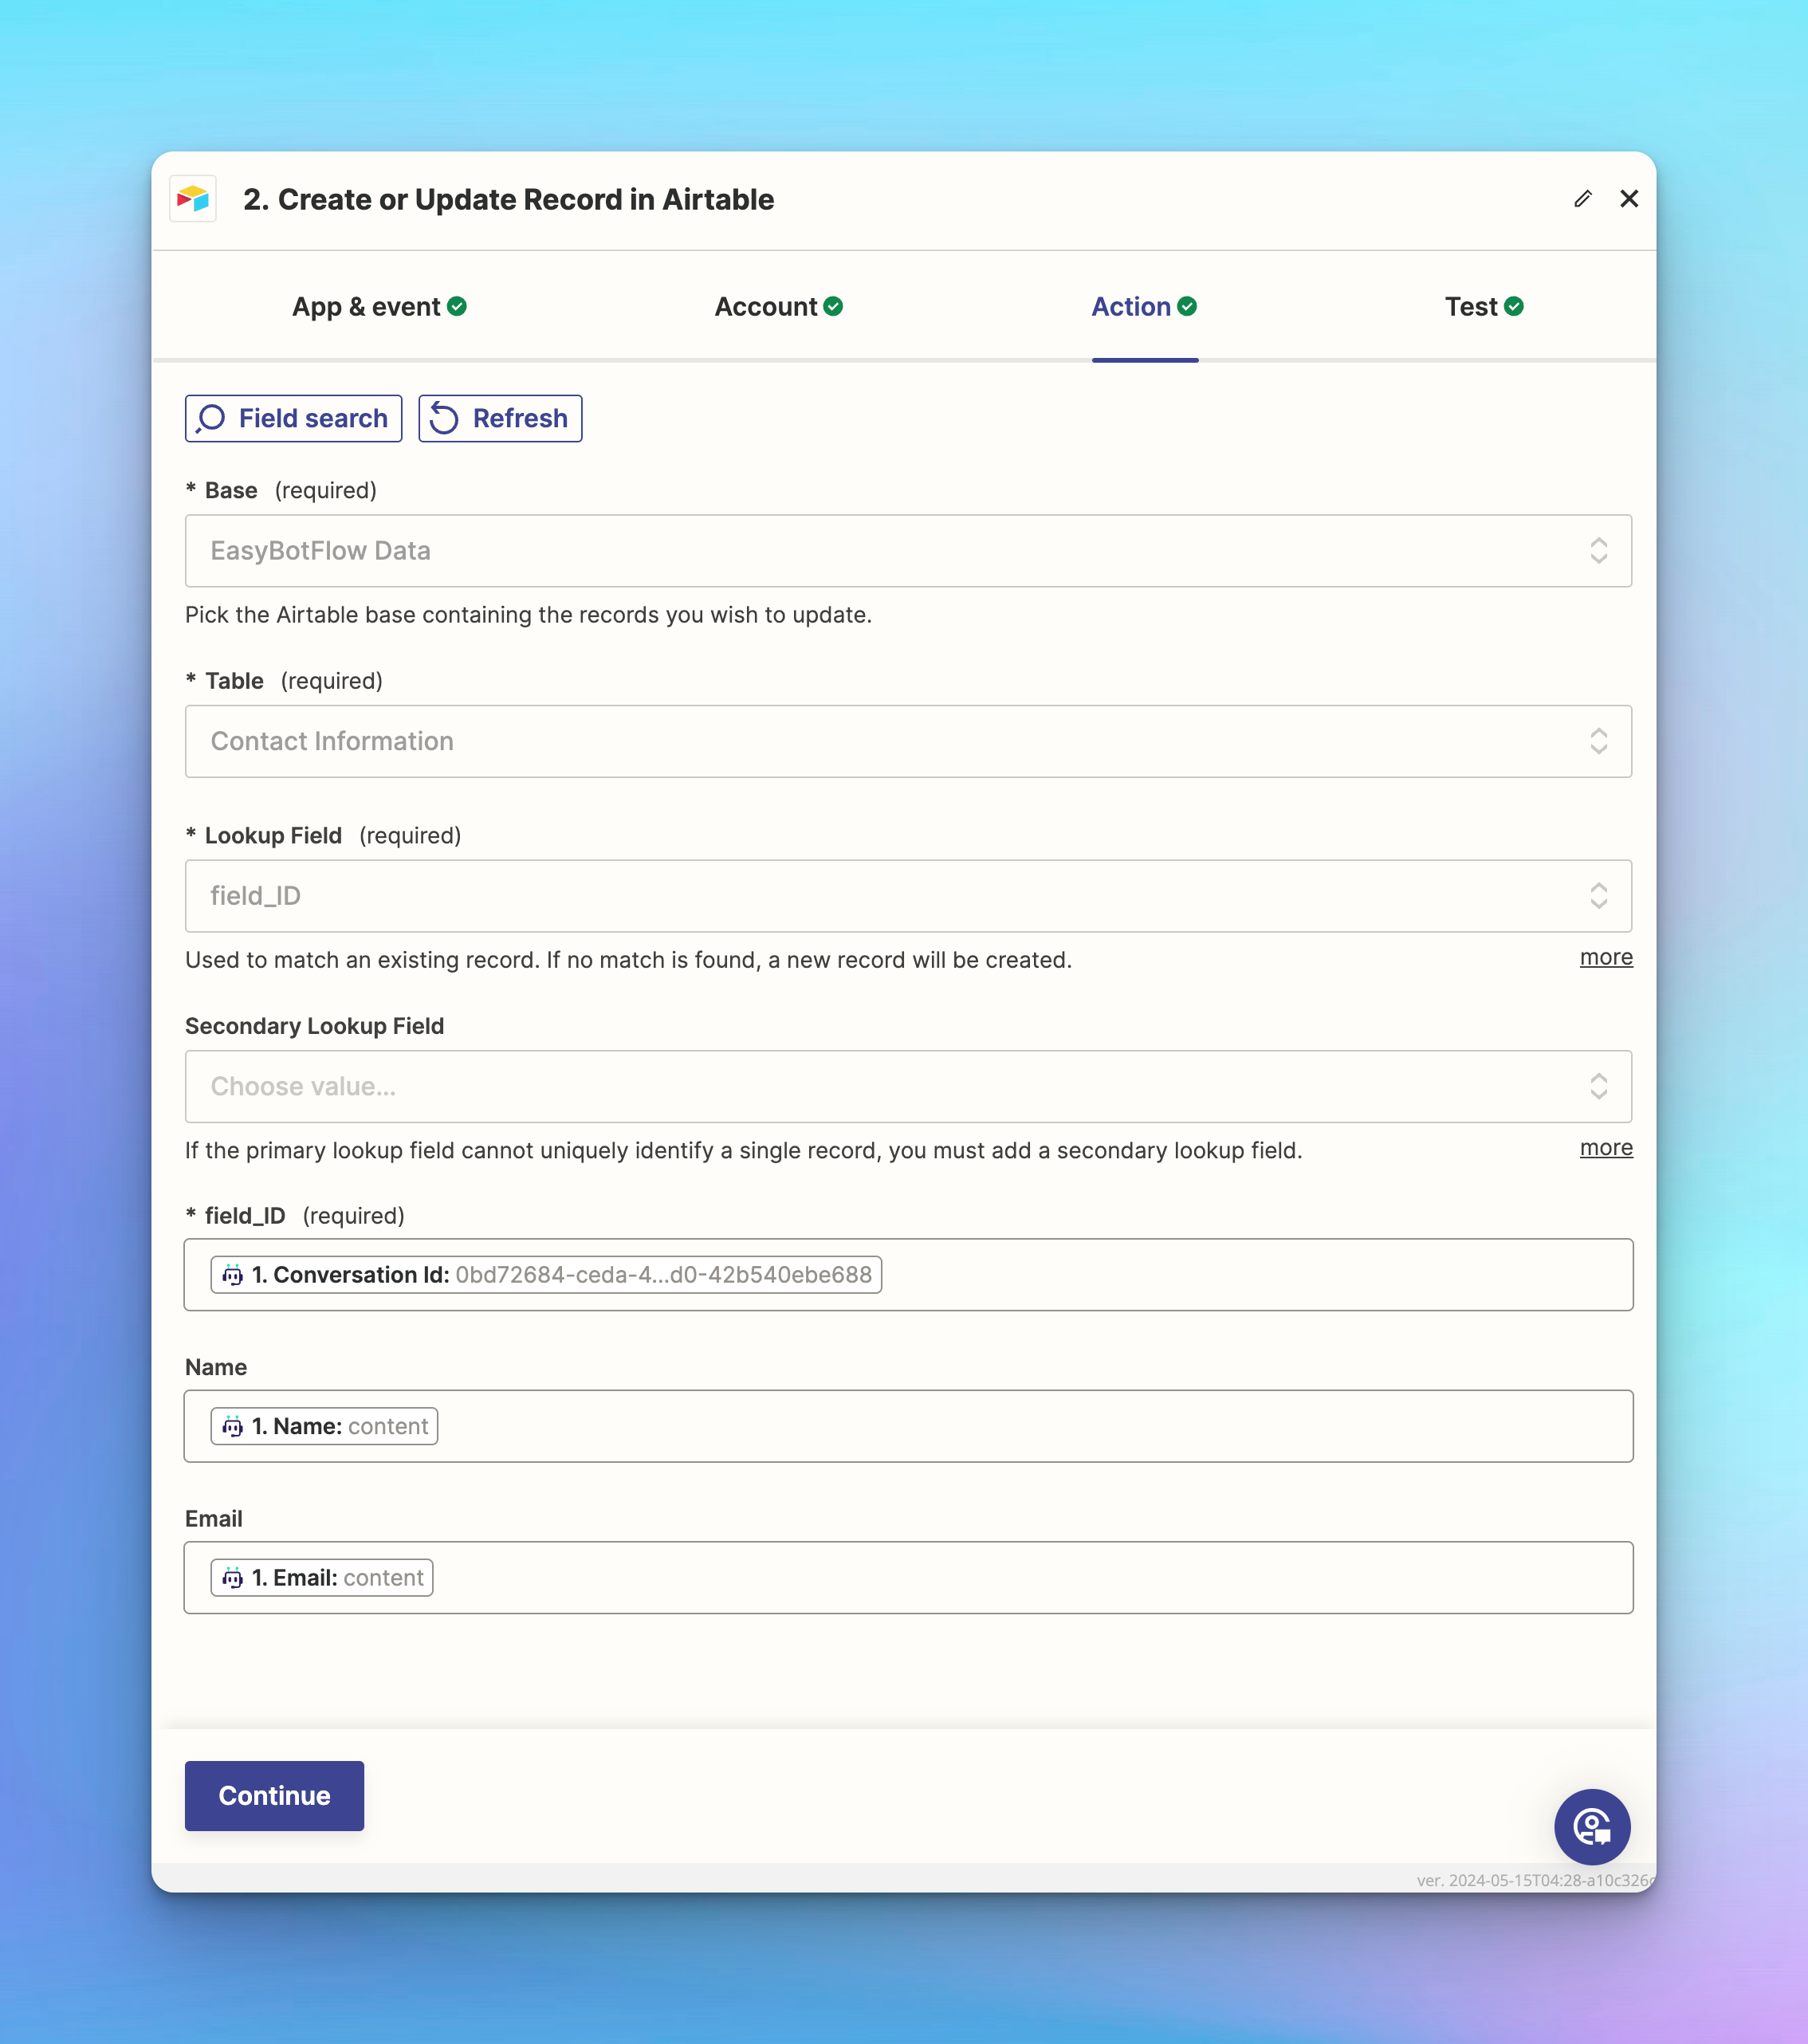
Set up your action:
- Select the base: "EasyBotFlow Data".
- Select the table: "Contact Information".
- Select the lookup field, which in this case is "ID".
- Map the fields:
- Field_ID: Link to "ConversationId" from EasyBotFlow.
- Name: Link to "Name" from EasyBotFlow.
- Email: Link to "Email" from EasyBotFlow.
Continue to testing:
- Click the blue "Continue" button.
- You can choose to test this Zap or skip the test and proceed.
Publish Your Zap:
- Once satisfied with the setup, click "Publish" to activate your Zap.
This setup ensures that your EasyBotFlow bot automatically saves captured data to your Airtable base, utilizing Zapier for seamless integration and data management.
Test the Integration in EasyBotFlow
Once you've configured the Zapier integration and set up the actions in Zapier, return to EasyBotFlow to test and confirm that everything is working as expected.
Verify the Trigger Configuration: Go back to your bot flow in EasyBotFlow. Check the Zapier element you set up earlier. It should now display "Trigger Zap" instead of "Configure Zapier," indicating that the trigger is properly configured and ready to use.
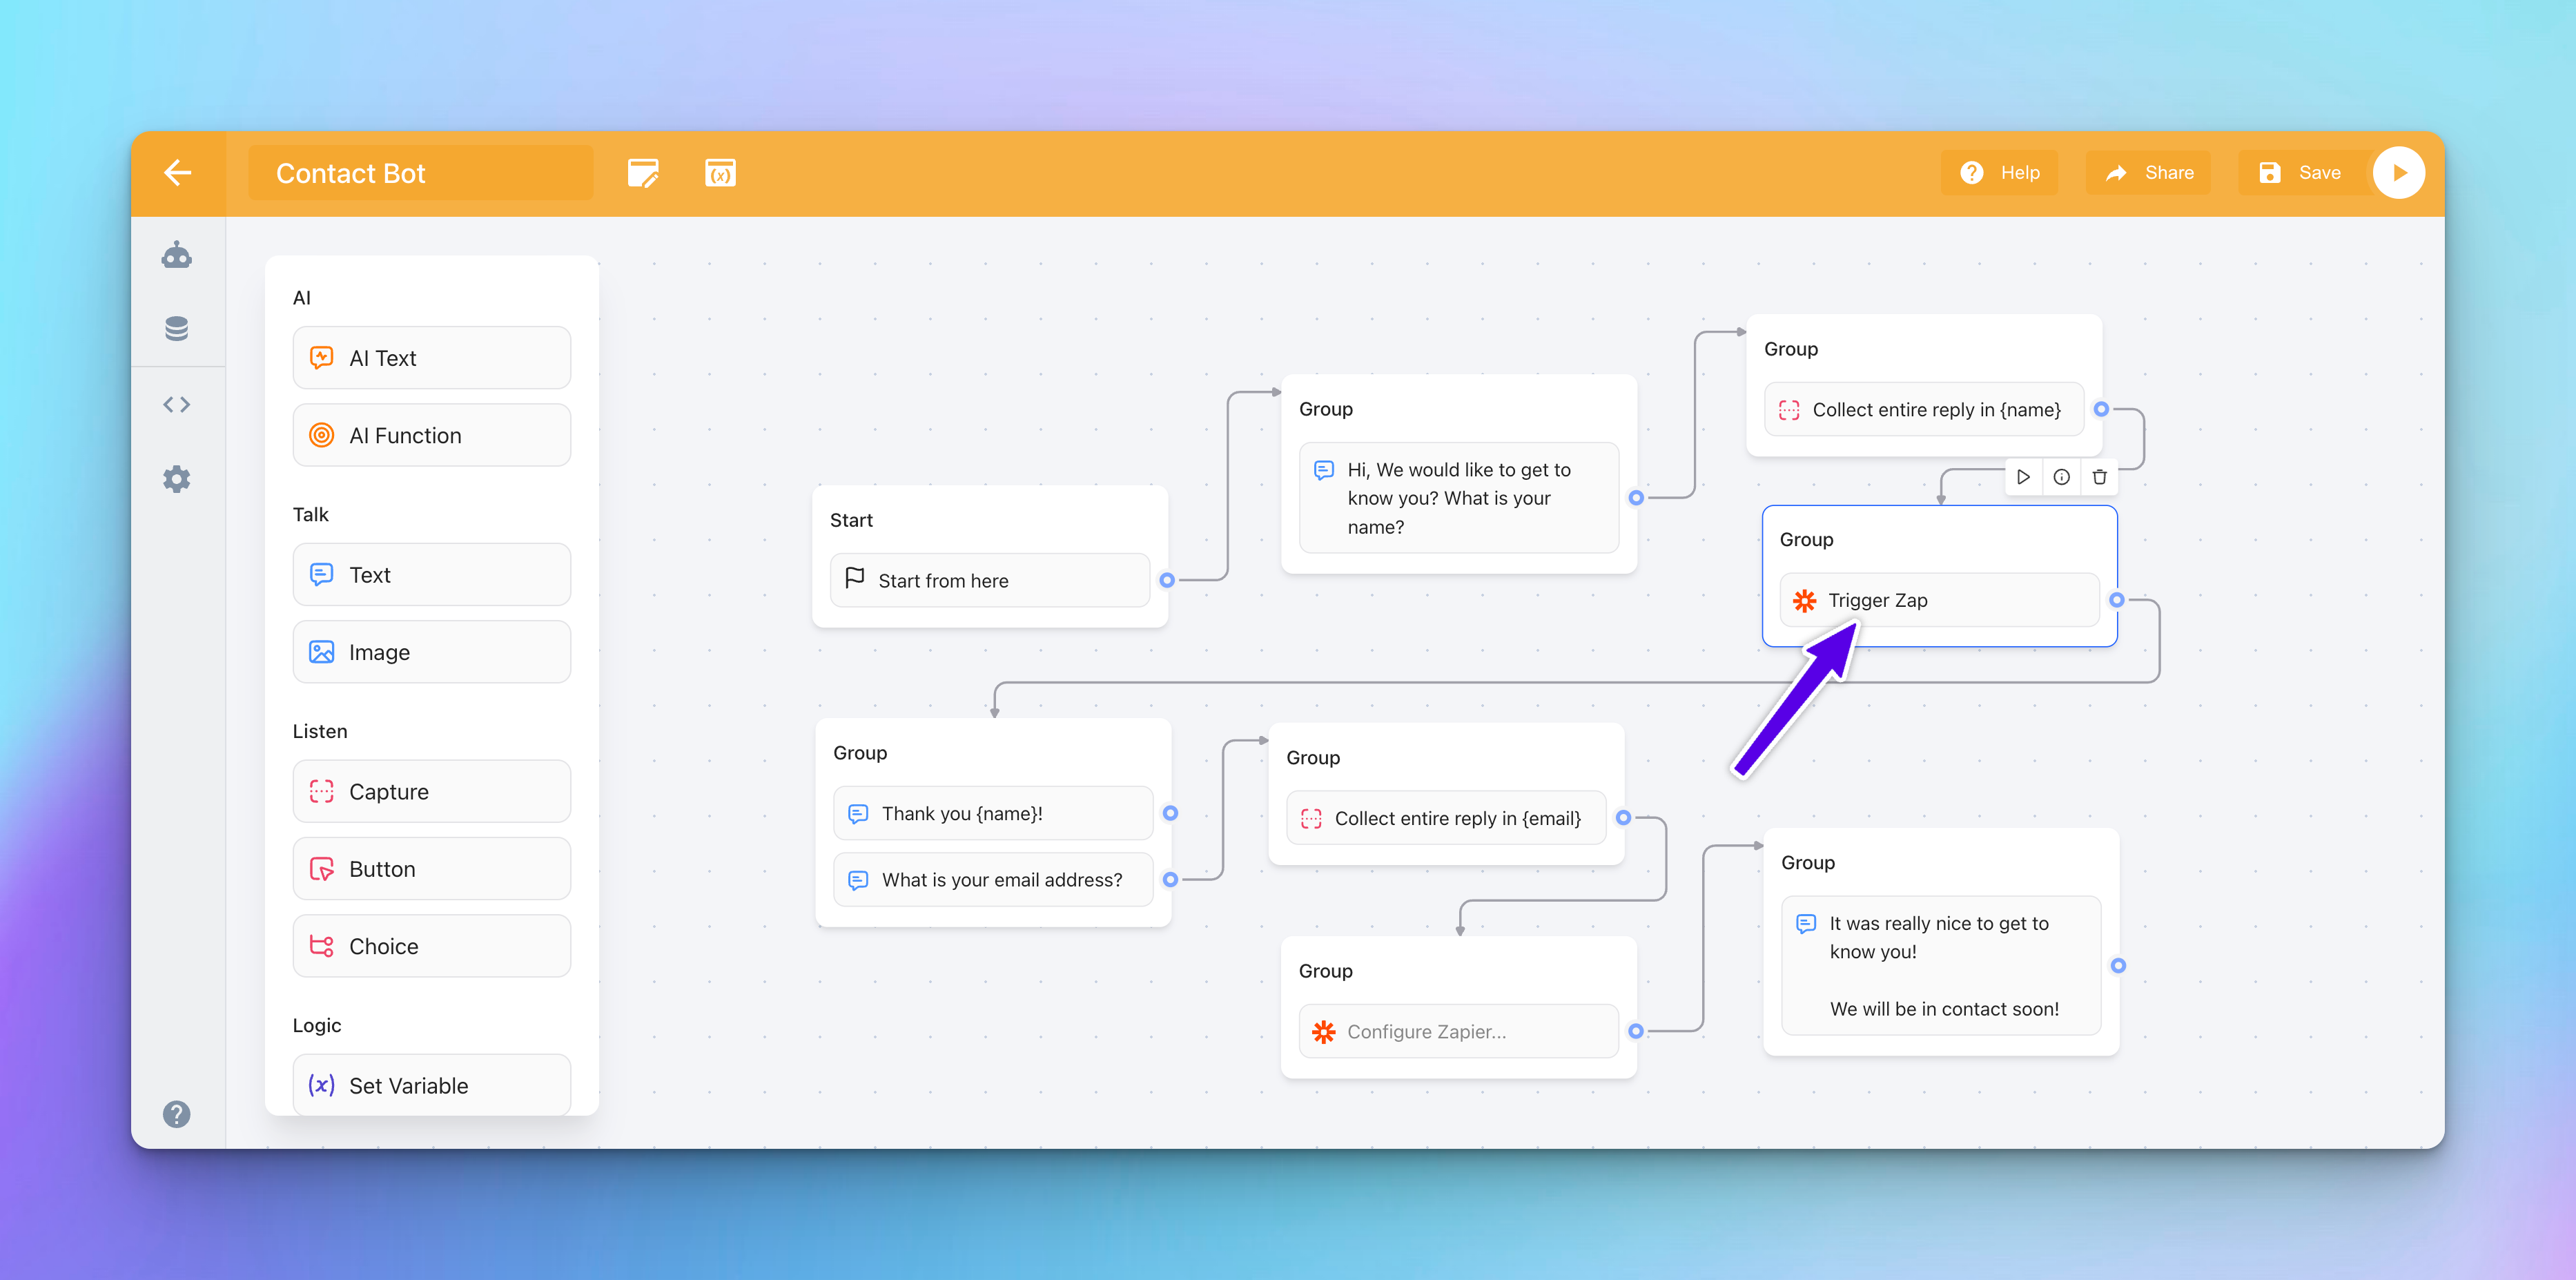
Save Your Bot Flow: It's important to save any changes you've made during the setup process. Make sure all your modifications are saved before proceeding to testing.

Test Your Bot: Click the "Play" button in EasyBotFlow to start a test session. This allows you to interact with the bot just like a user would. Provide inputs as requested by your bot, such as your name and email address.
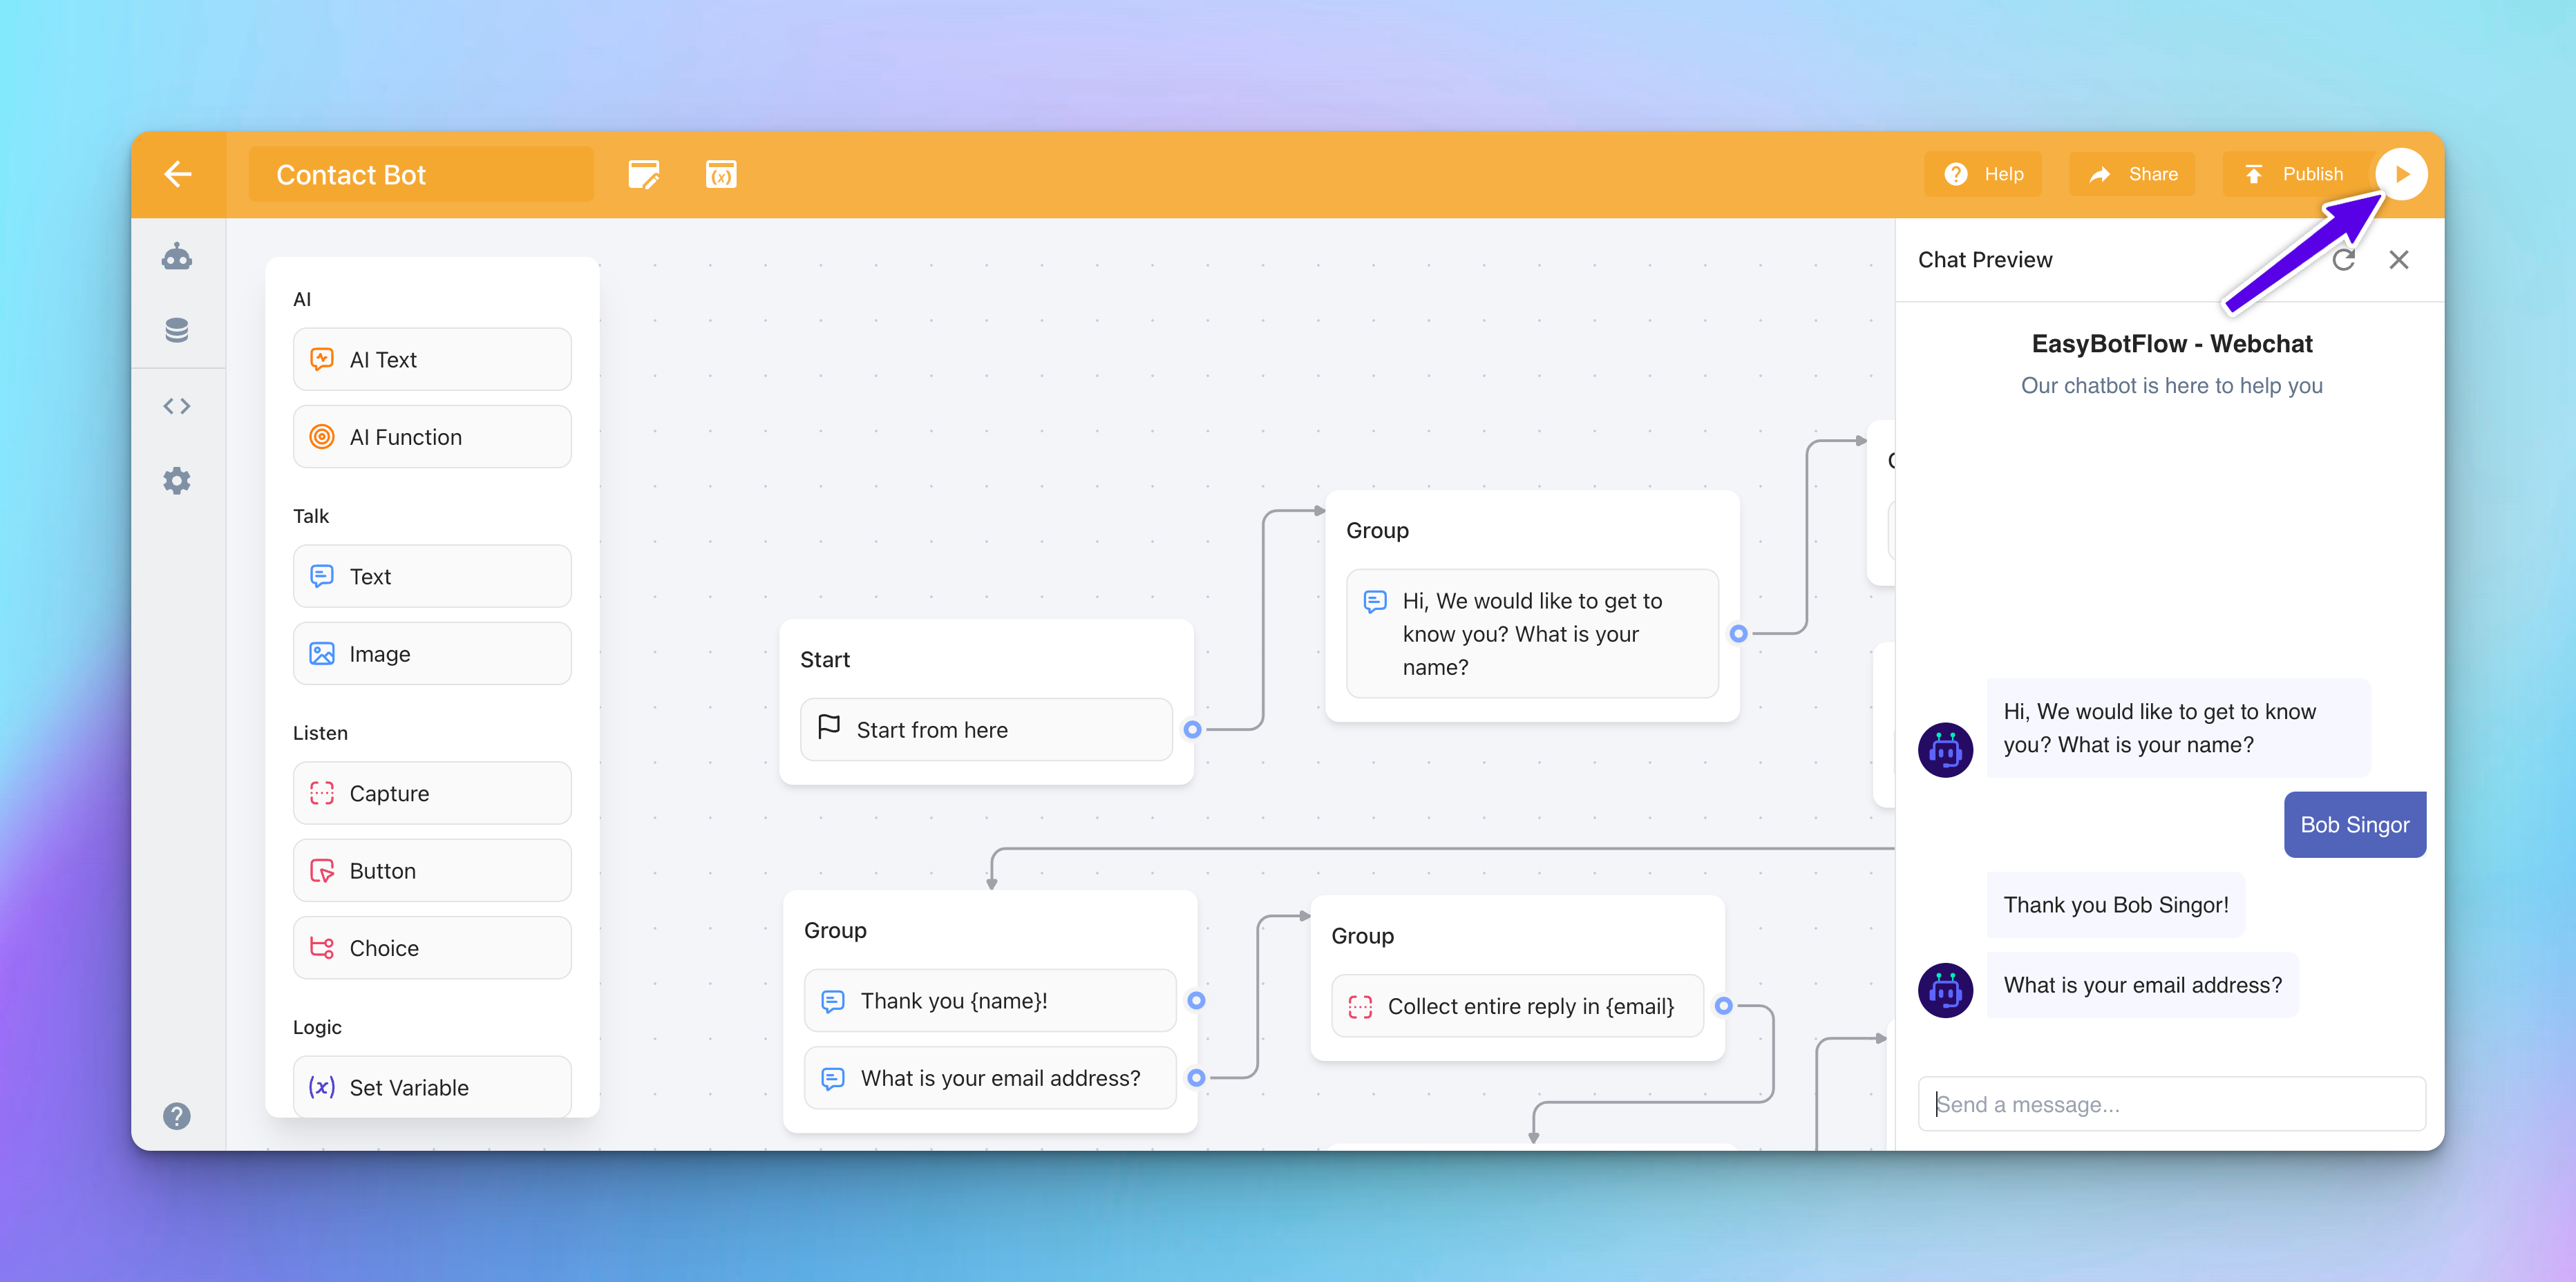
Check Data in Airtable: After interacting with the bot, visit your Airtable base to verify that the data you entered has been correctly saved to the "Contact Information" table. Look for new records that match the inputs you provided during the test.
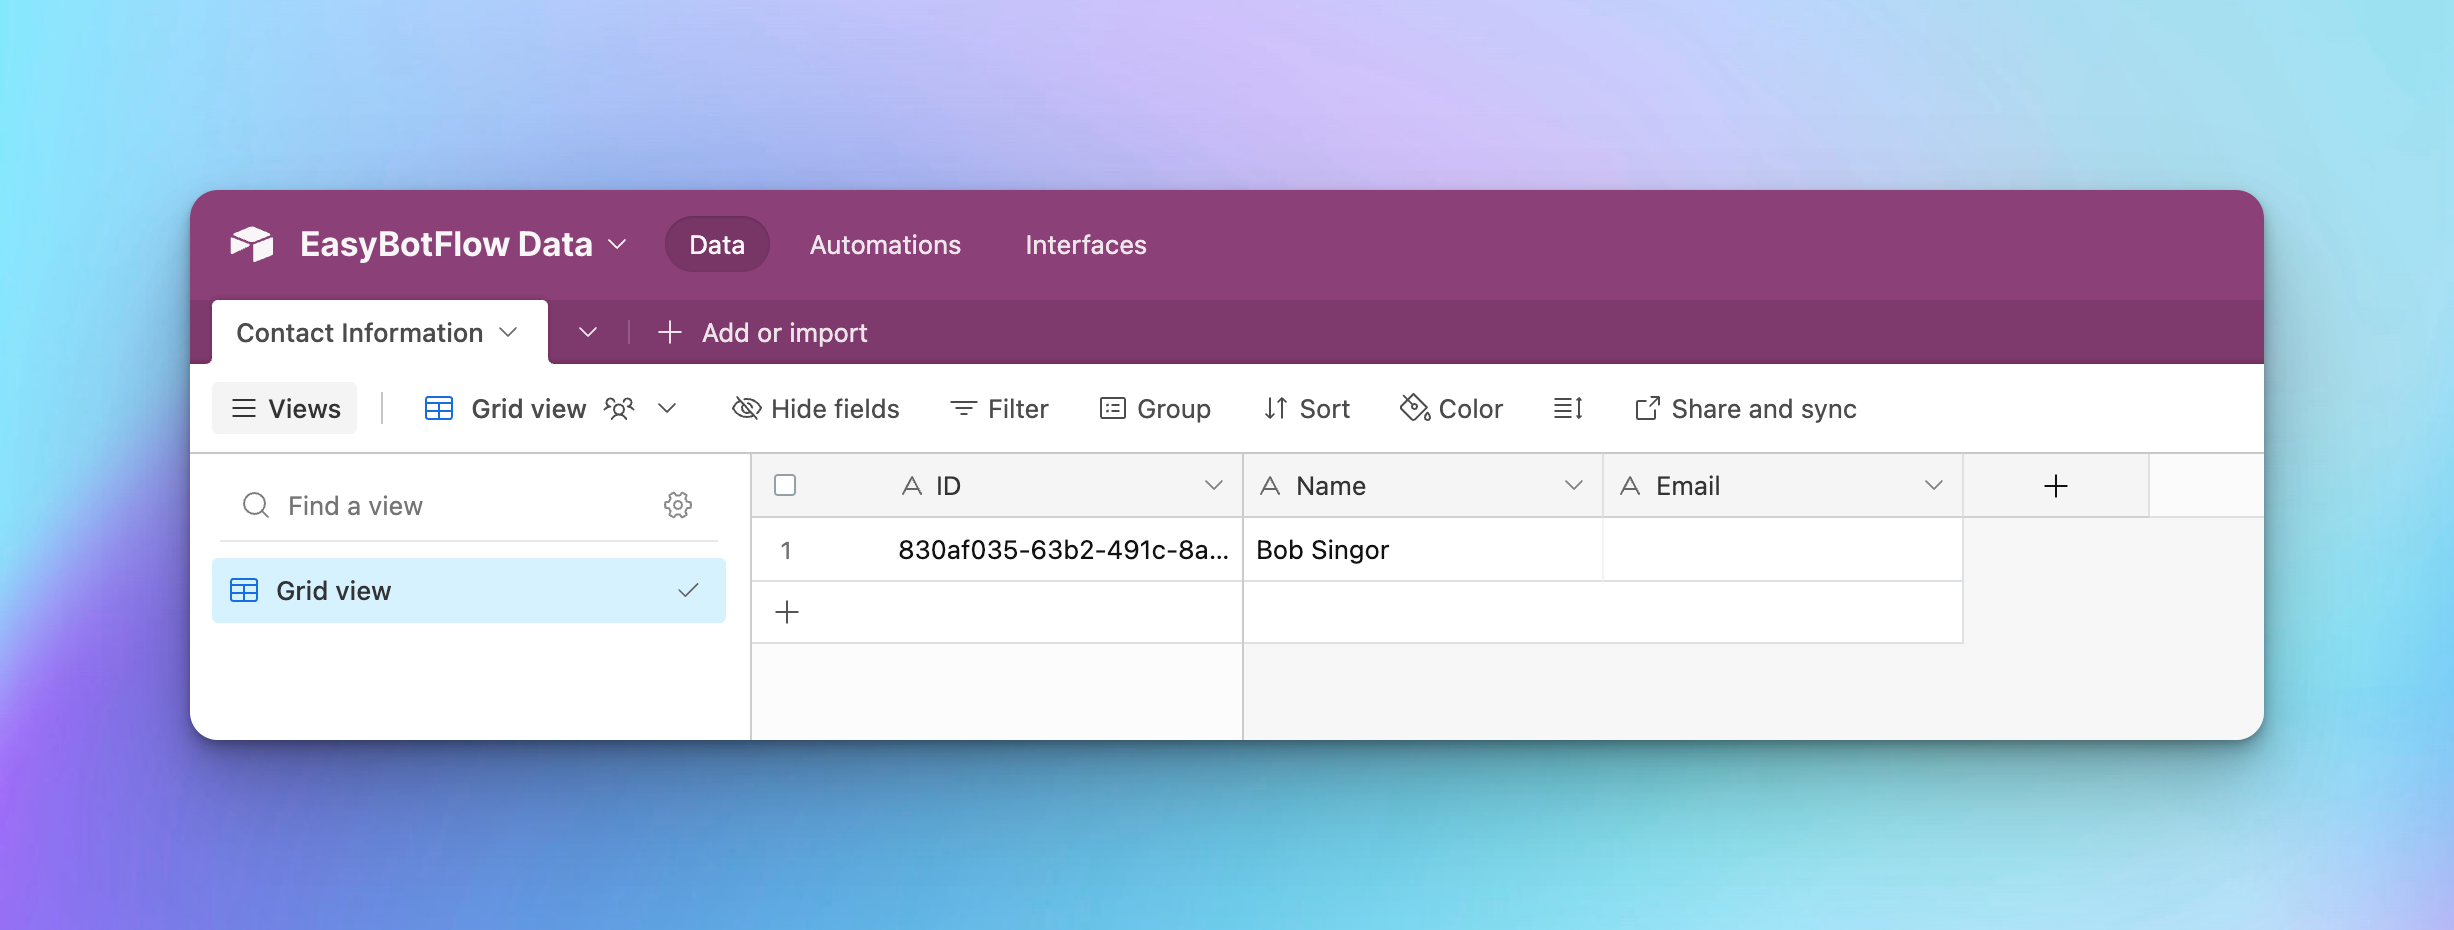
This testing phase is crucial for ensuring that your integration is functioning correctly and that data flows seamlessly from EasyBotFlow to Airtable via Zapier. If everything works as planned, your bot is now fully equipped to automate data collection and storage, enhancing your workflow automation capabilities.
Setting Up Additional Zapier Elements
If your bot flow includes additional Zapier elements, such as the second Zapier trigger in our example, you can repeat the steps outlined in the "Connect EasyBotFlow with Airtable Through Zapier" section. Each Zapier element can be configured to perform different actions or connect to different services, providing flexibility and expanding the capabilities of your automated workflows.
Conclusion
By following this guide, you have learned how to enhance your EasyBotFlow bot by integrating with Zapier, allowing it to connect with a variety of applications like Airtable. This integration not only automates data collection but also ensures efficient management and storage of information. Continue to explore other Zapier apps and actions to further extend the functionality of your bots, making them more powerful tools in your digital workflow.
Remember, the flexibility of Zapier combined with the versatility of EasyBotFlow opens up endless possibilities for workflow automation. Experiment with different configurations and services to find the best solutions for your needs.